
Deploy a serverless Flask app with Zappa and Amazon RDS
Deploying a serverless application has become easier with Zappa. If you have a Flask application and you want to ship it quickly and host it on a public URL so that it can be accessed from the Internet, Zappa can help you with that.
Zappa is a Python library that allows you to deploy serverless applications to AWS Lambda and API Gateway. It also has a CLI that allows you to manage your deployment with the configuration set up in your zappa_settings.json file.
In this tutorial, I’ll show you how to deploy an existing Flask application to Zappa. This app is a social blogging platform that you can use to publish blog posts and communicate with other users.
Why go serverless?
But what do we mean by “serverless”?
Serverless is a bit of a buzzword. Let’s break it down.
Serverless does not mean there is no server behind the scenes. It means that the application is running on AWS Lambda and API Gateway, without any permanent infrastructure.
With a traditional server, you have to deploy your application to a server that is running 24/7, and you have to pay for that server and its operating costs even when you don’t use it. With serverless using Zappa, you don’t have to pay for the infrastructure that you don’t use because you only pay for the time you use your application. This is a huge saving especially if you want to scale your app.
With traditional HTTP servers, if the queue of the incoming HTTP requests is full, the server will stop responding to new requests and will time out. With serverless Zappa, Amazon API Gateway gives each request its own virtual HTTP server. And as the documentation says, AWS handles the horizontal scaling automatically, so no requests ever time out.
Zappa is a great tool to deploy serverless applications with frameworks like Flask and Django. One of the best benefits of Zappa is that you often don’t need to change your existing applications to use it.
Prepare your desired Flask app
I’ve forked the app and made two changes; one change is upgrading/downgrading some libraries to solve circular dependencies. I’ve named this file: zappa_requirements.txt and added Zappa as a requirement to install.
Note that fixing the circular dependencies is unrelated to Zappa.
I’ve also made another change which is related to Zappa. I added a zappa_settings.json file to the root of the repository.
Let’s now clone the forked repository and cd into the directory:
$ git clone https://github.com/EzzEddin/flasky.git
$ cd flasky
and then install the requirements after creating a new virtual environment:
$ python3 -m venv venv
$ . venv/bin/activate
$ pip install --upgrade pip
$ pip install -r zappa_requirements.txt
Prerequisites
In this tutorial, it’s preferred to use Python 3.7.9 and pip 21.2.4 on a Linux or a Mac machine.
It’s assumed that you’ve installed AWS CLI and you have the credentials already set up. If you haven’t installed it yet, revise the AWS documentation for doing it.
Configure your Flask app
Flasky is a social blogging application that you need to configure and set up your desired database settings. In this tutorial, let’s use MySQL as the database engine and make sure it’s running on the localhost and then we can move to Amazon RDS and host our application on AWS.
Let’s first set up the database URL which includes the database name, the database user name, and password as an environment variable:
$ export DEV_DATABASE_URL=mysql+pymysql://<user_name>:<password>@<endpoint>:3306/flaskappwhere:
<user_name>is the user name of the database (feel free to use your own)<password>is the password of the database (feel free to use your own)-
<endpoint>is the endpoint of the database server (in this case, it’slocalhost) -
3306is the port of the MySQL database server flaskappis the name of the database (feel free to use your own)
If you want to create a new MySQL database for your application, you can open a new terminal and run the following command:
$ mysql -u root -p
# write your password
$ create database flaskapp;
Notes:
- The previous command assumes you have mysql client command line tool. If you don’t have it already on your machine, install it first from here.
- If you want to use MySQL on a docker container (especially if you’re not a Linux user and the above command doesn’t work for you), you can run the MySQL docker image. If you face any issues with an arm64 M1 chip, you can follow the suggestion here for your
docker-compose.yml.
Now, flaskapp database is created. Note I’ve used the root user name while you can use your user name that you set up already in MySQL server (if you have one).
Before running the Flask application, you need to create the tables used in the application to be in the database. To do that, let’s define first the main entry point of our Flask app using the following command:
$ export FLASK_APP=flasky.pyand then open a Flask shell using `flask shell` and run the following command:
>>> db
<SQLAlchemy engine=mysql+pymysql://root:***@localhost:3306/flaskapp?charset=utf8>
>>> db.create_all()
As you can see, db is the database instance that is created in the Flask app. The command db.create_all() creates all the tables in the database.
Side note: We’re able to use db here immediately and not have to worry about importing it from the flasky.py file because we’ve already returned it in the dictionary that exists inside the make_shell_context() function wrapped in the decorator: @app.shell_context_processor.
Now, we’re ready to run the Flask application. Let’s run the following command:
$ flask runYou can sign up for the application and start posting your blog posts.
Feel free to populate the database with some dummy data. Let’s open a new terminal and open a Flask shell and run the following command:
>>> from app import fake
>>> fake.users(100)
>>> fake.posts(100)
Now, there are 100 fake users created and 100 fake posts are populated in the database.
Configure Amazon RDS
The documentation for connecting MySQL instance on Amazon RDS is here.
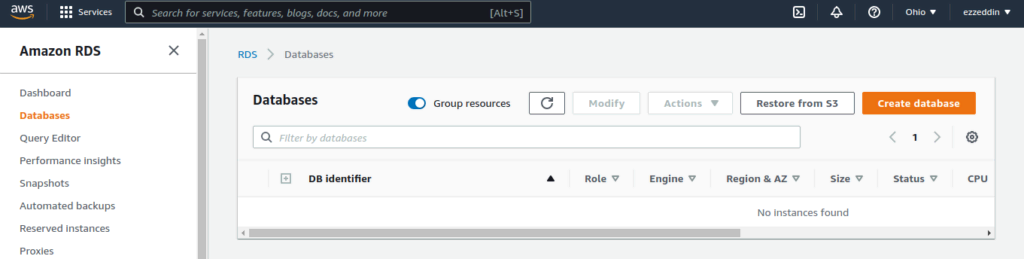
- Open AWS console
- Navigate to Amazon RDS and create a new database
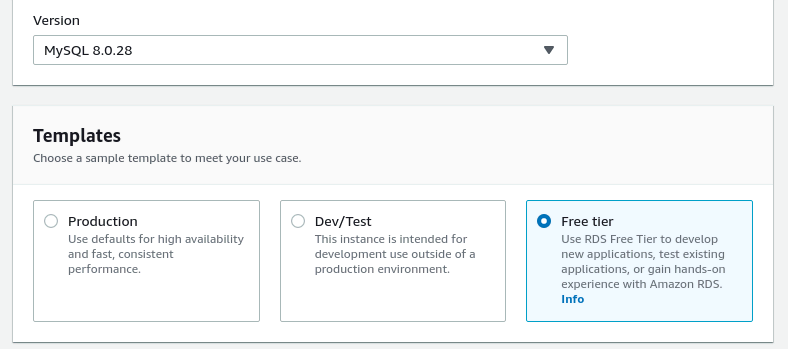
– Choose your desired database creation method (let’s select ‘Standard create’) and then choose MySQL as the database engine

– Choose your desired MySQL version and then choose the desired ‘Free tier’ template to avoid charges
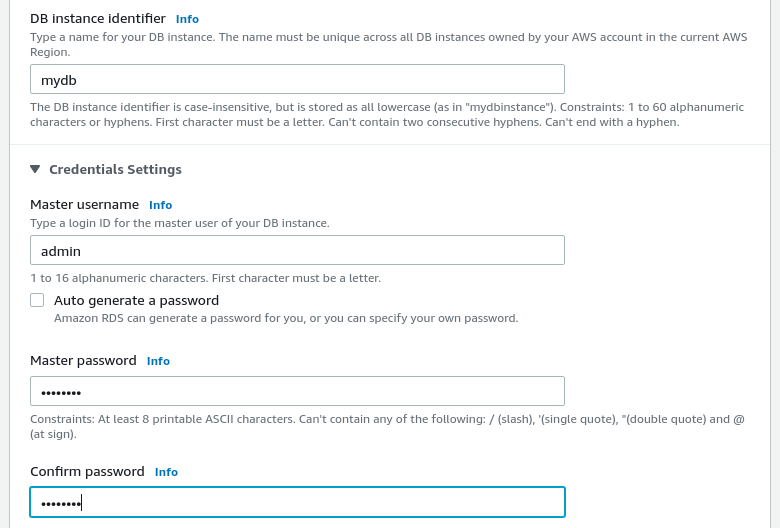
– Set up the database name and the database user name and password
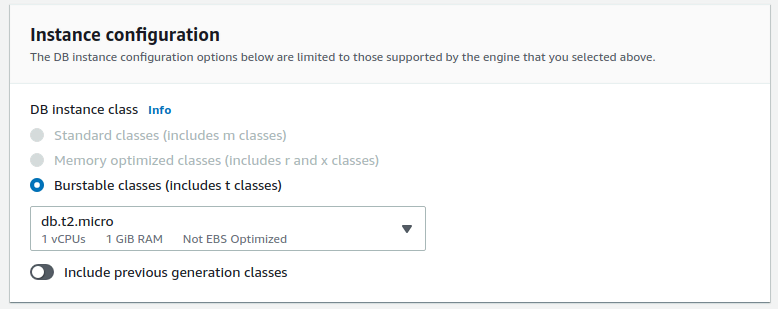
– Select a lightweight instance type from the free tier (we’ll use t2.micro)
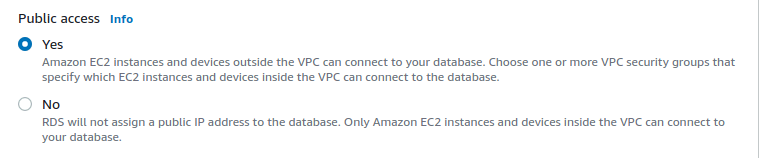
– Set the public access to ‘Yes’ because you’re going to use the application from your own machine. Warning: this is not the best practice for security reasons. You might have to change this later if you’re going to use the application on production.
– Make sure that the database port is set to 3306

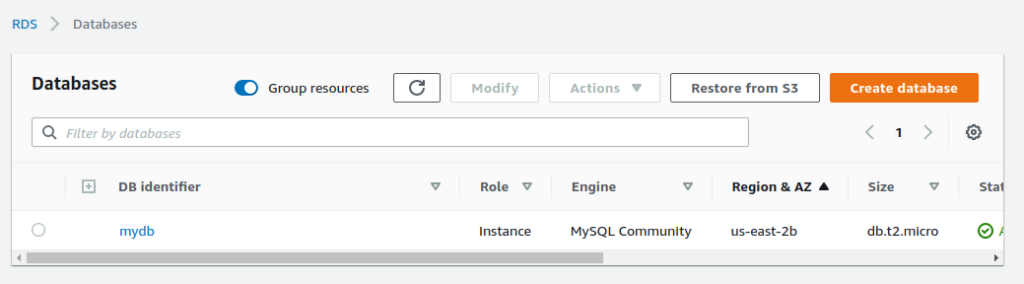
– Now mydb database is created and active on the RDS instance
Let’s create a new environment variable for the new endpoint of the RDS MySQL database instance:
$ export DEV_DATABASE_URL=mysql+pymysql://<user_name>:<password>@<rds_endpoint>:3306/flaskappwhere:
-
<user_name>is the user name of the MySQL database instance on RDS (it’sadminin our case) <password>is the password of the RDS database (use the master password you set on RDS)-
<rds_endpoint>is the endpoint of the RDS database instance (in our case, it’s starting withmydbthat ends with.<region>.rds.amazonaws.com) 3306is the port of the MySQL database instance on RDSflaskappis the name of the database that we haven’t set yet (feel free to use your own)
Note that flaskapp is not the same as the database name that we created in the previous step when we were testing our Flask application locally.
That’s why we need to create a new database instance on RDS endpoint with the following command:
$ mysql -h ...rds.amazonaws.com -P 3306 -u admin -p
# write your password
mysql> create database flaskapp;
Query OK, 1 row affected (0.16 sec)
Configure Zappa
Now that we have our database set up on RDS, let’s set up Zappa to deploy our Flask application on AWS.
First, the Zappa package is already installed on your virtual environment. Now, you don’t need to run zappa init because it will just create a new config file and, in our case, it’s already there. This config file is the zappa_settings.json.
So you’re ready to move on and deploy your application to dev (which is the key name of the zappa_settings.json file).
$ zappa deploy devBut what does the zappa_settings.json file contain?
This file contains the configuration for the Zappa deployment. In our case, it contains the following information:
{
    "dev": {
        "app_function": "flasky.app",
        "profile_name": "default",
        "project_name": "flasky",
        "runtime": "python3.6",
        "aws_region": "us-east-1",
        "environment_variables": {
            "DEV_DATABASE_URL": "mysql+pymysql://<user_name>:<password>@<rds_endpoint>:3306/flasky"
        }
    }
}
where the value of the “app_function” key is “flasky.app” which is the name of the file that contains the Flask application (in our case, flasky.py) followed by the Flask instance name (in our case, app).
The other keys are self-explanatory like the environment variable DEV_DATABASE_URL that contains the database endpoint we set up for RDS instance. Be sure to add your own credentials now.
When you deploy this application with Zappa, you might get an error like the following:
Error: Warning! Status check on the deployed lambda failed. A GET request to '/' yielded a 502 response code.So to figure this out, you need to debug the application and see why the status check failed. Use zappa tail to see the logs of the application and see more verbosity that will be more helpful.
You’ll see a similar error message to “Can’t connect to MySQL server on <rds_endpoint>” which means that the database endpoint is not reachable through Zappa. You can fix this by editing the inbound rule of the security group in the VPC that you selected for your RDS instance.
So select the security group on your RDS instance and open the inbound rules tab and click on “Edit inbound rules” button. Edit the existing rule to have the type “MySQL/Aurora” and 0.0.0.0/0 for the source to allow all traffic. Then click on “Save changes” button.
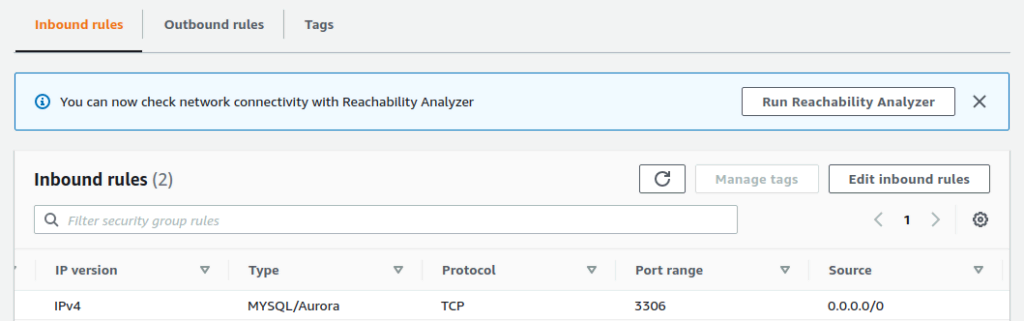
Warning: this is still not the best practice for security reasons. You might have to change this later if you’re going to use the app on prod. If you are still having issues, make sure there are no other rules restricting ports or traffic.
Now you figured out the error and it’s fixed. Let’s update the zappa deployment with the update command:
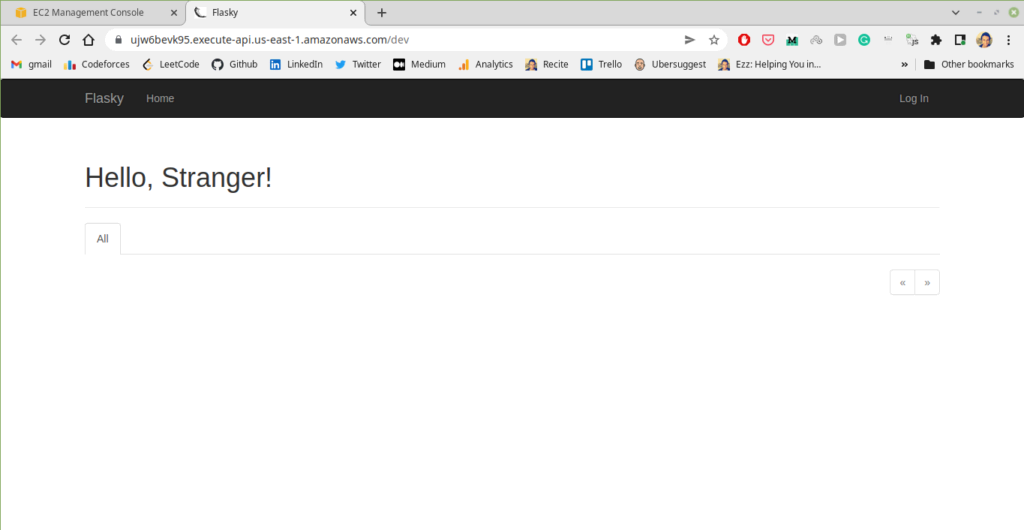
$ zappa update devCongratulations! You have successfully deployed your Flask application on AWS. Here is the message returned by Zappa from the last command:
Your updated Zappa deployment is live!: https://ujw6bevk95.execute-api.us-east-1.amazonaws.com/devwhich contains the endpoint of the deployed application.
Conclusion
We have successfully deployed our serverless Flask application on AWS using Zappa and connected it to our database on RDS.
We covered how to configure Flask locally and set up a MySQL database on Amazon RDS. We also saw common practices to use Zappa for deployment and fixed a possible bug in the deployment process.


