How to add Google and GitHub Login to Next.js App with NextAuth and Typescript
From managing databases to dealing with cookies and web tokens, implementing user authentication in web applications can be stressful and time-consuming. And because it is a feature required to secure every web application, it must be reusable across applications. NextAuth was created to handle server and client-side authentication in a Next.js application by allowing users to log in or sign up with their Google or GitHub accounts.
This tutorial will teach us how to authenticate users in a Next.js application with Google and GitHub Auth.
- What is NextAuth?
- Why use NextAuth?
- Get OAuth client IDs
- Project setup
- Creating API route
- Configuring NextAuth Session Provider
- Updating the index page
- Testing the application
What is NextAuth?
NextAuth is an open source authentication solution for Next.js applications. It has built-in support for Next.js and serverless. By default, NextAuth saves the user’s session using JSON Web Tokens (JWT). The database will be used to save the user’s session if you use a database adapter. When using a database, you can use the configuration options to force the use of JWT.
Why use NextAuth?
There are several reasons why developers choose NextAuth. NextAuth was developed for serverless computing, and can be run anywhere. It offers support for popular sign-on services like Google, Facebook, Auth0, and Apple,as well as OAuth 1.0 and 2.0 services. It integrates with email, passwordless, and magic links. NextAuth also provides flexibility when it comes to databases, supporting both SQL and NoSQL databases and allowing users to choose between database sessions and JWT. In short, NextAuth is a flexible, configurable authentication solution that works well for a variety of needs.
Prerequisites
To follow along with this tutorial, you need to have the following in place:
- Node.js 12.22.0 or later
- Yarn (
npm install --global yarn) - Google OAuth Credential
- Github OAuth Provider
The code for this tutorial is available on GitHub; feel free to clone it and follow along.
Get OAuth client IDs
To allow your application to authenticate users in your application using Google or GitHub, you have to create a GitHub and Google application to get an OAuth client ID.
GitHub client ID
To get the Google client ID, follow the steps below:
1. Navigate to the GitHub application page.
2. Enter your project Credentials and hit Register application.
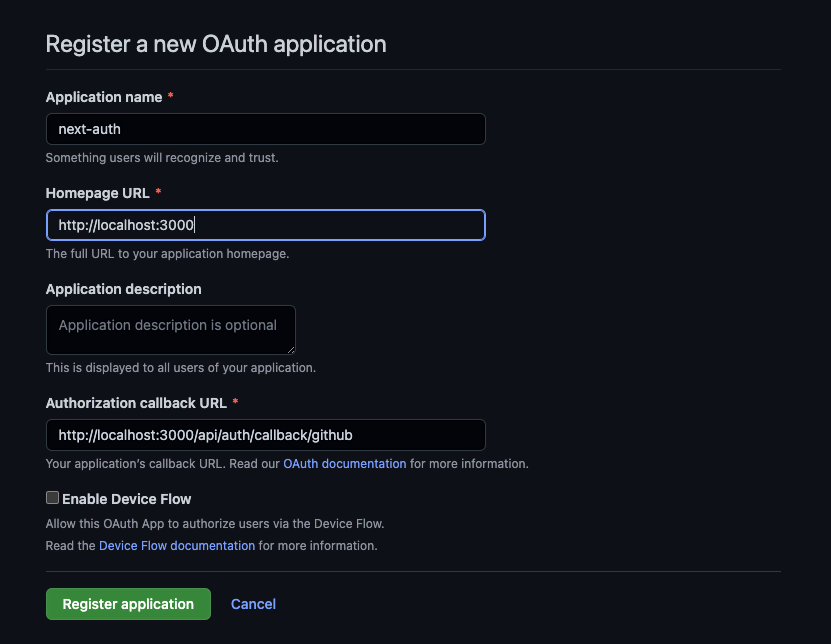
3. Click on Generate new client secret, to get your app secret token
4. Copy both the client ID and client secret to a safe place.
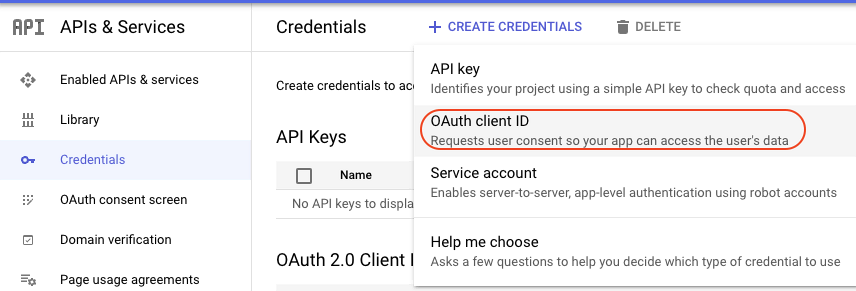
Google OAuth Credential
To get the Google OAuth credential, follow the steps below:
1. Navigate to the Google console page.
2. Click on CREATE CREDENTIALS -> OAuth client ID.
3. Choose your application type (Select Web application).
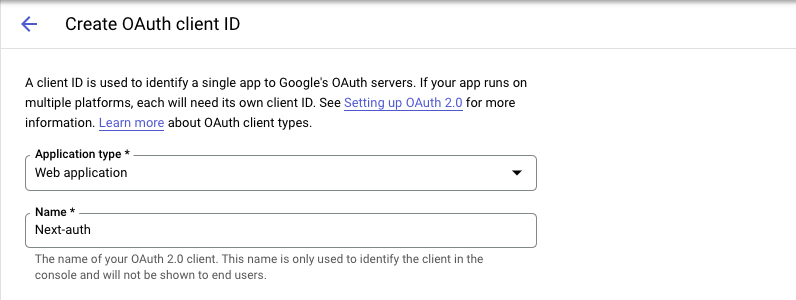
4. Enter the app Authorized JavaScript origins, Authorized redirect URIs and hit the CREATE button.

5. Copy your client ID and client secret to a safe place.
Project setup
With the above requirements met, create a new Next.js TypeScript application with this command:
yarn create next-app --typescriptThe above command will prompt for the name of the project. Enter next-auth-demo, and hit the Enter key. Then wait while Next.js sets up everything and installs the required dependencies.
Next, install the next-auth package with the command below.
yarn add next-authOnce this is done, you will have all the dependencies required to follow up with this tutorial setup.
Now, create a .env.local file in the root directory of your project and add both the GitHub and Google credentials as follows:
GOOGLE_CLIENT_ID= <YOUR GOOGLE CLIENT ID>
GOOGLE_CLIENT_SECRET=<YOUR GOOGLE CLIENT SECRET>
NEXTAUTH_URL=https://localhost:3000
NEXTAUTH_SECRET=<YOUR NEXTAUTH SECRET>
GITHUB_ID= <YOUR GITHUB CLIENT ID>
GITHUB_SECRET=<YOUR GITHUB CLIENT SECRET>
You can use OpenSSL to generate your NextAuth secret with the command openssl rand -base64 32.
Creating the API route
With the NextAuth package installed, proceed with the next step to creating the NextAuth API route. To get started, create an auth folder in the pages/api folder. After that, create a [...nextauth].ts file in the auth folder and add the code snippet below:
import NextAuth from "next-auth"
import GoogleProvider from "next-auth/providers/google";
import GithubProvider from "next-auth/providers/github"

export default NextAuth({
    // Configure one or more authentication providers
    providers: [
        GoogleProvider({
            clientId: process.env.GOOGLE_CLIENT_ID as string,
            clientSecret: process.env.GOOGLE_CLIENT_SECRET as string,
        }),
        GithubProvider({
            clientId: process.env.GITHUB_ID as string,
            clientSecret: process.env.GITHUB_SECRET as string,
        }),
        // ...add more providers here
    ],
})
In the above code snippet, we imported NextAuth from the next-auth, the GoogleProvider and GithubProvider providers. The NextAuth function takes an array of providers which in this case is the GoogleProvider and GithubProvider credentials.
Configuring NextAuth Session Provider
NexthAuth provides a useSession object that lets us know if a user is signed in. But to access it, you’ll need to expose the session context, <SessionProvider />, at the top level of your application. We’ll do that in the _app.ts file with the code snippet below:
import '../styles/globals.css'
import { SessionProvider } from "next-auth/react"
import type { AppProps } from "next/app"

export default function App({ Component, pageProps }: AppProps) {
  return (
    <SessionProvider
      session={pageProps.session}
    >
      <Component {...pageProps} />
    </SessionProvider>
  )
}
In the above code snippet, we imported the SessionProvider and used the <SessionProvider> to allow useSession() to be used anywhere in your application to access the session object.
Updating the index page
Now, let’s update the index.ts page to create a bookstore application that will be accessed by only logged-in users. Update the code snippet in the pages/index.ts file with the following code:
import type { NextPage } from 'next'
import Head from 'next/head'
import Image from 'next/image'
import styles from '../styles/Home.module.css'
import { useSession, signIn, signOut } from "next-auth/react"
const Home: NextPage = () => {
const { data: session } = useSession()
return (
<div className={styles.container}>
<Head>
<title>Create Next App</title>
<meta name="description" content="Generated by create next app" />
<link rel="icon" href="/favicon.ico" />
</Head>
<nav className={styles.navbar}>
<div className={styles.navbarLinks}>
<a href="#">Home</a>
<a href="#">About</a>
<a href="#">Contact</a>
</div>
<div className={styles.signup}>
{session && session.user ? (
<button onClick={() => signOut()}>Sign out</button>
) : (
<button onClick={() => signIn()}>Sign in</button>
)}
</div>
</nav>
<main className={styles.main}>
<div>
{session && session.user ? (
<div className={styles.card}>
<div className={styles.cardImage}>
<Image src="/architecture.png" alt="book" width={500} height={300} />
</div>
<div className={styles.cardContent}>
<h2>Computer Programming Cookbook</h2>
<p>
This is a simple hero unit, a simple jumbotron-style component for calling
extra attention to featured content or information.
</p>
<p>
<a className={styles.btn} href="https://nextjs.org/docs" target="_blank">
Learn More
</a>
</p>
</div>
</div>
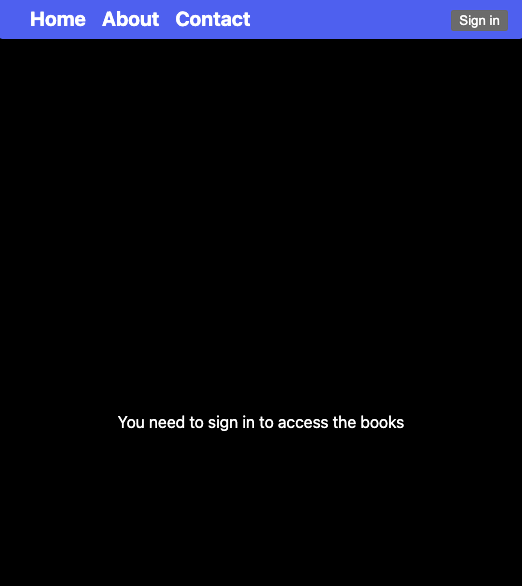
) : (
<p>You need to sign in to access the books</p>
)}
</div>
</main>
</div>
)
}
export default HomeIn the above code snippet, we imported the next-auth useSession, signIn and signOut hooks. The signIn hook allows you to sign in with your Google or GitHub accounts by loading a sign-in UI with login sign-in buttons. The signOut will allow you to sign out a user’s session.
Then we used conditional rendering to render the sign-in and sign-out buttons to the users by checking if the user object exists in the session object available from the useSession hook. Also, we render the book component to only signed-in users implementing the same conditional rendering logic.
Now, create a Home.module.css file in the **styles** directory; copy styles here and add it to the Home.module.css file to add styles to the application.
Testing the application
Now, run the application with the yarn dev command and navigate to https://localhost:3000. You should see the output below on your browser when you are not signed in.
Then when you click the sign-in button, you will be redirected to the /api/auth/signin page where you’ll choose the Auth provider to use as shown below.
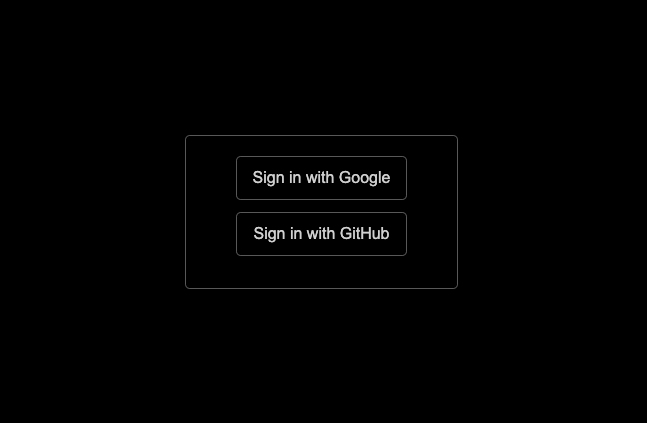
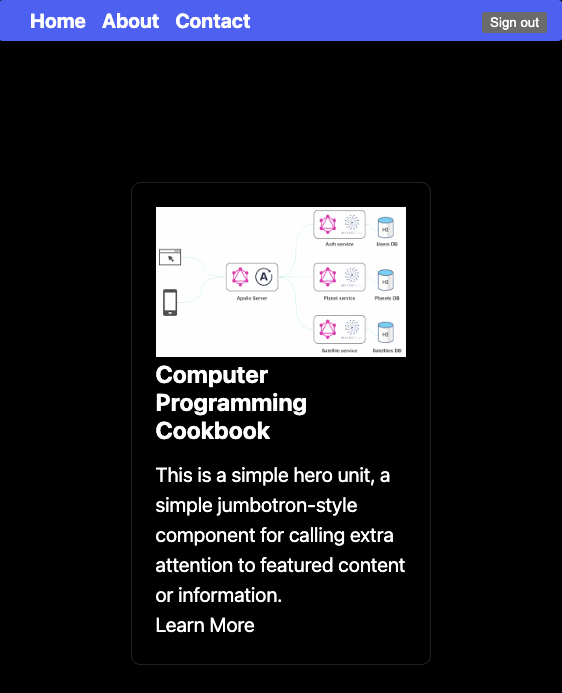
Select either Google or GitHub by clicking either of the buttons and providing your sign-in details. Then you’ll be redirected to the application and a session will be created allowing you to access the books as shown below.
Learn more about using NextAuth
Throughout this tutorial, you’ve learned how to add Google and GitHub authentication in a Next.js TypeScript application using NextAuth. We started by learning about what NextAuth is all about, then we created a bookstore application and implemented user authentication. Learn more about NextAuth from the official documentation.
Interested in reading more about developing and managing secure applications? Check out more articles about security on the Mattermost blog.
This blog post was created as part of the Mattermost Community Writing Program and is published under the CC BY-NC-SA 4.0 license. To learn more about the Mattermost Community Writing Program, check this out.


