Using React with TypeScript
React is a JavaScript library that enables developers to build full-fledged applications in a modular structure. Modular construction means making user interface (UI) components individually and composing them to create web pages.
Setting up a React project involves many pieces, including:
- Webpack, which bundles the JavaScript modules so that the browser can interpret them
- Loaders for webpack for processing files and resources beyond JavaScript (such as HTML, CSS, SCSS, and SVG)
- Plugins for webpack for bundling modules
- Configurations for webpack to correctly bundle modules
- Babel for transpiling JavaScript from higher versions to lower versions that all browsers can understand
- React, react-dom, and react-router-dom library, which contain routes and renders the code on a browser
- Server for serving the application on a port where you can view the application
Properly performing this setup usually requires sufficient experience and time. There are also boilerplates available online that you can easily duplicate, but the Create React App (CRA) library removes this step.
CRA lets you set up a React application with just one command:
npx create-react-app my-app
# or
yarn create react-app my-app
Using the latest version of CRA, these commands install all the necessary dependencies, configure webpack, the plugins, loaders, and the server for your application. With this, you can focus on building your application rather than setting up React.
A brief overview of TypeScript
TypeScript is a superset of JavaScript that supports typed syntax. It compiles plain JavaScript for a browser to execute but is very effective during development. Setting up TypeScript in a new or existing application requires some dependencies and configurations to compile to JavaScript correctly. Thankfully, CRA handles this for us.
Before adding support for TypeScript in CRA v2.1.0, developers had to manually configure the setup, as CRA was limited to scaffolding JavaScript applications. Now, the library makes it even easier to add TypeScript either at the start of a React project or into an existing one.
In the rest of this article, we’ll explore how to create a new TypeScript app with CRA and convert an existing CRA app to TypeScript.
Creating a new TypeScript app
As mentioned above, you can use this command to create a new React application:
npx create-react-app ecommerce-app
# or
yarn create react-app ecommerce-app
However, this is for starting a JavaScript application. For TypeScript, you must use one of CRA’s many available options — the template. The template option enables you to select a custom template that CRA uses to build your project while retaining all the features of CRA. Alternatively, you can build a template.
CRA ships the TypeScript template by default. To use this template, you pass typescript to the template option:
npx create-react-app ecommerce-app --template typescript
# or
yarn create react-app ecommerce-app --template typescript
Moving forward, we’ll use the npm registry to demonstrate, but note that you can use yarn in the same way.
Running the npx command above creates the project folder ecommerce-app, installs the required dependencies, and sets up the configurations for React and TypeScript to work. Here’s the folder tree:
ecommerce-app
├── README.md
├── package-lock.json
├── package.json
├── public
│   ├── favicon.ico
│   ├── index.html
│   ├── logo192.png
│   ├── logo512.png
│   ├── manifest.json
│   └── robots.txt
├── src
│   ├── App.css
│   ├── App.test.tsx
│   ├── App.tsx
│   ├── index.css
│   ├── index.tsx
│   ├── logo.svg
│   ├── react-app-env.d.ts
│   ├── reportWebVitals.ts
│   └── setupTests.ts
└── tsconfig.json
As you can see, CRA supports tests too.
CRA also creates a tsconfig.json file that contains the configurations for TypeScript. Let’s write some code. Clear everything in App.tsx and paste the following:
import React from 'react'
import "./App.css"

type Product = {
  id: number
  name: string
  price: number
}

const products: Product[] = [
  {
    id: 1,
    name: "iPhone",
    price: 400,
  },
  {
    id: 2,
    name: "Samsung",
    price: 500,
  },
]

function App() {
  return (
    <div className="App">
      <ul>
        {products.map((product) => (
          <li key={product.cid}>
            <p>
              <b>{product.name}</b>
              <br />
              <span>{product.price}</span>
            </p>
          </li>
        ))}
      </ul>
    </div>
  )
}

export default App
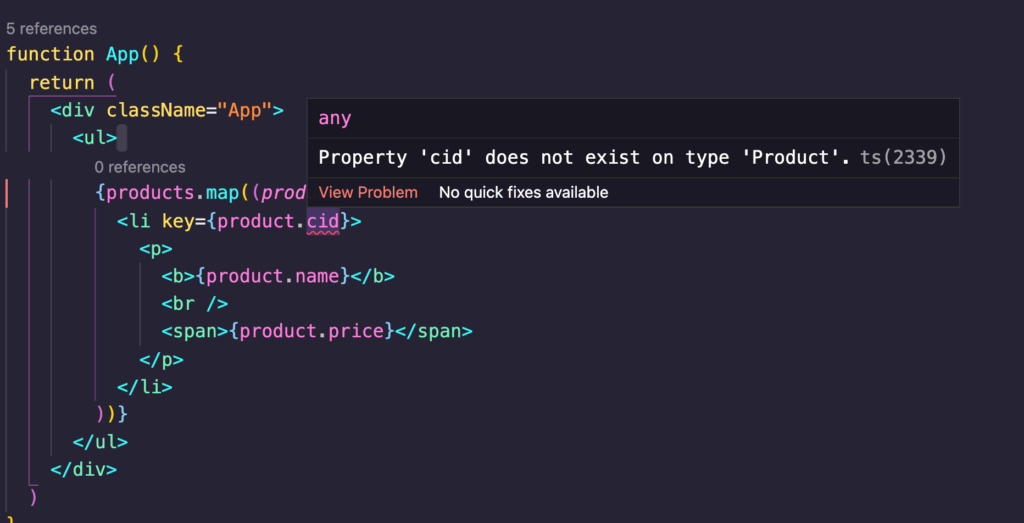
If you’re using TypeScript extensions in your editor, you may receive errors like this:
Property 'cid' does not exist on type 'Product'.
This is because cid does not exist in the type declaration. Rename cid to id. Then you can start the server with npm run start and the app is now live on localhost:3000. The React app shows connected products on the home page.

A complete understanding of TypeScript is beyond the scope of this article. You can view the documentation to learn more.
Converting an existing app to TypeScript
You might have some apps built with CRA in JavaScript, but prefer the typed syntax that TypeScript offers. To convert existing apps to TypeScript, we need to install some dependencies and fix a few errors. CRA handles the rest.
Create a new app without the template:
npx create-react-app ecommerce-app-2Here’s the project folder structure:
ecommerce-app-2
├── README.md
├── package-lock.json
├── package.json
├── public
│   ├── favicon.ico
│   ├── index.html
│   ├── logo192.png
│   ├── logo512.png
│   ├── manifest.json
│   └── robots.txt
└── src
    ├── App.css
    ├── App.js
    ├── App.test.js
    ├── index.css
    ├── index.js
    ├── logo.svg
    ├── reportWebVitals.js
    └── setupTests.js
In contrast to the TypeScript template structure, this structure does not have a tsconfig.json file and its files are in JavaScript format.
To add support for TypeScript, you need five dependencies:
- TypeScript: the compiling tool for typing syntax
- @types/node: TypeScript definitions for Node.js
- @types/react: TypeScript definitions for the React library
- @types/react-dom: TypeScript definitions for the React DOM library
- @types/jest: TypeScript definitions for the Jest library
You may also need any definitions for other libraries that your application uses.
Install all these dependencies using:
npm install -D typescript @types/node @types/react @types/react-dom @types/jestWe’re using the -D flag to denote that these are development dependencies — not those needed in the production app. Alternatively, you can install everything as dependencies. Dan Abramov has a helpful explanation of this solution.
With the dependencies installed, rename the App.js file to App.tsx and start your server with npm run start. At first, the development server may not work as expected. Let’s explore the possible issues you may encounter.
Can’t resolve ‘./App’
If your React project doesn’t yet know how to interpret TypeScript code, you may get the following error in your terminal:
ERROR in ./src/index.tsx 7:0-24
Module not found: Error: Can't resolve './App' in '/[your file path]'
This usually occurs because tsconfig.json (TypeScript’s configuration file) is absent from your project. CRA should generate this for you, but it can be inconsistent.
To resolve this, manually create a tsconfig.json file and paste the following:
{
  "compilerOptions": {
    "target": "es5",
    "lib": [
      "dom",
      "dom.iterable",
      "esnext"
    ],
    "allowJs": true,
    "skipLibCheck": true,
    "esModuleInterop": true,
    "allowSyntheticDefaultImports": true,
    "strict": true,
    "forceConsistentCasingInFileNames": true,
    "noFallthroughCasesInSwitch": true,
    "module": "esnext",
    "moduleResolution": "node",
    "resolveJsonModule": true,
    "isolatedModules": true,
    "noEmit": true,
    "jsx": "react-jsx"
  },
  "include": [
    "src"
  ]
}
This is the default configuration that CRA would typically generate automatically.
TypeScript problems like “Missing Type Declarations”
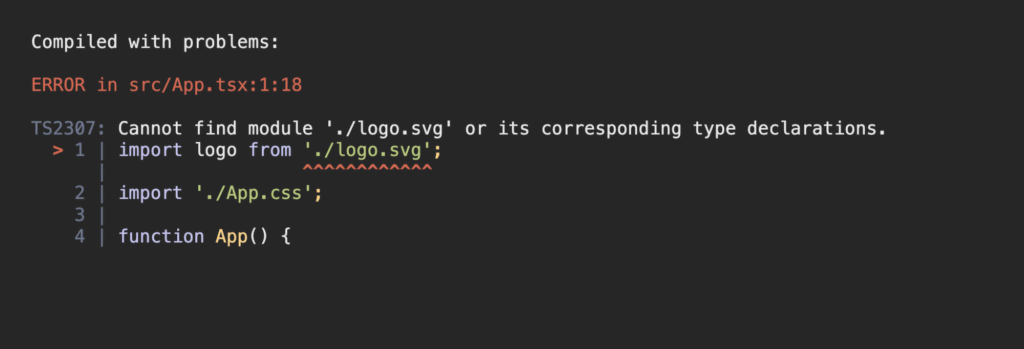
When working with TypeScript, you typically need to provide declaration files for different imports. The image that follows is one example of an error you might encounter. As shown, TypeScript doesn’t understand the svg import, so we need a way of informing TypeScript that it is a valid import.

If you created the React app with the TypeScript template, CRA creates the create-react-app/react-app.d.ts declaration file in node_modules. Since you’re using TypeScript afterward, you can manually create a declarations.d.ts file in the src directory and paste the content of the following declaration file:
// declaration.d.ts
///
///
///

declare namespace NodeJS {
  interface ProcessEnv {
    readonly NODE_ENV: 'development' | 'production' | 'test';
    readonly PUBLIC_URL: string;
  }
}

declare module '*.avif' {
  const src: string;
  export default src;
}

declare module '*.bmp' {
  const src: string;
  export default src;
}

declare module '*.gif' {
  const src: string;
  export default src;
}

declare module '*.jpg' {
  const src: string;
  export default src;
}

declare module '*.jpeg' {
  const src: string;
  export default src;
}

declare module '*.png' {
  const src: string;
  export default src;
}

declare module '*.webp' {
    const src: string;
    export default src;
}

declare module '*.svg' {
  import * as React from 'react';

  export const ReactComponent: React.FunctionComponent<React.SVGProps & { title?: string }>;

  const src: string;
  export default src;
}

declare module '*.module.css' {
  const classes: { readonly [key: string]: string };
  export default classes;
}

declare module '*.module.scss' {
  const classes: { readonly [key: string]: string };
  export default classes;
}

declare module '*.module.sass' {
  const classes: { readonly [key: string]: string };
  export default classes;
}
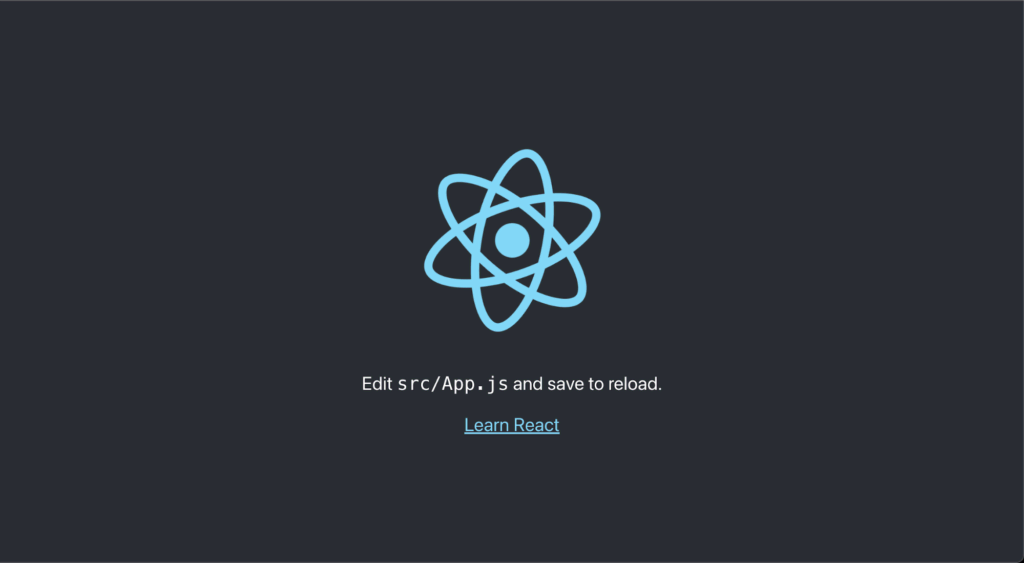
Now your app should work on localhost:3000. When you run npm run start, you should see:
Edit src/App.js and save to reload.
You can proceed further by adding types to your application.
Learn more
Typed applications may require more development time, but they are more effective for maintaining applications. TypeScript brings many typing benefits to JavaScript applications and React. The typed syntax makes it easier to catch errors during compile time. You will rarely receive errors reading “cannot read x property of undefined.”
You’ve now seen how to create a new TypeScript app and convert an existing React app in JavaScript to TypeScript. Moving forward, you can learn more about TypeScript in its documentation. Check out these additional resources to learn more about loaders and types:
This blog post was created as part of the Mattermost Community Writing Program and is published under the CC BY-NC-SA 4.0 license. To learn more about the Mattermost Community Writing Program, check this out.


