
How to set up and customize Tailwind in Nuxt.js
CSS frameworks like Bootstrap, Bulma, and Materialize are hugely popular among front-end developers. They are a great way to quickly style an application on the set of standard guidelines. However, they are a little difficult to customize and bloated for small applications.
Tailwind CSS is a utility-first CSS framework. This means that instead of providing you with ready-made components, Tailwind provides utility-based CSS classes that you can use to style your components. This gives you more flexibility over your design and you can build your own UI framework on top of Tailwind CSS by extending the Tailwind classes.
In this tutorial, you’ll build a portfolio landing page that will have the author’s information and a form to subscribe to a newsletter. You’ll build the front end with Nuxt.js and style it using Tailwind CSS.
- Prerequisites
- Setting up Nuxt.js
- Setting up Tailwind in Nuxt.js
- Creating custom components using Tailwind classes
- Trimming long classes
When you’re finished, you’ll have a portfolio website that will look like the following:

Prerequisites
To follow along with this tutorial, you will need the following things:
- Node.js
- A text editor like Visual Studio Code
- A web browser like Firefox or Chrome
The tutorial assumes that the reader has basic working knowledge of Nuxt.js and uses Nuxt.js v2.15.7, Tailwind v2.2.19, Node v14.18.2, and NPM v6.14.15.
Setting up Nuxt.js
In case you don’t have an existing Nuxt.js project, you can set up one in this section. Otherwise, feel free to skip to the next section.
First, open up your terminal, navigate to a path of your choice and run the following command in your terminal:
npx create-nuxt-app nuxt-tailwind-portfolioDuring the installation, you’ll be asked some questions related to project name, Nuxt options, UI framework, TypeScript, linter, testing framework, and more. Choose the values according to your need (but skip adding Tailwind CSS here, we’ll do so in the next step in greater detail). Once the installation is complete, your Nuxt.js project will be created in the nuxt-tailwind-portfolio directory.
Next, cd into the directory and launch the Nuxt.js project by running the following commands in your terminal:
cd nuxt-tailwind-portfolio
npm run dev
This completes the basic setup for the Nuxt.js project and next you need to set up Tailwind.
Setting up Tailwind in Nuxt.js
In this step, you’ll set up Tailwind CSS in your Nuxt.js project.
First, navigate to your project path and run the following commands in your terminal. This will install the packages related to Tailwind CSS and its peer dependencies.
npm install @nuxtjs/tailwindcss tailwindcss@latest postcss@latest autoprefixer@latestNext, create a Tailwind configuration file at the root of your project by running the following command in your terminal:
npx tailwindcss initThis will create a tailwind.config.js file with a minimal configuration as follows:
module.exports = {
  content: [],
  theme: {
    extend: {},
  },
  plugins: [],
}
Finally, add the @nuxtjs/tailwindcss module to the buildModules array in the nuxt.config.js file:
export default {
  ...
  buildModules: [
    ...
    '@nuxtjs/tailwindcss',
  ],
}
This configures the Nuxt.js to load @nuxtjs/tailwindcss at the build time.
At this point, restart your Nuxt.js development server by running the following command and making sure that the dev server build completes without any build errors:
npm run devThat’s it! You are now ready to use Tailwind CSS classes in your Nuxt.js application. In the next section, you’ll create Nuxt.js components and style them using Tailwind CSS.
Creating custom components using Tailwind classes
In this step, you’ll learn to create custom components in Nuxt.js, style them using Tailwind CSS classes and import them into a Nuxt.js page.
In this Developer Portfolio app, you need to add three components:
- Author information
- Newsletter subs
- Footer
Designing the author component
First, create an Author.vue file in the components directory and add the following template code to it:
<template>
<div class="flex items-center w-3/4 min-h-screen mx-auto">
<div class="flex-1">
<h1 class="mb-3 text-3xl">Sammy</h1>
<p class="mb-3 text-gray-700 pr-4">
Hi 👋, I am a Full Stack Developer and Technical Content Writer. I work
with React, Vue, Flutter, Strapi and more.
</p>
</div>
<div class="flex-1">
<img
class="w-full shadow-lg rounded"
src="https://unsplash.com/photos/GkFQEOubrCo/download?ixid=MnwxMjA3fDB8MXxzZWFyY2h8MTl8fGNvZGluZ3x8MHx8fHwxNjM4MTc1MzMw&force=true&w=640"
/>
</div>
</div>
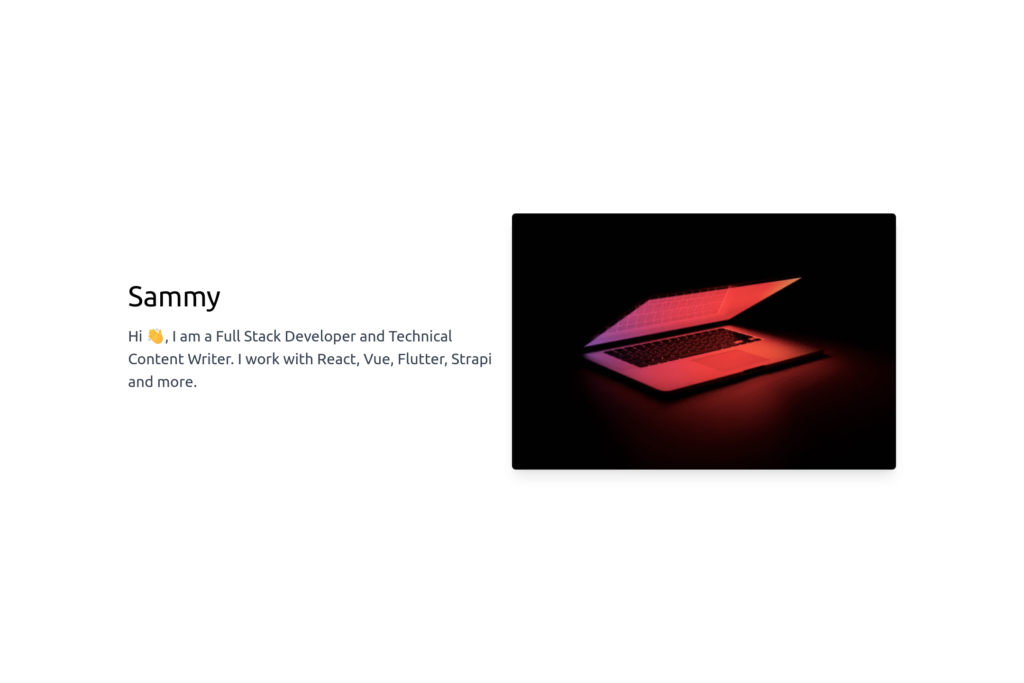
</template>Next, open the pages/index.vue file and replace the existing code with the following template code:
<template>
  <section>
    <Author />
  </section>
</template>
Finally, save your progress and visit https://localhost:3000 on your favorite web browser. You’ll see your Author component rendered as follows:
Designing the “subscribe to” newsletter component
First, just like in the previous case, create a SubscribeBox.vue file in the components directory and add the following template code to it:
<template>
<div class="w-1/2 mx-auto bg-gray-800 px-6 py-8 rounded shadow-md">
<h2 class="mb-1 text-2xl text-white">Subscribe to Newsletter</h2>
<p class="mb-3 text-gray-500">
I will send tips and tricks related to Jamstack technologies every Tuesday
morning.
</p>
<input
type="email"
class="block bg-gray-900 w-full py-2 px-4 rounded mb-4"
name="email"
placeholder="Your Email"
/>
<button
type="submit"
class="inline-block bg-blue-100 rounded-full px-4 py-1 font-semibold text-blue-900"
>
Subscribe
</button>
</div>
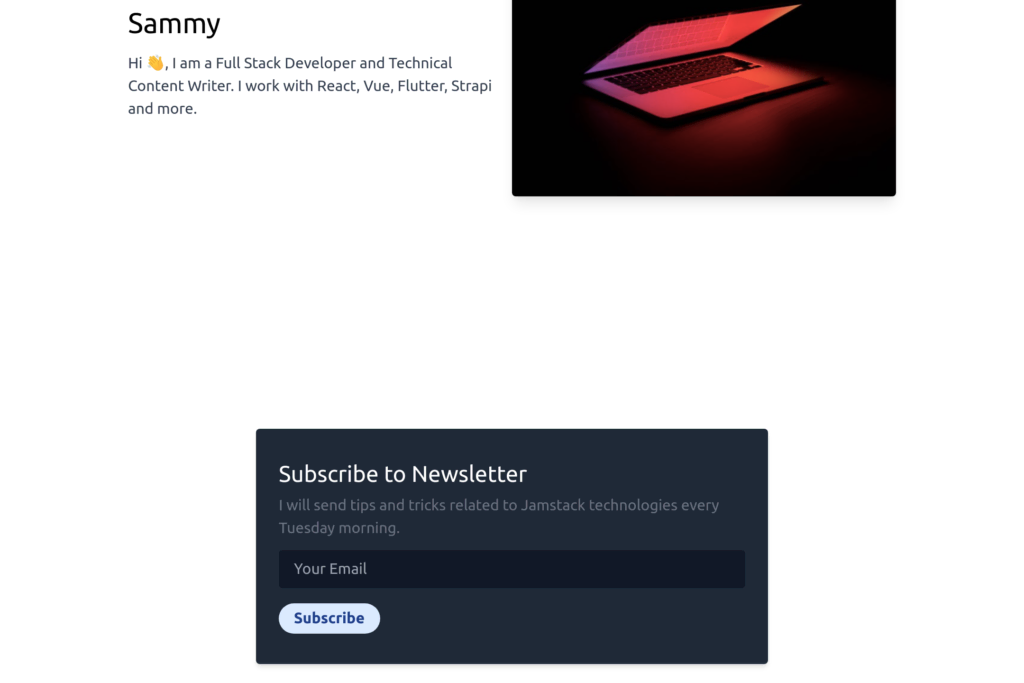
</template>Next, update the pages/index.vue file and add a reference to the SubscribeBox component:
<template>
  <section>
    <Author />
    <SubscribeBox />
  </section>
</template>
Finally, save your progress and visit https://localhost:3000. You’ll see the SubscribeBox component rendered as follows:
Designing the footer component
First, create a Footer.vue file in the components directory and add the following template code to it:
<template>
<footer class="container mx-auto py-8">
<p class="text-gray-500 text-sm text-center">
This portfolio website is built using Nuxt and Tailwind.
</p>
</footer>
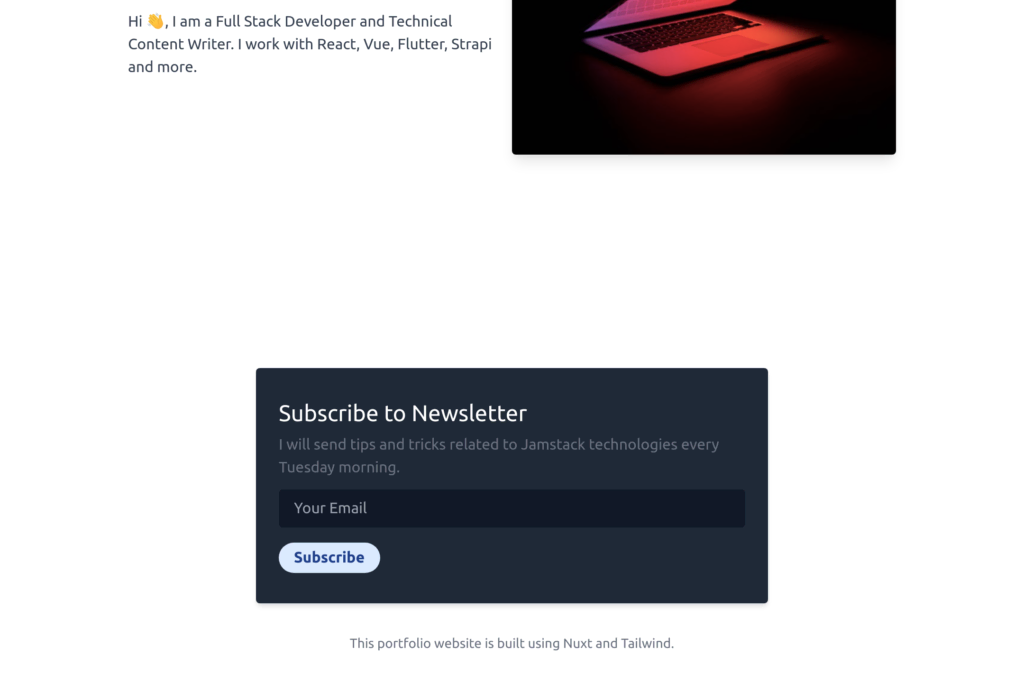
</template>Next, update the pages/index.vue file and add a reference to the Footer component:
<template>
  <section>
    <Author />
    <SubscribeBox />
    <Footer />
  </section>
</template>
Finally, save your progress and visit https://localhost:3000. You’ll see all the three components rendered as follows:
At this point, the project uses very long CSS classes. In the next section, you’ll learn to trim the CSS classes into short single class names.
Trimming long classes
In this step, you’ll learn to trim long classes to a single class name.
If you look at the classes used for styling the h1 and p tags, you’ll see we use the same classes repeatedly. We use mb- to add bottom margin, and text- to specify text size. Instead of adding classes over and over again, you can abstract them into a single class and reference your custom classes anywhere in your Nuxt.js application. This is how you can leverage the power of Tailwind CSS to rapidly build beautiful websites.
To do so, in the pages/index.vue file, add the following styles after your <template> block:
<template> ... </template>

<style lang="postcss">
  .c-h1 {
    @apply mb-3 text-3xl;
  }
  .c-h2 {
    @apply mb-1 text-2xl;
  }
  .c-p {
    @apply mb-3;
  }
</style>
These classes can be applied to different elements all across the application.
Next, use these new CSS classes in your components in the components/Author.vue file by updating the styles of h1 and p tags:
<h1 class="c-h1">Sammy</h1>
<p class="c-p text-gray-700 pr-4">
  Hi 👋, I am a Full Stack Developer and Technical Content Writer. I work with
  React, Vue, Flutter, Strapi and more.
</p>
Finally, save your progress at this moment and check your styles on the website. You won’t see any difference because you simply abstracted the existing CSS classes into custom CSS classes.
Next, in the same way, update the styles of h2 and p tags in the components/SubscribeBox.vue file:
<h2 class="c-h2 text-white">Subscribe to Newsletter</h2>
<p class="c-p text-gray-500">
  I will send tips and tricks related to Jamstack technologies every Tuesday
  morning.
</p>
Notice that we preserved text color classes because those are not abstracted into our new custom class. Now that you know how to create your own custom CSS classes by extending the Tailwind CSS classes, you can also customize the default Tailwind behavior.
Using Tailwind config
In this step, you’ll learn to configure the Tailwind for easy handling of custom styles from a single place. This practice leads to a more consistent design and provides you with a single source of truth to implement the design-related changes.
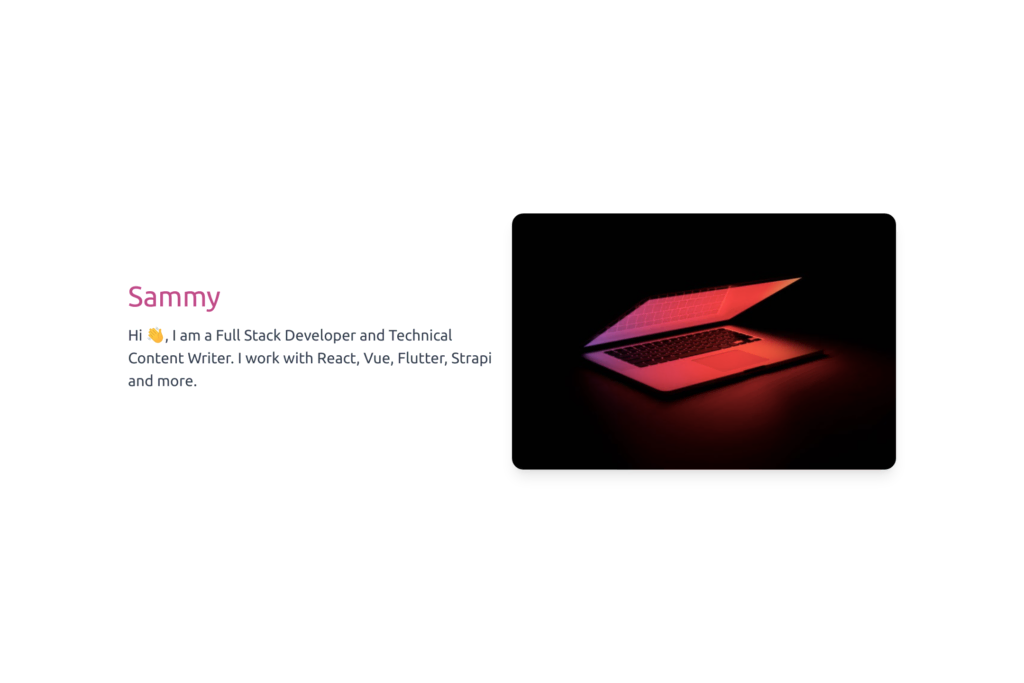
First, open the tailwind.config.js file and update the Tailwind config’s theme field by adding a new color (special) and the default value for border-radius:
module.exports = {
  ...
  theme: {
    extend: {
      borderRadius: {
        DEFAULT: '0.75rem',
      },
      colors: {
        special: { DEFAULT: '#bf1587' },
      },
    },
  },
  ...
}
Next, in the components/Author.vue file, update the text color of the h1 tag by adding the text-special CSS class:
<h1 class="c-h1 text-special">Sammy</h1>
Finally, save your progress, stop the dev server, and rerun it with npm run dev to rebuild your custom CSS config. Then check out the updated styles by visiting https://localhost:3000:
Note: You can learn about all the config settings for Tailwind in their documentation.
That’s it! You’ve successfully built a portfolio website using Nuxt.js and Tailwind.
Learn more about using Tailwind
In this article, you learned to use Tailwind CSS in a Nuxt.js application. You learned about creating custom components, styling them using Tailwind CSS, creating custom CSS classes, and updating Tailwind config.
Next, you can add more sections like the projects you have done, your professional experiences, and any kind of information you’d like to share with the world. To learn more about Tailwind CSS, check out the documentation on their official website.
This blog post was created as part of the Mattermost Community Writing Program and is published under the CC BY-NC-SA 4.0 license. To learn more about the Mattermost Community Writing Program, check this out.


