
How to Deploy Mattermost on AWS Via Opta
A common denominator that Mattermost and most corporate applications share is the challenge users can face in successfully setting up a self-hosted instance in their own cloud account. Even with cloud-specific documentation, there’s almost always a hard requirement of understanding said documentation, resolving any errors encountered along the way, and maintaining the application. Not only must this challenge be addressed before a self-hosted Mattermost instance is operational, but it must be done expertly, or face risking downtime and data insecurity.
As such, companies are traditionally forced to either build a standing DevOps team, or hire external parties to do the work. Either case can easily be prohibitively expensive. It is for this reason that my company has developed our open source project, Opta. In this article, I will demonstrate how one can use Opta to install a secure, configurable, production-grade Mattermost deployment in their own AWS account in under an hour—with no DevOps knowledge.
What is Opta?
Opta is an Infrastructure-As-Code framework where you work with high-level constructs instead of getting lost in low-level cloud configuration. Opta gives you a vast library of modules that you can connect together to build your ideal Infrastructure stack. Best of all, Opta uses Terraform under the hood — so you’re never locked in. You can always write custom Terraform or even take the Opta-generated Terraform and go your own way!
For usage, it is packaged as a stand-alone binary and run like a typical CLI tool (more on that later). Its commands take as input a manifest yaml where the user details the desired cloud architecture to use, such as opta apply -c my_config.yaml. With its high level of abstraction, users can even use pre-fabricated manifests, filling in only a handful of values to deploy complex applications — as will be done in this demo.
Prerequisites
Before beginning, let us go over the prerequisites for this demo. Firstly, as this is a self-hosted AWS deployment demo, you will need to have an AWS account, and admin access within as we will be manipulating multiple resource types. As Opta is a CLI tool, make sure you have loaded your credentials locally, and they are available in your shell.
Opta with AWS has some prerequisites itself, namely:
- A supported macOS or Debian or Red Hat distro release.
- Terraform (v1.0+)
- Docker (v19+) — this one is not needed for our demo.
- kubectl (should be packaged with docker-for-mac)
- AWS CLI (v2)
- Opta assumes that
git,curlandunziptools are already installed on the command line; in addition if you are using Ubuntu/Debian Linux then the language-pack-en package should be installed; you may also need to addexport LC_CTYPE=en_US.UTF-8to your profile.
For full details, please refer to the official docs here.
Performing the Deployment
Once you have completed the prerequisites, we can begin the deployment. As alluded to earlier, the Opta team has created a yaml generator providing a nice UI to fill in the few user-provided fields in a pre-fabricated Opta manifest. We have actually created such a prefabricated manifest for Mattermost on AWS, which you can configure and download by pushing this button:

Note that the domain will be the domain used by mattermost, so make it some subdomain of one of the domains which you own, like mattermost-demo1.runx.dev for us at RunX.
So once you’ve configured it and downloaded the yaml to your current directory, all that is left to do is run opta apply -c mattermost-aws.yaml. You will be prompted to approve changes a couple of times as Opta will go through various stages. This is expected, just keep approving.
And that’s it! The deployment usually takes about ~30 minutes, but once ready, your self-hosted Mattermost should be fully operational, with a secure database, persistent disk, and (after further configuration described below) email capabilities.
Verifying the Deployment
Once the Opta command finished, there should have been a list of outputs containing details of the created architecture, including a load_balancer_raw_dns. If you lost it you can quickly find these values by running opta output -c mattermost-aws.yaml. This is the domain name of the load balancer created for you. Later on we’ll show how you can add your official domain and SSL, but for now you can use the load_balancer_raw_dns to access your mattermost deployment through HTTP:
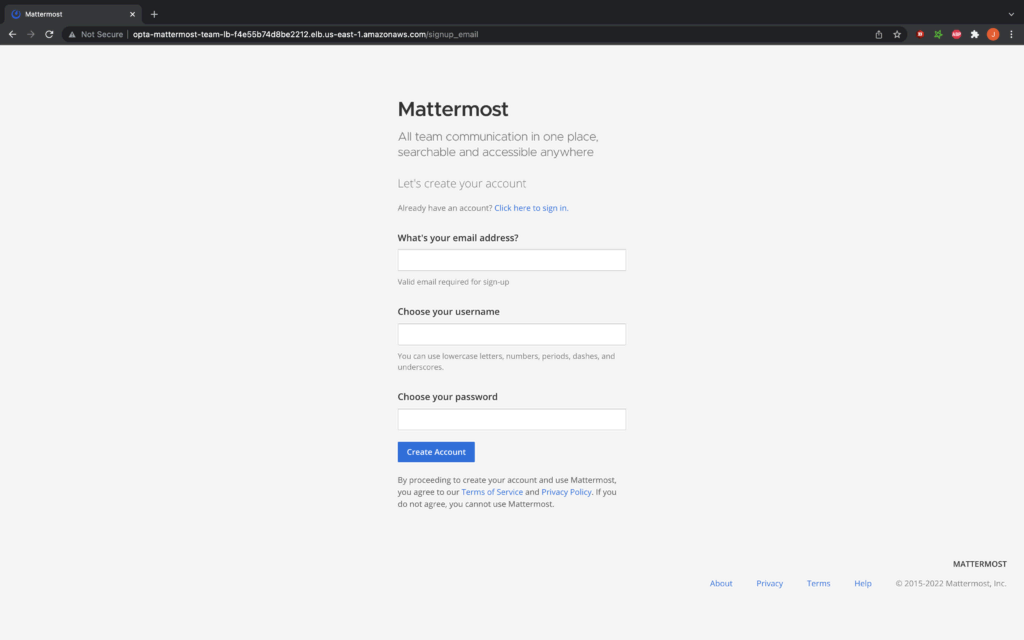
Go ahead and fill in this form quickly as the first admin is the first person to fill this out. The system will then ask you a series of Mattermost start up questions (e.g. create your first team), and you should be good to go!
Understanding What Was Installed
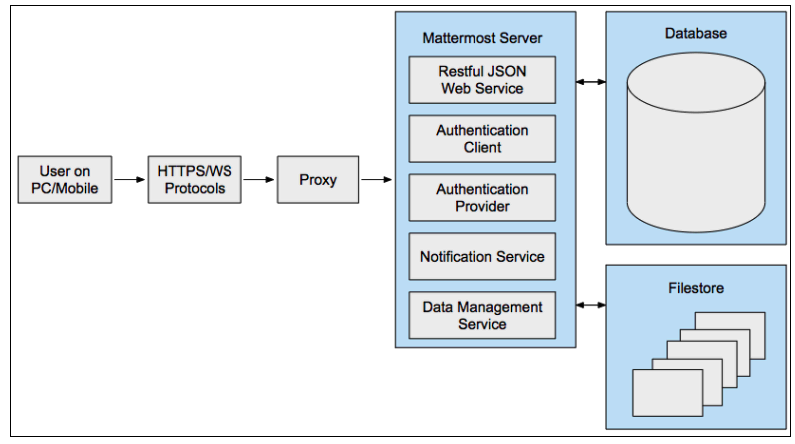
Opta aims for simplicity and is easy to explain at a high level. For our Mattermost deployment, Opta begins by creating a new VPC and EKS cluster therein, with a load balancer serving as an entry point to the cluster. The Opta deployment above spins up a single container version of Mattermost (Team Edition) on the EKS cluster. This EKS then provisions an EBS volume for persistent storage for the container. Additionally, Opta creates an RDS MySQL instance to serve as the database for Mattermost.
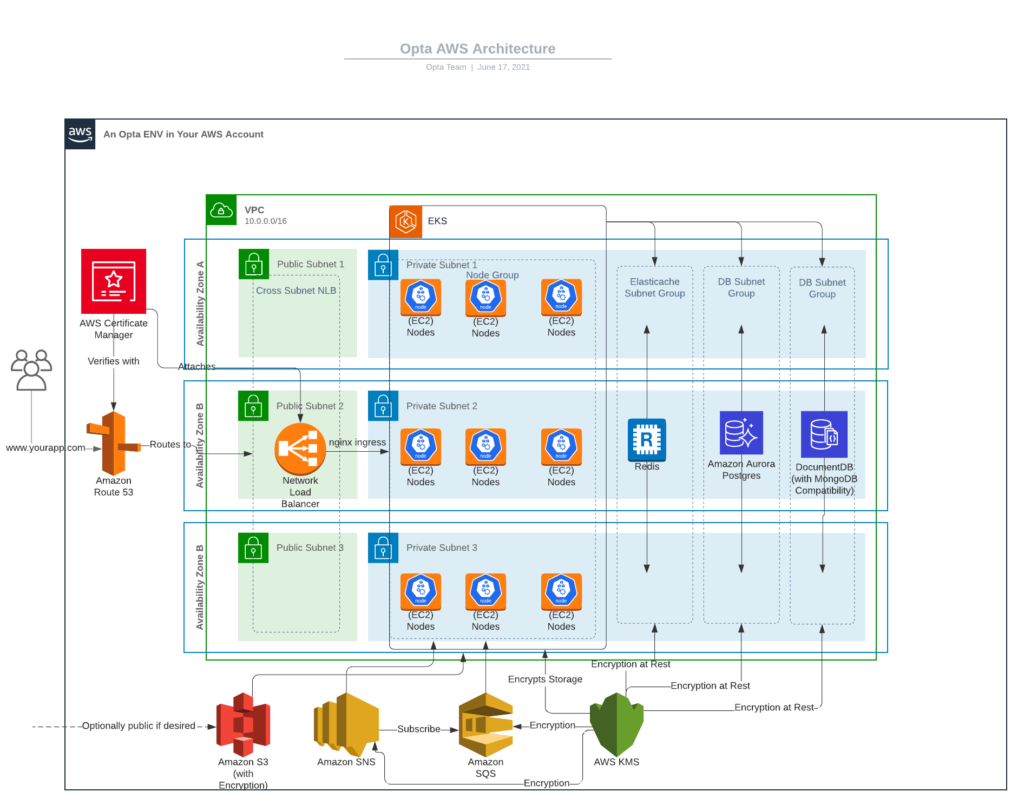
For full details, please refer to the official docs here.
Getting DNS to work
To get your SSL and your domain for your Mattermost instance, you will need to do a few more steps as you will need to “prove” your DNS ownership (this is needed for the email links to work properly):
To begin, run opta output -c mattermost-aws.yaml to get the nameservers. You will see a section like this:
{
"name_servers": [
"ns-1234.awsdns-26.org",
"ns-1757.awsdns-27.co.uk",
"ns-214.awsdns-26.com",
"ns-864.awsdns-44.net"
],
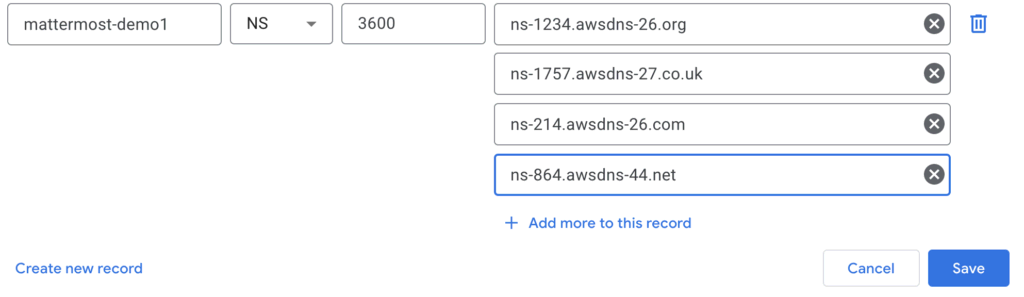
}Go to your domain registrar (like namecheap, godaddy, etc.) to point the domain to these nameservers using a new NS record.
Give it a few minutes for the propagation to take effect and try hitting it (mind you, use http, not https as the next step does TLS).
Now that the DNS ownership is settled, set the delegated field to true in the mattermost-aws.yaml file, and run opta apply -c mattermost-aws.yaml again. This time it will generate the necessary certificates
The load balancer will be unavailable for a few minutes after the command is completed, but after that your domain should now be pointing to the Mattermost deployment with secure TLS!
Adding Email
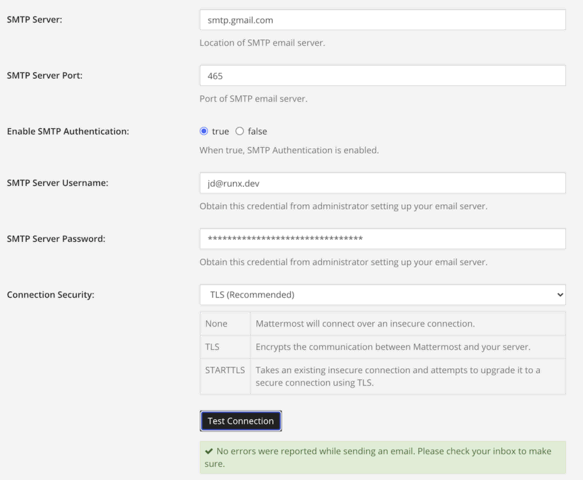
For adding an email, there is nothing specific to Opta, and the regular docs do a good job explaining. I began by setting the site url in the config properly (you should see a small banner warning you to do so).
As I have Gmail, I followed the instructions for Gmail and successfully set it up with no problems (you may want to give Mattermost a dedicated email address later on).

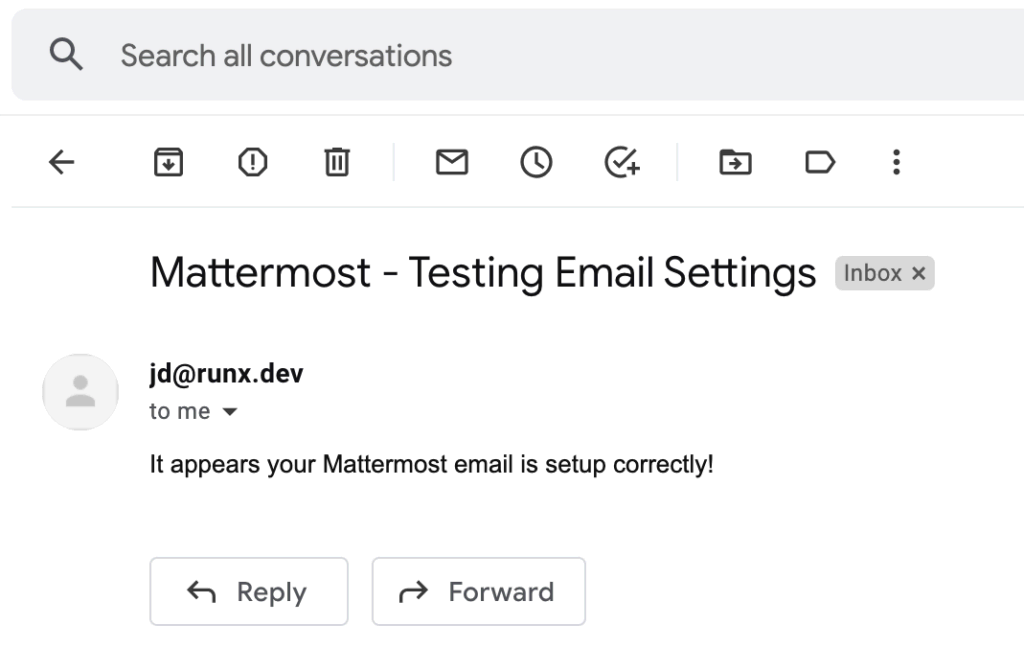
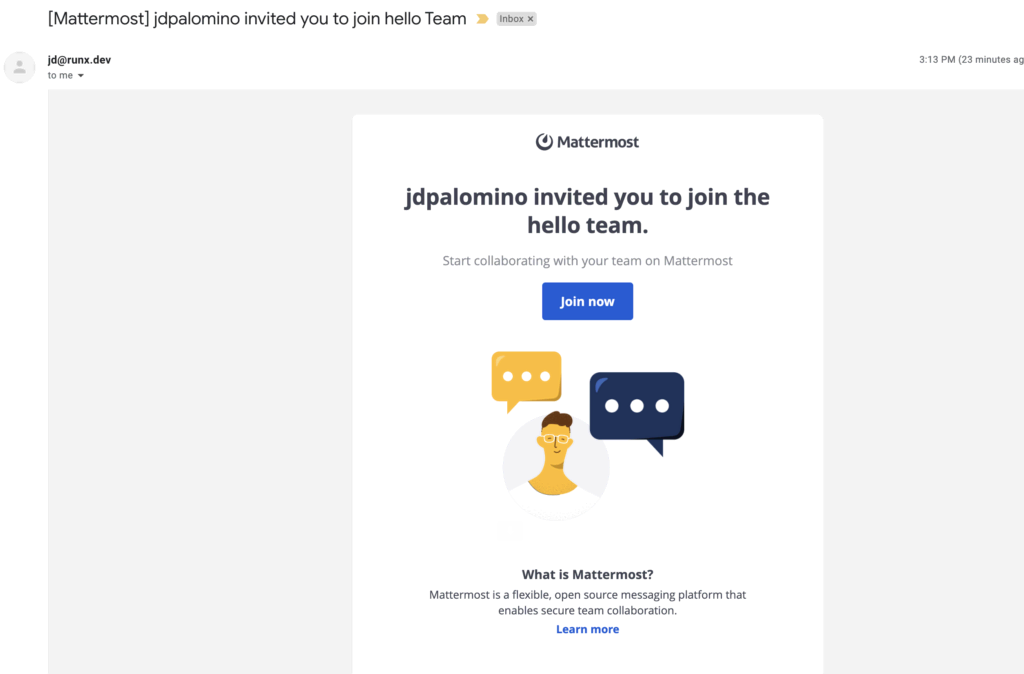
Once that config was completed I was able to send email invitations on my behalf with no problems!
Clean Up
Now that the demo is complete, you may clean up all the Opta deployment by running opta destroy -c mattermost-aws.yaml.
Conclusion
So as we just saw, it’s now perfectly possible to have a robust and secure Mattermost instance running on your cloud account with no prior DevOps knowledge. The Opta team hopes that our tool will allow many more people to easily try out Mattermost without fretting about the cloud architecture. If you have any questions about Opta, or wish to use it for your project, please check us out on GitHub — we’ve got a growing community, and are more than happy to have you!


