
Beginners Guide to GUI Development with Python and Tkinter
Imagine you are doing a simple calculation. When you command the program to do a calculation, data is calculated by the code behind the application and displays the answer in a second. If the calculator has only front-end, it is not able to do the calculation. And if it has only a back-end, it can do the calculation but is unable to display the answer. Therefore, both front-end and back-end are essential components in an application.
In this article, we’re going to learn how to work with front-end using Python and Tkinter, a powerful GUI (Graphical User Interface) library used by millions of Python developers. By the end of this article, you will be able to build beautiful, functional applications with Python. And in the last part, we will make two simple applications with GUI. So make sure to read until the end!
Prerequisites
Before getting started, let’s set up the things. You will need:
- An IDE
- Python 3. x
- Basic understanding of Python
- Tkinter 8.6. (To check the version, use python3 -m Tkinter in Terminal.)
Note: Even though Tkinter supports multiple operating systems, the code may change according to the OS. The screenshots in this blog post use Mac as the operating system.
What is Tkinter?
Tkinter is an open source, GUI library developed for Python, by Steen Lumholt and Guido van Rossum. You don’t need to worry about the installation of the Tkinter module as it comes with Python already. It gives an object-oriented interface to the Tk GUI toolkit. So, with the help of this amazing library, creating desktop GUI applications is not that hard.
There are also a few other GUI frameworks that might be useful to explore, including PyQT, Kivy, and WxPython. But among all these, Tkinter is the most popular GUI library because it makes GUI development easier and faster.
Introduction to Tkinter Widgets
Widgets are elements of the GUI that display or let the user interact with the OS. In Tkinter, widgets include text, buttons, frames, canvases, and more. Let’s take a look at these widgets and how you can use them.
Canvas Widget
Tkinter Canvas widget is mainly used as a general-purpose widget that is used to draw anything on the application window in Tkinter. This widget can be used to draw graphics and plots, drawings, charts, and showing images. Canvas has several options available like border-width, height, background color, cursor, etc. In the following program, we’re drawing a pie chart on canvas, and the cursor is also changed:
from Tkinter import *

win = Tk()

win.geometry("300x300")

win.title("Pie-Chart in Canvas")


# creating a simple canvas with canvas widget
cv = Canvas(win, bg="#fff", height="300", width="300", cursor="dot")

coord = 10, 10, 300, 300
arc1 = cv.create_arc(coord, start=0, extent=170, fill="#2E64FE")
arc2 = cv.create_arc(coord, start=170, extent=190, fill="#5858FA")

cv.pack()

win.mainloop()
So the output would be:

Label Widget
The Label widget is one of the most useful widgets. The Label widget is used to display text, and has some customizations — anchor, font, border-width, width, underline, etc. Note that while the label widget is used to display text, the text widget is used to make Input Textboxes.
Here’s a sample code for creating a Label widget.
from tkinter import *

win = Tk()

win.geometry("450x270")
win.configure(bg = "#fff")
win.title("Label Widget")


# creating a label
myLabel= Label(win, text="This is a Label created by me. And it looks great, doesn't it?",font =("Agency FB", 14),bg= "#fff",fg= "#000").place(x=50, y=50)

win.mainloop()
And the output is:

One thing you’ll notice is that this widget is not centered and no responsiveness can be seen. But don’t worry, Tkinter has a solution: the rel keyword. It stands for the relative_to keyword and uses the following syntax, in this case:
myLabel= Label(win, text="This is a Label created by me, does it look great?",font =("Agency FB", 14),bg= "#fff",fg="#000").place(relx=0.5, rely=0.1, anchor = 'center') # must be used along with anchor keywordOutput:
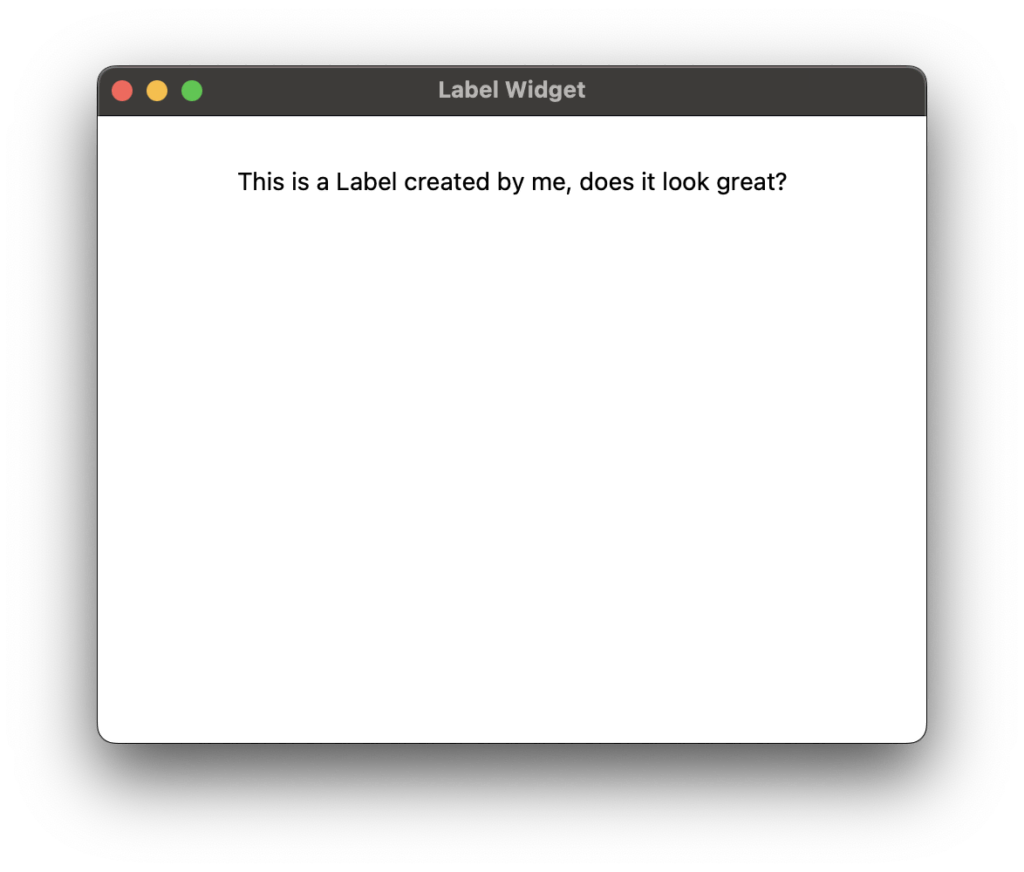
If you resize the window, you can see that the label is still in the center. Even if the text is changed, the label will stay in the same relative place, making it responsive.
Text Widget
The Text widget is used to provide a multi-line textbox as Entry Widget is used to provide a single-line textbox. Here’s a sample program that uses the Text widget:
import tkinter as tk
from tkinter import *

win = Tk()
# specify the size of the window.
win.geometry("450x270")
win.configure(bg = "#fff")
win.title("Text Widget")

# To Create a text widget and specify size.
T = Text(win, height = 6, width = 53,font =("Agency FB", 14))

# TO Create a label
l = Label(win, text = "How's your day?",bg= "#fff",fg= "#000")
l.config(font =("Agency FB", 14))

Quote = """Great as usual!"""

l.pack()
T.pack()

# Insert the Quote
T.insert(tk.END, Quote)

tk.main()
Output:

Button Widget
As simple as it sounds, the Button widget is used to create a button. The button widget has a lot of customization options, such as Image to display as a button, background color, foreground color, highlight color, etc.
Here’s a demo code:
from tkinter import *

win = Tk()

win.geometry("450x270")
win.configure(bg = "#fff")
win.title("Button Widget")

name = Label(win, text="Tkitner is not that hard, do you like it?",bg= "#fff",fg= "#000",font =("Agency FB", 14)).place(x=120, y=40)

b = Button(win, text="Yes!")

b.place(x=200, y=80) # using pack() geometry

win.mainloop()
Output:

Entry Widget
The Entry widget is also the same as the Text widget, but it supports single-line text.
from tkinter import *

win = Tk()

win.geometry("450x270")
win.configure(bg = "#fff")
win.title("Text Widget")

name = Label(win, text="Enter your name",bg= "#fff",fg= "#000",font =("Agency FB", 14)).place(x=30, y=40)
email = Label(win, text="Email",bg= "#fff",fg= "#000",font =("Agency FB", 14)).place(x=30, y=80)


submitbtn = Button(win, text="Submit",font =("Agency FB", 11)).place(x=30, y=170)

entry1 = Entry(win).place(x=140, y=50)

entry2 = Entry(win).place(x=80, y=90)


win.mainloop()
Output:

Frame Widget
The Tkinter Frame widget is used to group and organize the widgets in a better way. The Frame widget is an invisible container whose task is to hold other widgets and arrange them concerning each other. The Tkinter Frame widget makes up a rectangular region on the screen.
In the below program, we create two Frame widgets and include three buttons each. And then, we use the Frame widget’s geometry manager to organize these buttons.
from tkinter import *
win = Tk()
win.geometry("300x300")

win.title("Frame Widget")

w = Label(win, text ='Tkinter Frame', font = "80")
w.pack()

frame = Frame(win)
frame.pack()

bottomframe = Frame(win)
bottomframe.pack(side = BOTTOM)

button1 = Button(frame, text ="Block1", fg ="black")
button1.pack(side = LEFT)

button2 = Button(frame, text ="Block2", fg ="black")
button2.pack(side = LEFT)

button3 = Button(frame, text ="Block3", fg ="black")
button3.pack(side = LEFT)

button4 = Button(bottomframe, text ="Block4", fg ="black")
button4.pack(side = BOTTOM)

button5 = Button(bottomframe, text ="Block5", fg ="black")
button5.pack(side = RIGHT)

button6 = Button(bottomframe, text ="Block6", fg ="black")
button6.pack(side = BOTTOM)

win.mainloop()
Output:

Message Box Widget
A Message Box is usually used to display a message, a warning, or an error. It may include some text and a button. A simple message box can be created by this program:
from tkinter import *
win = Tk()
win.geometry("300x300")

win.title("Message Box Widget")
win.configure(bg = "#fff")
msg = Message(win, text="Error: 404",font =("Agency FB", 14),bg= "#fff",fg= "#000")
b = Button(win, text="Got it!")

msg.place(x =110, y=50)
b.place(x =130, y=100)

win.mainloop()
Output:

Radio Button Widget
Radio buttons are used to implement one-of-many selections. Radio buttons can contain text or images, and you can associate a Python function or method with each button.
The following program can be used to create Radio Button widgets. If you try the example yourself, you will realize that in the output, only one option can be selected.
from tkinter import *
win = Tk()
win.geometry("450x350")

win.title("Radio Button Widget")
win.configure(bg = "#fff")


myLabel= Label(win, text="Best Open Source Collaboration Platform for Developers",font =("Agency FB", 14),bg= "#fff",fg= "#000").place(x=50, y=10)

var = IntVar()
R1 = Radiobutton(win, text="Mattermost", variable=var, value=1,bg= "#fff",fg= "#000",font =("Agency FB", 14))
R1.place(x=180, y=80)

R2 = Radiobutton(win, text="Slack", variable=var, value=2,bg= "#fff",fg= "#000",font =("Agency FB", 14))
R2.place(x=180, y=130)


win.mainloop()
Output:

Check Button Widget
The Check Button is the same as the Radio Button, it is used to display a number of options in a form, where users can check to select any option. But there’s one difference— it allows both single and multiple choices, unlike the Radio Button.
The below example can be used to create a Check Button widget:
from tkinter import *
win = Tk()
win.geometry("450x350")

win.title("Check Button Widget")
win.configure(bg = "#fff")

Checkbutton1 = IntVar()
Checkbutton2 = IntVar()
Checkbutton3 = IntVar()
myLabel= Label(win, text="Mattermost key developer collaboration use cases",font =("Agency FB", 14),bg= "#fff",fg= "#000").place(x=70, y=10)


Button1 = Checkbutton(win, text="Agile software development",
                     variable=Checkbutton1,
                     onvalue=1,
                     offvalue=0,
                     height=2,
                     width=40,
                     bg= "#fff",
                     fg= "#000",
                     font =("Agency FB", 13))

Button2 = Checkbutton(win, text="Developer workflow orchestration",
                     variable=Checkbutton2,
                     onvalue=1,
                     offvalue=0,
                     height=2,
                     width=40,
                     bg= "#fff",
                     fg= "#000",
                     font =("Agency FB", 13))

Button3 = Checkbutton(win, text="Incident resolution",
                     variable=Checkbutton3,
                     onvalue=1,
                     offvalue=0,
                     height=2,
                     width=40,
                     bg= "#fff",
                     fg= "#000",
                     font =("Agency FB", 13))

Button1.place(x=80, y=50)
Button2.place(x=100, y=100)
Button3.place(x=55, y=150)

win.mainloop()
And the output is:

Listbox Widget
Listbox widget is used to display different types of items to the user in the form of a list inside a box and the user can select the items. Only text can be used and users can choose either one or more options.
The below program can be used to create a simple Listbox.
from tkinter import *
win = Tk()
win.geometry("450x350")

win.title("Listbox Widget")
win.configure(bg = "#fff")

myLabel= Label(win, text="Choose A Programming Language",font =("Agency FB", 14),bg= "#fff",fg= "#000").place(x=130, y=10)

listbox = Listbox()

listbox.insert(1,"Python")

listbox.insert(2, "Java")

listbox.insert(3, "C#")

listbox.insert(4, "C++")

listbox.place(x = 150,y=50)

win.mainloop()
Output:

Top-Level Widget
The Top-Level widget is used to create and display top-level windows other than the application window. It can include everything the same as a default window—text, buttons, images, etc.
In the following program, we create a default window that contains a button and when that button is clicked, we call a function to open a Top-Level widget:
from tkinter import *
window = Tk()
window.geometry("450x350")

window.title("Toplevel Widget")
window.configure(bg = "#fff")

def open():
 top = Toplevel(window)
 top.geometry("450x350")
 top.configure(bg="#fff")
 toplevelLabel = Label(top, text="A new window is opened, and it looks great!", font=("Agency FB", 14),bg= "#fff",fg= "#000")
 toplevelLabel.place(x=90, y=10)
 top.mainloop()


myLabel= Label(window, text="Click To Open A New Window",font =("Agency FB", 14),bg= "#fff",fg= "#000").place(x=130, y=10)
btn = Button(window, text="open", command=open)
btn.place(x=200, y=50)

window.mainloop()
Result:

Menu Widget
As it sounds, the Menu widget is used to create a menu on the top of the window. The Tkinter Menu widget has some important methods as below:
add_command() – To add a menu item
add_radiobutton() – To add a Radio Button
add_checkbutton() – To add a check-button
add_separator() – To add a separator line to the menu items
The below program can be used to create a simple window with a Menu widget.
Result:
from tkinter import *
win = Tk()
win.geometry("450x350")

win.title("Menubar Widget")
win.configure(bg = "#fff")

myLabel= Label(win, text="Menu Widget is located on the top of the window",font =("Agency FB", 14),bg= "#fff",fg= "#000").place(x=90, y=10)

def hello():
  print("hello!")

menubar = Menu(win,font =("Agency FB", 14))
menubar.add_command(label="Go to Mattermost", command=hello)
menubar.add_command(label="Exit", command=win.quit)

win.config(menu=menubar)

win.mainloop()
Note: Some widgets such as Menu behave differently (or are nonfunctional) on different operating systems, like Mac. Be sure to research your widget use cases for your target operating systems.
Creating Sample GUI Applications
Learning how to use the widgets is just the starting point. Now, it’s time to build some simple applications with them to get a clear and deep understanding of how they work. You’ll quickly realize that developing an application with GUI is not an easy task!
In this tutorial, we’ll make two applications with GUI.
- Password Generator
- Age Calculator
Excited? Scroll down!
Sample GUI #1: Password Generator Application
The process of creating a password generator application is pretty simple.
First of all, we create a variable that contains all the characters— letters (both uppercase and lowercase), numbers, and special characters. Next, we get input from the user to get the length of the password. It can be four, six, or eight characters long. Thereafter, we randomly shuffle all the characters in our variable and get some random letters according to the input using random library.
Below is the program we can use:
import random
from tkinter import Tk, Canvas, Entry, Text, Button, PhotoImage, Checkbutton
# using from tkinter import * may not work sometimes so this is safe
from tkinter import StringVar, IntVar, Label, Radiobutton

#creating the window
window = Tk()
window.title('Buddy PW Generator')
window.geometry('450x350')
window.config(bg= "#fff")

Label(window,text='PASSWORD GENERATOR',font =("Agency FB", 14),bg= "#fff",fg= "#000").pack()

length=IntVar()

l =Label(window, text = 'password', bg= "#fff",fg= "#000", font =("Agency FB", 14)) #displaying password

def password_generate(leng):
  valid_char='abcdefghijklmnopqrstuvwxyzABCDEFGHIJKLMNOPQRSTUVWXYZ0123456789!@'#characters of the password
  password=''.join(random.sample(valid_char,leng))#random generation of password
  l.config(text=password)
  l.place(x=190,y=50)

Radiobutton(text='4 character',variable=length,font =("Agency FB", 14),bg= "#fff",fg= "#000", value=4).place(x=170,y=150)#creating checkbox
Radiobutton(text='6 character',variable=length,font =("Agency FB", 14),bg= "#fff",fg= "#000",value=6).place(x=170,y=200)#creating checkbox
Radiobutton(text='8 character',variable=length,font =("Agency FB", 14),bg= "#fff",fg= "#000",value=8).place(x=170,y=250)#creating checkbox


#function to check the radio button
def get_len():
 if length.get() == 4:
   password_generate(4)
 elif length.get() == 6:
   password_generate(6)
 elif length.get() == 8:
   password_generate(8)
 else:
   password_generate(6)
    # usual value

Button(window,text='Generate',font =("Agency FB", 14),bg= "#fff",fg= "#000",command=get_len,width=15).place(x=170,y=100)

window.mainloop()
In this program, we’ve used three widgets: Label widget, Radio Button widget, and the Button widget. If you run the program, you will see an output like this:

Sample GUI #2: Age Calculator Application
The process of creating an Age Calculator is also simple. In this, we get 4 inputs— Name, Year, Month, Date. When inputs are given, we use datetime library to calculate the period between the born data and the present day. Finally, we format the string and display it in a Top-Level widget.
This program can do this job!
from tkinter import *
from datetime import date


#root and win are two other common words used to define the Tk Window
root = Tk()
root.geometry("450x300")
root.title("Buddy Age Calculator")
root.configure(bg = "#fff")

def calculateAge():
   today = date.today()
   birthDate = date(int(yearEntry.get()), int(monthEntry.get()), int(dayEntry.get()))
   age = today.year - birthDate.year - ((today.month, today.day) < (birthDate.month, birthDate.day))

   top = Toplevel(bg="#fff")
   top.geometry("280x100")
   top.title("Age")
   l = Label(top, text=f"{nameValue.get()} your age is {age}",font =("Agency FB", 14),bg= "#fff",fg= "#000")
   l.pack()

Label(text="Name",font =("Agency FB", 14),bg= "#fff",fg= "#000").grid(row=1, column=0, padx=90)
Label(text="Year",font =("Agency FB", 14),bg= "#fff",fg= "#000").grid(row=2, column=0)
Label(text="Month",font =("Agency FB", 14),bg= "#fff",fg= "#000").grid(row=3, column=0)
Label(text="Day",font =("Agency FB", 14),bg= "#fff",fg= "#000").grid(row=4, column=0)

nameValue = StringVar()
yearValue = StringVar()
monthValue = StringVar()
dayValue = StringVar()

nameEntry = Entry(root, textvariable=nameValue,font =("Agency FB", 14))
yearEntry = Entry(root, textvariable=yearValue,font =("Agency FB", 14))
monthEntry = Entry(root, textvariable=monthValue,font =("Agency FB", 14))
dayEntry = Entry(root, textvariable=dayValue,font =("Agency FB", 14))

nameEntry.grid(row=1, column=1, pady=10)
yearEntry.grid(row=2, column=1, pady=10)
monthEntry.grid(row=3, column=1, pady=10)
dayEntry.grid(row=4, column=1, pady=10)

computeButton = Button(text="What's my Age?", command=calculateAge,font =("Agency FB", 12),bg= "#fff",fg= "#000")
computeButton.place(x=180,y=200)
root.mainloop()
In this program, four Tkinter widgets are used: Label, Entry, Button, and Top-Level. The output of this program would be:

Next Steps in Exploring GUI Development
Adding a GUI makes your application usable by a much wider user group, so it’s essential to learn how to develop applications with GUI. We learned to create good-looking GUIs in Python using the Tkinter library, but the possibilities for what you can create are endless. Tkinter has its own Documentation site, so make sure to take a visit if you get stuck building your next GUI!


