
Deploying a Web App with Python Flask and Heroku
Flask is a Python microframework that puts web app developers in the driver’s seat. We can build without any component generation, allowing us to control the flow of our applications fully. Flask has been around for a while and has a great community of developers using it.
After developing our app, we need to focus on deploying it so that others can access it easily. Heroku is a cloud hosting platform that uses Amazon Web Services (AWS) infrastructure with rapid scaling capabilities, offering flexible deployment services for all kinds of applications. Its ease of use makes it particularly suitable for fast development cycles.
In this article, we’ll present a hands-on walkthrough in creating a simple game leaderboard application in Flask, and then we’ll deploy it to Heroku. We’ll cover some best practices for deploying Python applications to Heroku.
Deploying a Flask App to Heroku
To follow along with this tutorial, you need to use Python 3.8 or Python 3.9. You can check the Python documentation to learn more about which version may be more appropriate for your needs and development environment.
You also need to have pip installed in your local environment to help install Python packages and virtual environments. You can check the pip documentation to pick a release that meets your operating system’s requirements.
Setting Up the Environment
Let’s start building our application. If you’re developing on a Linux or macOS machine, use the terminal. If you’re developing on a Windows machine, use the Windows Command Prompt or PowerShell.
First, navigate to the directory where you’d like to create this project. Then, create a directory called “game”.
In this game/ directory, create a virtual environment by entering the following command in your CLI:
python3 -m venv venvTo activate your virtual environment, you need to enter the appropriate OS-specific command in your CLI.
On Linux or macOS, enter this command:
source venv/bin/activateIf you’re using a cmd.exe-based CLI, enter this command:
\venv\Scripts\activateIf you’re using PowerShell, enter this command:
.\venv\Scripts\activate.ps1There are different ways to structure a Flask application during development. To simplify our deployment, we’ll use the following application structure:
game/
  ├─ app/
  │  ├─ static/
  │  ├─ templates/
  │  ├─ __init__.py
  │  ├─ forms.py
  │  ├─ models.py
  │  └─ views.py
  ├─ venv/
  ├─ config.py
  ├─ .gitignore
  └─ manage.py
In the app’s root directory, we’ll create an app/ folder that holds the static/ and templates/ directories, the __init__.py file that defines our application instance, and a forms.py file that handles our form. The models.py file handles model objects and the views.py file handles routes. The venv/ folder is our virtual environment, and config.py is where we’ll declare the app’s configuration variables. The .gitignore file holds modules we don’t want Git to track, and the manage.py file holds modules to run our application.
Next, install Flask using the following command:
pip install Flask==1.0.2Be sure to install Flask version 1.0.2, as newer versions don’t support Flask-Script and Flask-Migrate.
Now, let’s initialize our application, import our views, and set up our configurations.
Enter the following code in app/init.py:
from flask import Flask

app = Flask(__name__, instance_relative_config=True)

# Load views
from app import views

# Setting up configuration
app.config.from_object('config')
Next, let’s define our app’s first route. Enter the following code in app/views.py:
from app import app
from flask import render_template

@app.route('/')
def index():
    return render_template('index.html')
This imports our app instance from the app/ folder and render_template from Flask. The view renders the index.html template, which we’ll create next, and routes to default port 5000 when opened in the browser.
In the app/templates/ folder, create a file called “index.html” and enter the following code in it:
<h3>Welcome to Game LeaderBoard</h3>We’ll now use the manage.py file to figure out how to run our application. First, we need to install Flask Script, a package that enables us to execute external scripts, such as running development servers.
Enter the following command in your CLI:
pip install Flask-Script==2.0.6Then, to import the app, Manager, and Server instances from Flask-Script, enter the following code in game/manage.py:
from app import app
from flask_script import Manager, Server

manager = Manager(app)
manager.add_command('server', Server)

if __name__ == '__main__':
    manager.run()
The manager instance lets us track the commands in the command line while manager.run readies the Manager instance for any input in the command line.
To execute the server with the debugger, add DEBUG=True to game/config.py. Then, serve the application by running the following command:
python manage.py runserver The browser output should look similar to this:

Setting Up the Database
Next, we’ll connect our database to our application so that we can create models and interact with the data objects. To keep this deployment simple, we’ll use the PostgreSQL database, which is supported by default in Heroku.
Flask has an Object Relational Mapper (ORM) that enables interaction with the database at a higher level using entities and classes. This ORM, called Flask SQLalchemy, is a wrapper for the SQLAlchemy package. We install it with the following command:
pip install flask-sqlalchemy psycopg2 Flask-Migrate==2.6.0Alongside flask-sqlalchemy, this installs psycopg2 and version 2.6.0 of the Flask-Migrate extension, which acts as our Postgres driver. The Flask-Migrate extension allows us to perform database migrations.
To create the database, enter the following commands in your CLI:
sudo su - postgres
psql
postgres=# CREATE DATABASE game;
postgres=# \c game;
postgres=# CREATE USER test_user WITH PASSWORD '';
postgres=# GRANT ALL PRIVILEGES ON DATABASE mattermost TO test_user;
This creates a database called game, connects to it, creates a user with the password you specify, and grants all privileges to the user on the database.
With our user privileges set, we can now connect the database URI.
Add the following code to game/config.py:
DEBUG = True
SQLALCHEMY_DATABASE_URI = 'postgresql+psycopg2://test_user:@localhost/mattermost'
Then, add the following code to app/__init__.py:
from flask import Flask
from flask_sqlalchemy import SQLAlchemy

db = SQLAlchemy()

app = Flask(__name__, instance_relative_config=True)

# Load views
from app import views

# Setting up app configuration
app.config.from_object('config')

# Initializing flask extensions
db.init_app(app)
This imports SQLAlchemy, creates a database instance from it, and then initializes the database using init_app.
To create database migrations, we need to add a few commands to manage.py. We the following code to game/manage.py:
from app import app,db
from flask_script import Manager, Server
from flask_migrate import Migrate, MigrateCommand

manager = Manager(app)
migrate = Migrate(app,db)

manager.add_command('server', Server)
manager.add_command('db', MigrateCommand)

@manager.shell
def make_shell_context():
    return dict(app=app, db=db)

if __name__ == '__main__':
    manager.run()
This imports the database from the app instance. It also imports Migrate and MigrateCommand from Flask-Migrate and creates their instances. The shell command uses the @manager.shell decorator with a context function to return the Flask application instance.
Setting Up Models
With Flask-Migrate set up, we now need to create models so we can migrate our database.
Let’s import the database instance from the app folder then describe our model and its attributes.
Enter the following code in app/models.py:
from . import db

class Game(db.Model):
    __tablename__ = 'games'

    id = db.Column(db.Integer, primary_key=True)
    name = db.Column(db.String(255))
    viewer_hour = db.Column(db.Integer)
    hours_streamed = db.Column(db.Integer)
    acv_num = db.Column(db.Integer)
    creators = db.Column(db.Integer)
    streams_num = db.Column(db.Integer)

    def save_game(self):
            db.session.add(self)
           db.session.commit()

    def __repr__(self):
            return f'Game is {self.name}'
The Game model takes in five attributes with id as the primary key. We also define save_game, which adds and commits our data to the database. The __repr__ magic string returns a formatted string of the game’s name. The __tablename__ variable gives our model an alias.
To migrate the database, we need to import the model in manage.py and add the Game model in the make_shell_context dictionary.
Add the following code to game/manage.py:
from app import app, db
from app.models import Game
from flask_script import Manager, Server
from flask_migrate import Migrate, MigrateCommand

manager = Manager(app)
migrate = Migrate(app,db)

manager.add_command('db', MigrateCommand)
manager.add_command('server', Server)

@manager.shell
def make_shell_context():
	return dict(app=app, db=db, Game=Game) # Add Game model to the dict

if __name__ == '__main__':
	manager.run()
Then, enter the following commands in your CLI to apply the migrations:
python manage.py db init
python manage.py db migrate -m "Initial Migration"
python manage.py db upgrade
The first command, python manage.py db init, adds a migrations folder to the root of our application. The python manage.py db migrate -m "Initial Migration" and python manage.py db migrate commands create the database migration and apply it to the database, respectively.
Setting Up Views and Forms
Our database is set up and running, so we now need to add some views and a form that users add entries. We’ll create the form first and then connect it to the views and routes.
We can easily define our form fields by using Flask-WTF. This package is a simple integration of WTForms, a validation and rendering library for Python web development.
To install the package, enter the following command in your CLI:
pip install flask-wtfNext, we need to import FlaskForm from the package, import the fields and validators we’ll use from WTForms, and then create our form.
Enter the following code in app/forms.py:
from flask_wtf import FlaskForm
from wtforms import StringField, IntegerField, SubmitField
from wtforms.validators import DataRequired

class GameForm(FlaskForm):
    name = StringField('Name', validators=[DataRequired()])
    viewer_hour = IntegerField('Viewer Hours', validators=[DataRequired()])
    hours_streamed = IntegerField('Viewer Hours', validators=[DataRequired()])
    acv_num = IntegerField('ACV', validators=[DataRequired()])
    creators = IntegerField('Creators', validators=[DataRequired()])
    streams_num = IntegerField('Numbers Streamed', validators=[DataRequired()])
    submit = SubmitField('Submit')
We can now make our views. Our view will have two routes: one for rendering all the objects from the database, and one for allowing users to make entries using the form we created.
We need to update views.py so that it imports the app instance, models, and forms, as well as importing redirect for handling page redirects and url_for for creating our URLs.
Add the bolded code in the following example to app/views.py, which should now contain all of the following code:
from app import app
from .models import Game
from .forms import GameForm
from flask import render_template, redirect, url_for

# Views
@app.route('/')
def index():
    games = Game.query.all()
    return render_template('index.html', games=games)
Then, add the following code to app/views.py:
@app.route('/game/new/', methods=['GET','POST'])
def new_game():
    form = GameForm()
    if form.validate_on_submit():
        new_game = Game(
                    name=form.name.data,
                    viewer_hour=form.viewer_hour.data,
                    hours_streamed=form.hours_streamed.data,
                    acv_num=form.acv_num.data,
                    creators=form.creators.data,
                    streams_num=form.streams_num.data
                    )

        # Save game method
        new_game.save_game()
        return redirect(url_for('index'))

    return render_template('new_game.html', game_form=form)
In the index route, we query all the Game objects from the database and pass them to the template as a context. In new_game, we define two methods, GET and POST, for handling requests to our form, and then check if the inputs to the form are correct. The form then saves the data and redirects the user to the index page. We then pass the form as context to the new_game.html template.
Creating the Templates and UI
Now, let’s create some templates and improve the user interface before we run our application.
Before we continue, we need to install Flask-Bootstrap to help render forms from the templates that WTForms.
To install Flask-Bootstrap, run the following command in your CLI:
pip install Flask-BootstrapFlask allows template inheritance, so we’ll create a base template from which our other templates inherit.
In the app/templates/ directory, create a template file called “base.html” and enter the following code in it:
<!DOCTYPE html>
<html lang="en" dir="ltr">
  <head>
    <meta charset="utf-8">
    <link href="https://cdn.jsdelivr.net/npm/[email protected]/dist/css/bootstrap.min.css" rel="stylesheet" integrity="sha384-EVSTQN3/azprG1Anm3QDgpJLIm9Nao0Yz1ztcQTwFspd3yD65VohhpuuCOmLASjC" crossorigin="anonymous">
      <link rel="stylesheet" href="https://cdnjs.cloudflare.com/ajax/libs/font-awesome/5.15.4/css/all.min.css"/>
    <link rel="stylesheet" href="{{url_for('static',filename='css/styles.css')}}">
    <title>Game LeadBoard</title>
  </head>
  <body>
    <!-- Navbar -->
    <nav class="navbar navbar-expand-lg bg-light navbar-light py-3 mb-5 fixed-top">
      <div class="container">
        <a href="{{url_for('index')}}" class="navbar-brand" style="color: #4c7f99;">Game Leaderboard</a>
        <button
          class="navbar-toggler"
          type="button"
          data-bs-toggle="collapse"
          data-bs-target="#navmenu"
        >
        <span class="navbar-toggler-icon"></span>
        </button>

        <!--Paginator & Icon -->
        <div class="collapse navbar-collapse" id="navmenu">
          <ul class="navbar-nav ms-auto">
            <li class="nav-item">
              <a href="{{url_for('new_game')}}" class="nav-link"><i class="fa fa-plus-circle"></i></a>
            </li>
          </ul>
        </div>
      </div>
    </nav>
    <br>

    <!-- Showcase -->
    <div class="game-table mt-5">
      {% block content %}{% endblock content %}
    </div>

  </body>
</html>
We use Bootstrap 5 for styling and pass in a link to our customized CSS files. In the navbar, we pass the URLs of the two routes we defined earlier, for easy navigation. Then, we define the content block where the templates will be inherited.
In the app/static/ directory, create a folder called “CSS” to hold the CSS files we create. Inside this app/static/css/ folder, create a file called “styles.css” and enter the following code in it:
/* Google Fonts */
@import url('https://fonts.googleapis.com/css2?family=Abel&display=swap');
/* Navbar styles */
body {
  font-family: 'Abel', sans-serif;
  background: #fafafa;
  color: #333333;
}

.navbar-brand {
  font-weight: bold;
}

.game-table {
    margin-bottom: 10%;
}
/* Game form */
.content-section {
  background: #ffffff;
  padding: 10px 20px;
  border: 1px solid #dddddd;
  border-radius: 3px;
  margin-bottom: 20px;
  font-size: 17px;
  margin-top: 20px;
  padding-bottom: 30px;
}

.list-color.td {
  color: #a2afb8;
}
Next, let’s extend the base.html file and then pass it in the table for rendering our objects.
Add the following code to app/templates/index.html:
{% extends 'base.html' %}

<!-- Content block -->
{% block content %}
<div class="container">
    <table class="table table-hover">
    <thead>
      <tr>
        <th scope="col">#</th>
        <th scope="col">Name</th>
        <th scope="col">Viewer Hours</th>
        <th scope="col">Hours Streamed</th>
        <th scope="col">ACV</th>
        <th scope="col">Creators</th>
        <th scope="col">Streams</th>
      </tr>
    </thead>

    {% for game in games %}
      <tbody>
        <tr class="list-color">
          <th scope="row">{{ loop.index }}</th>
          <td>{{game.name}}</td>
          <td>{{game.viewer_hour}}</td>
          <td>{{game.hours_streamed}}</td>
          <td>{{game.acv_num}}</td>
          <td>{{game.creators}}</td>
          <td>{{game.streams_num}}</td>
        </tr>
      </tbody>
    {% endfor %}

   </table>
{% endblock %}
In the body of our table, we iterate through the context parameters we passed in the index route.
Next, we need to add entries to our form.
In the app/templates/ directory, create a template file called “new_game.html” and enter the following code in it:
{% extends 'base.html' %}
{% import 'bootstrap/wtf.html' as wtf %}

{% block content %}
  <div class="container">
    <div class="col-md-12">
      {{ wtf.quick_form(game_form) }}
    </div>
  </div>

{% endblock %}
As we did in index.html, we extend the base.html file. Here, however, we import Bootstrap as wtf and pass the game_form to it.
Next, we need to define a secret key to use the CSRF prevention in the form.
Add the following code to app/config.py:
SECRET_KEY = '' To finish building our app, we need to import Flask-Bootstrap in the __init__.py file, create its instance, and then initialize the extension to be able to use it.
Add the following code to app/__init__.py:
...
from flask_bootstrap import Bootstrap
...
bootstrap = Bootstrap()

# Initializing flask extensions
...
bootstrap.init_app(app)
Let’s see how the application works at this point.
Serve the application by running the following command:
python manage.py runserverThe browser output should look like this:

Deploying the App
Our application is now functioning as expected, but we need to deploy it so that anybody can view it. We’ll use Heroku fto help with this.
First, we need to install Gunicorn. It acts as an HTTP server that Heroku uses when running our application.
Run the following command in your CLI:
pip install gunicornNext, we create a Heroku account and install the Heroku CLI to enable us to manage and deploy our application from the CLI.
Then, we need to list all our dependencies and put them in a file so that Heroku can use them in its environment when building our application.
Run the following command in your CLI:
pip freeze > requirements.txtThen, we need to tell Heroku which commands to run when building and deploying our application, which we specify with a Procfile.
In the mattermost directory, create a file called “Procfile” and enter the following code in it:
web: python manage.py db upgrade; gunicorn manage:appThe web prefix tells Heroku that this is a web application. The first command defines our database schema to the Heroku database, and the second command starts our server using Gunicorn.
It’s good practice to store config variables as environment variables. This hides them from being committed to Github. We use the dotenv package to do this, which we’ll need to install.
Run the following command in your CLI:
pip install python-dotenvThen, restructure the app/config.py file so that it looks like this:
import os
from dotenv import load_dotenv

load_dotenv()

SECRET_KEY = os.getenv('SECRET_KEY')
DEBUG = True
SQLALCHEMY_DATABASE_URI = os.getenv('DATABASE_URL')

# When deploying to Heroku
if SQLALCHEMY_DATABASE_URI.startswith("postgres://"):
    SQLALCHEMY_DATABASE_URI = SQLALCHEMY_DATABASE_URI.replace("postgres://", "postgresql://", 1)
Since Heroku no longer supports Postgres, the condition checks if the database URI starts with Postgres. If it does, it replaces it with PostgreSQL, which Heroku supports.
Next, let’s create a new Heroku app. We use the CLI to initialize Git, log in to Heroku, and create a new application.
Run the following commands in your CLI:
git init
heroku login
heroku create
This creates a Git remote called heroku, to which we push our application. To prevent some files from being tracked by Git, we need to update the .gitignore file as well.
Update app/.gitignore so that it contains the following code:
venv/
*.pyc
instance/
.env
__pycache__/
We’re almost at the end of the build. Before we deploy, let’s add our environment variable and secret key, and set up PostgreSQL for Heroku.
Run the following commands in your CLI:
heroku config:set SECRET_KEY=
heroku addons:create heroku-postgresql
Our final step is to add and commit our changes to Git by creating a new branch then pushing to the heroku remote.
Run the following commands in your CLI:
git add . && git ci -m “Deployment to Heroku”
git branch -M main
git push heroku main
heroku open
Now, we can finally run our application.
Run the heroku open command in your CLI.
The browser output should look like this:
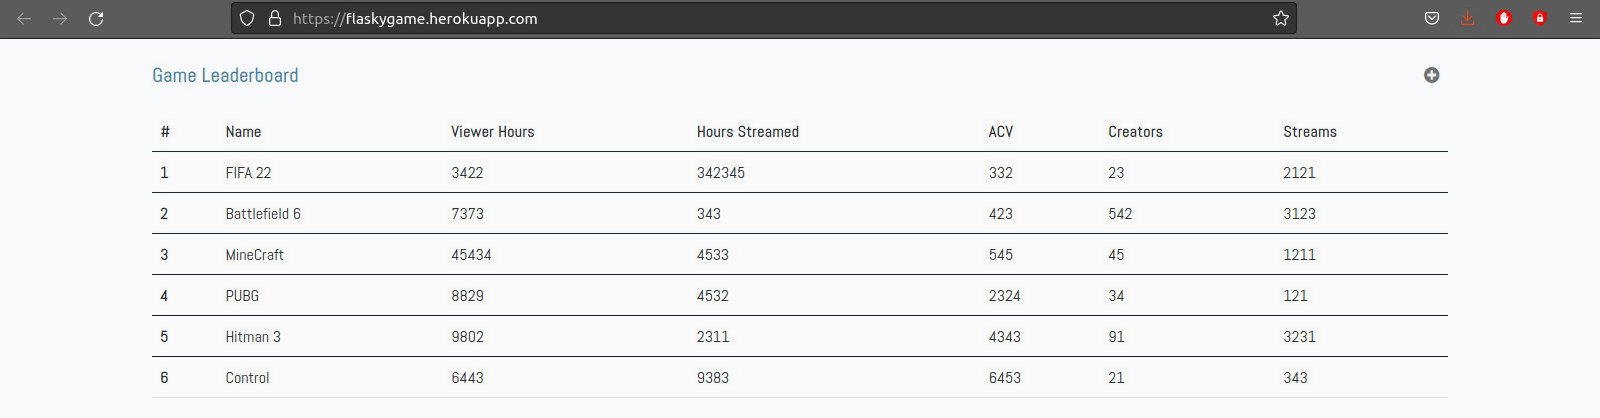
Our application is now live, and you can visit the link to add more entries.
Next Steps
In this hands-on article, we covered the process of building a simple Flask application from scratch and deploying it to Heroku. We used PostgreSQL for the database since it has better compatibility with the Heroku platform. We created a model, form, and views, using several Flask integrations and packages. We saw how these components interact to form the application by rendering it with Flask-WTF templates and then added some styling to the application to improve the user interface. Finally, we deployed it to Heroku, using the best practices to ensure it runs efficiently.
If you want to improve on the process we outlined here and move quickly through development, be sure to check Mattermost. The platform streamlines and automates workflows and keeps team communications efficient while ensuring everyone adheres to best practices. Learn more about the available solutions by visiting the Mattermost Blog, or jump right into a fully-featured 30-day experience.


