How to Set up a Jenkins CI/CD Pipeline for Your Golang App
Bringing the best software solutions to market as quickly as possible requires using automation to facilitate repetitive tasks (e.g., testing) so you can spend more time writing high-quality code. This is one of the main reasons why today’s top-performing dev teams build continuous integration (CI) and continuous delivery or continuous deployment (CD) pipelines, which enable them to ship new releases faster.
In this post, we’ll explore what you need to do to build a Jenkins CI/CD pipeline for your app. Before we get started, all of the examples in this guide are based on code found in this GitHub repository.
Now, let’s jump right in!
Set up Jenkins for Docker and Golang
Having a resilient Golang CI/CD pipeline helps to ensure that you can minimize your mean time to detect (MTTD) metrics since you won’t be sending failed builds to your actual customers (i.e., since they will remain on the last stable build). At the same time, you will also reduce mean time to resolve (MTTR), which ensures you can resolve issues as fast as possible and, thanks to continuous delivery and continuous deployment, ship new stable versions faster.
Thanks to automation, all of this requires minimum engineer interaction. In other words, you won’t need separate teams testing, building, and deploying your application. These practices of CI/CD have made the delivery process extremely efficient, saving countless engineering hours (which, as you know, are quite expensive).
Jenkins is a tool that we can use for setting up our CI/CD. It is written in Java and is completely open source. To get started, you first need to install Jenkins on your system. Head over to the official Jenkins page to do that.
Though simple Bash files can be used, many open source solutions use Makefile to automate basic tasks. At the most simple level, Makefiles define a list of commands under a name which can be run from the terminal using make <name>.
There are four main steps in CI/CD:
- Unit testing,
- Functional testing,
- Building the Docker image, and
- Pushing the Docker image to Dockerhub.
Here’s what the Makefile looks like:
run:
   go run main.go
unit-tests:
   go test ./...
functional-tests:
   go test ./functional_tests/transformer_test.go
build:
   docker build . -t shadowshotx/product-go-micro
You can use this script in the Jenkinsfile that you’ll set up. First, you need to configure some plugins and credentials in Jenkins. Let’s start with the credentials.
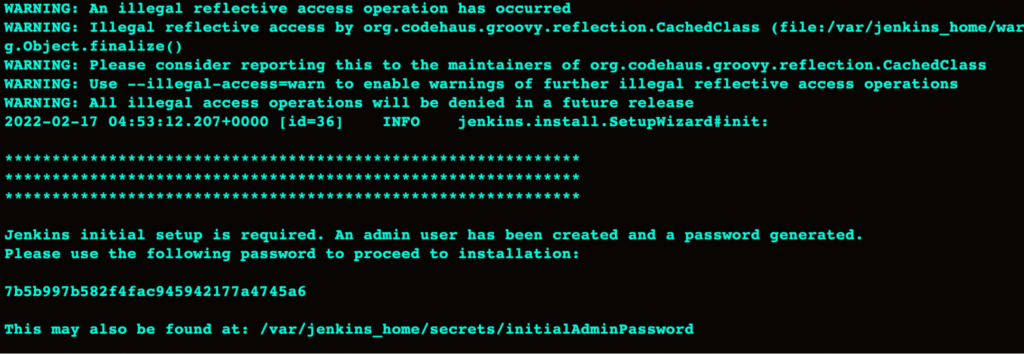
$ brew services start jenkins-ltsNext, you’ll be asked to set up a user. If you’re using Jenkins with Docker, you might have to look for the password in the logs.
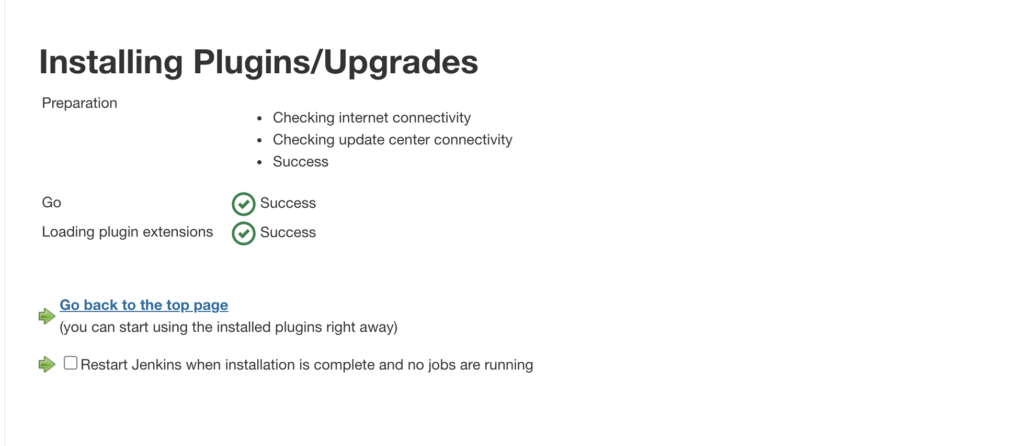
Now, it’s time to install the plugins. You can go forward with the plugins Jenkins suggests. After the plugins have been installed, you can use Jenkins to develop them further.

To continue, you’ll have to install some plugins from Manage Plugins. Go ahead and install Go, Docker, and the Docker plugin from the Available tab in Manage Plugins. Once that’s done, you’ll see a window like this:
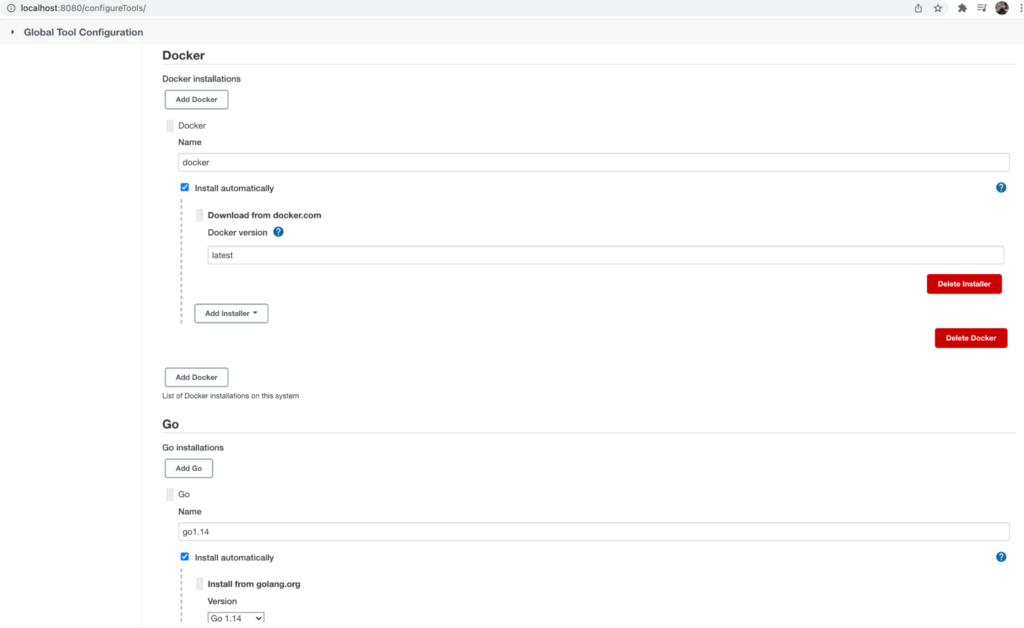
This lets the Jenkins node know that Docker and Golang are available inside the plugin. Next, you need to configure these plugins globally by going to Manage Jenkins -> Global Tool Configuration.
Set the configuration as shown in the image below. This will make Docker and Golang available to Jenkins nodes that will run CI/CD workflows.
Now, you can start building your Jenkins CI/CD pipeline. Go over to Dashboard and select New Item. When building an entire application on Jenkins, you can choose a freestyle project; the multibranch pipeline is used for a repository with multiple branches. Since we don’t need multiple branches, we’ll build a Pipeline for CI/CD.
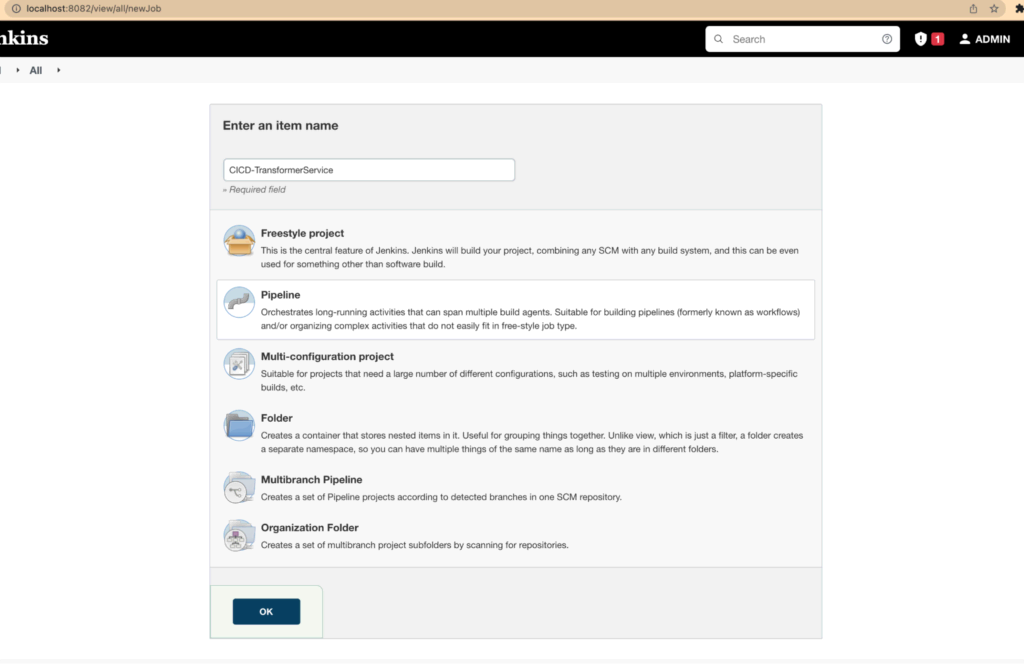
After selecting Pipeline, you’ll have to configure and add the GitHub repository that will be tracked by Jenkins. This can be done periodically, manually, or after GitHub events — like pull requests and commits. At this point, you’ll want to add the GitHub repository with the appropriate branch you want to track.
Finally, add credentials to be used by our code and Jenkins for GitHub and Dockerhub. Create these two credentials as shown below:
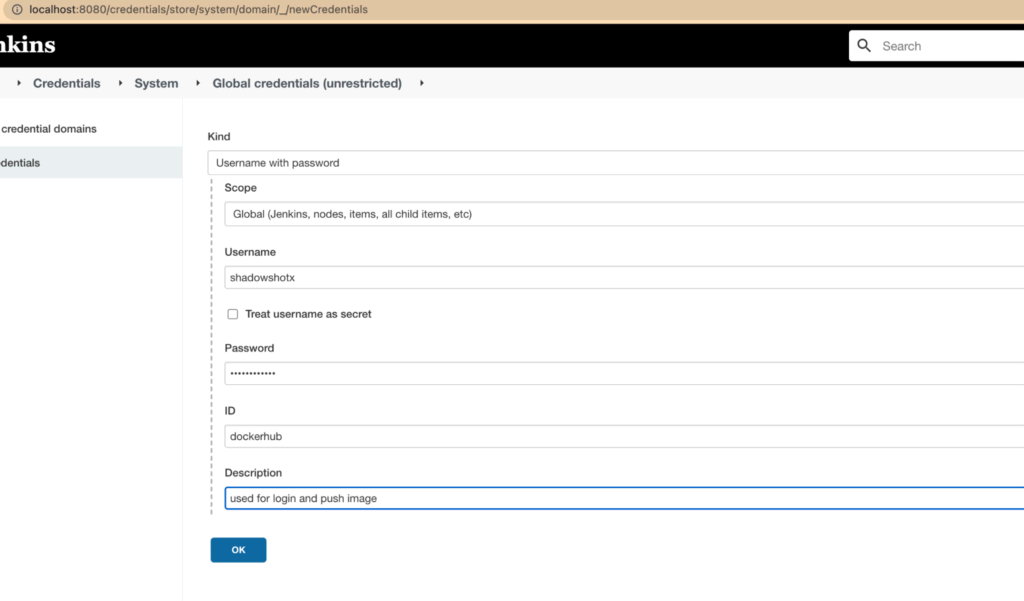
Congratulations on setting up your Jenkins server! This will automatically track the GitHub changes for your application.
Define Your CI/CD Steps
Jenkins includes a descriptive file, called a Jenkinsfile, that outlines what commands to run. When you specify the GitHub branch, Jenkins will automatically search for a Jenkinsfile there. When such a file is found, Jenkins will run the commands according to the file.
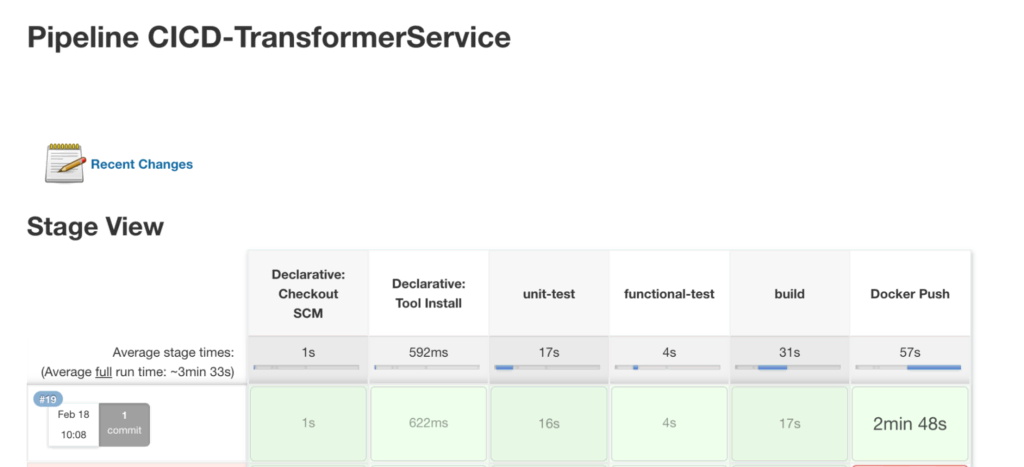
First, we’re setting up the Golang version for the Jenkins node. This is the same as we configured in the global column. Next, we specify the steps in stages:
- The unit test case where we run the command
make unit-test, which will refer to the Makefile. - The functional tests, after which we’ll build the Docker image.
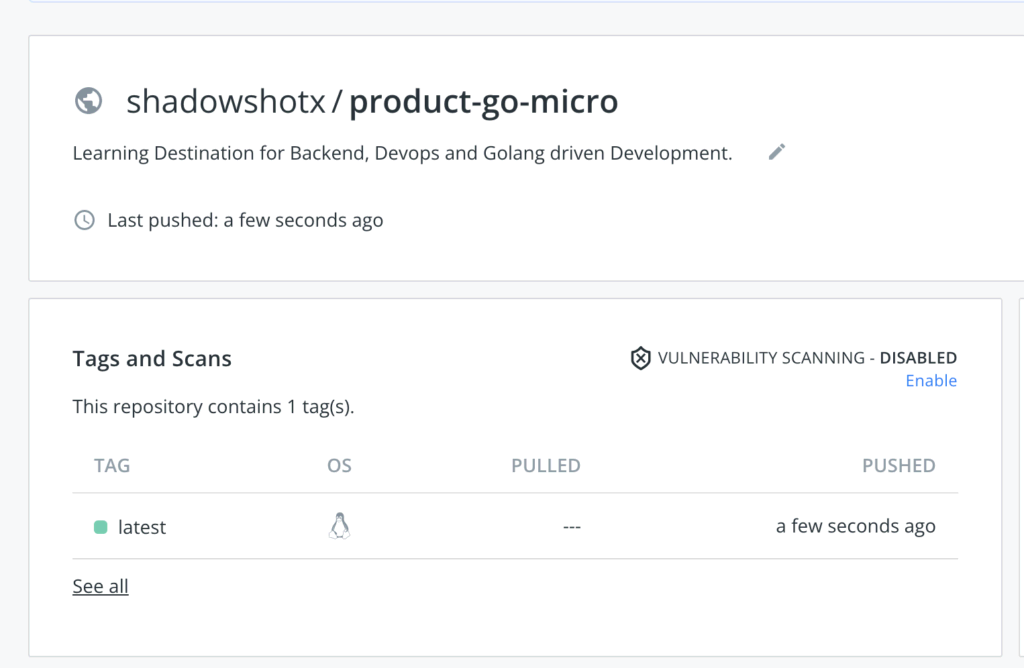
- Delivering the image by logging in and pushing the image using Dockerhub credentials.
pipeline {
    // install golang 1.14 on Jenkins node
    agent any
    tools {
        go 'go1.14'
    }
    environment {
        GO114MODULE = 'on'
        CGO_ENABLED = 0
        GOPATH = "${JENKINS_HOME}/jobs/${JOB_NAME}/builds/${BUILD_ID}"
    }
    stages {
        stage("unit-test") {
            steps {
                echo 'UNIT TEST EXECUTION STARTED'
                sh 'make unit-tests'
            }
        }
        stage("functional-test") {
            steps {
                echo 'FUNCTIONAL TEST EXECUTION STARTED'
                sh 'make functional-tests'
            }
        }
        stage("build") {
            steps {
                echo 'BUILD EXECUTION STARTED'
                sh 'go version'
                sh 'go get ./...'
                sh 'docker build . -t shadowshotx/product-go-micro'
            }
        }
        stage('deliver') {
            agent any
            steps {
                withCredentials([usernamePassword(credentialsId: 'dockerhub', passwordVariable: 'dockerhubPassword', usernameVariable: 'dockerhubUser')]) {
                sh "docker login -u ${env.dockerhubUser} -p ${env.dockerhubPassword}"
                sh 'docker push shadowshotx/product-go-micro'
                }
            }
        }
    }
}
Continuous Delivery vs. Continuous Deployment
Congratulations on building a CI/CD pipeline! Now, it’s time to continue your learning by making sure you understand the difference between delivery and deployment.
It’s a common practice in the industry to deploy the image manually in the production environment. When this happens directly, the process is called continuous deployment.
A very simple scenario where you can see CD in Kubernetes is by always using the image pull policy while setting up a Pod. Kubernetes tracks the tags of the Docker images they are using. So, as soon as the image is updated with the tracked tag, Kubernetes will pull the image and update the Pods. It’s as simple as setting this in YAML:
kind: Pod
apiVersion: v1

metadata:
  name: product-micro-go
  labels:
    app: product-micro-go
spec:
  containers:
  - name: product-micro-go
    image: shadowshotx/product-micro-go
    imagePullPolicy: Always
You set up the project on your local machine. Unfortunately, things work a bit differently in the cloud. Consider your machine as a simple node in the cloud when several nodes exist.
Recently, companies have started rolling out Kubernetes with CI/CD. The Jenkins instance you’ve set in your local machine has to be an actual Jenkins server in the cloud that will handle the pull requests. For a very large ecosystem, Jenkins is known to scale to a good extent. It has the capacity to run some jobs in parallel, and this can easily be configured. While designing a highly available system, it’s essential to make sure CI/CD is also available as this will be a hindrance in the development workflow.
Another great place to use CI/CD is when you’re building images for multiple operating systems. Due to different chip architecture, binary made on ARM processors (e.g., on a Mac) will not run on X86 processors (e.g., on an HP machine). As such, it’s essential to create Docker images separately for both of these.
Luckily, Jenkins provides an interface where you can build the image on a certain operating system and environment. So, during the continuous Integration phase, multiple Docker images can be built and finally delivered. This is yet another power of CI/CD.
All this said, Jenkins is not the only option for setting up your CI/CD pipeline. Open source solutions like Mattermost, for example, make use of CircleCI which has a very simple, declarative YAML format. TravisCI is also used in a lot of projects on the cloud. Over the years, companies have increasingly migrated privately built CI/CD automation tools to open source tools while paying close attention to security.
It’s Time to Continue Building
Thanks for reading! I hope you learned some helpful concepts about Golang, CI/CD, Jenkins, and testing, and I hope that you’ve learned a bit about the continuous deployment of Docker images with Kubernetes.
Ready to get started? Now it’s your turn to experiment with building multi-branch pipelines using these same concepts. All of the examples here are based on code found in this GitHub repository to help you kickstart your next project.
This blog post was created as part of the Mattermost Community Writing Program and is published under the CC BY-NC-SA 4.0 license. To learn more about the Mattermost Community Writing Program, check this out.


