
Mattermost plugins: The server side
The server side has hooks and an API for creating Mattermost plugins
(Originally published at controlaltdieliet.be)
In the first article in this series, we explained how to set up your developer environment to begin creating Mattermost plugins. In the second, we examined the structure of server-side and web app plugins and how to deploy them.
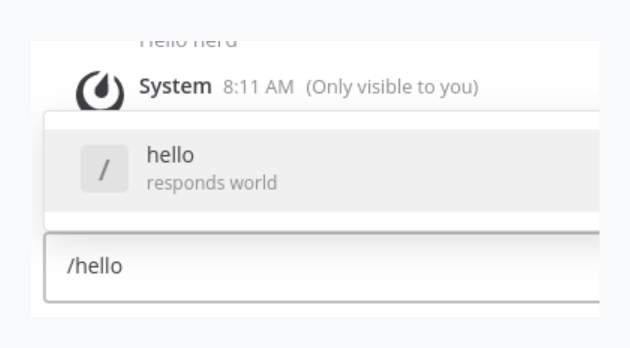
Now, it’s time to dive deeper into the server side of the application, which is written in Golang. At the end of this article, you will have a “hello world” plugin that has an associated slash command (/hello) that will welcome new users when they log into your server. You’ll also learn how to store and read configuration variables. Keep in mind that this is not a full tutorial on what server-side plugins can do. Rather, it’s a starting guide.
The server side lets your plugin react to events happening on the server or outside your server. You can let your plugin interact with the Plugin API, which is very similar to the REST API, which we introduced in a previous article. We gave an introduction on the REST API in a previous article.
I made a Git repository from the Mattermost Starter Template Plugin because it is minimalistic and is a good place to start. My repository contains a branch for each further step. While the Mattermost demo plugin gives a very nice overview, it can be overwhelming for someone starting out. Still, it’s a good reference. You should also take a look at the Welcome bot and the Todo bot to get a better idea of what you’re getting into.
Hooks are the first way your plugin interacts with the server. They listen to events and let you react to events. The second way your plugin interacts with the server is the API, which lets you do things on the Mattermost server (e.g., add a user to a channel, post a message, create a channel, and find a post).
An introduction to Go
Are you a developer who’s never written anything in Go but has experience with other languages? This section includes some of the things you need to know about Go based on my experience (you can also find a brief introduction here).
- Variables are declared with a variable name or like this:
variable_name:=value - Go code is structured in packages. All the files in a single directory form a package. To illustrate, let’s say you have a folder (
myfirstpackage) with two files (a.goandb.go). If you write a function calledwhattheheckin thea.gofile, you can call this function in your fileb.gowithout any import. - Speaking about functions, here’s how you define one:
func mycoolfunctionname (an_integer int, and_a_strings str) str {}- The type of a variable is specified after the variable name.
- A function can return multiple variables.
- Go doesn’t know classes. Methods are just functions but have a special receiver argument between the
funcand the method name. You can only declare a method with a receiver whose type is defined in the same package as the method.func (a_variable a_type) mycoolfunctionname (an_integer int, and_a_strings str) {}
- The above example uses
a_variableas a value but the originala_variablewill not be changed.
This must be the shortest introduction to Go ever written.
Clone my code into your environment
Go to your mmplugins folder and give the following command: git clone. You have now a folder mattermost-plugin-starter with my code in it.
cd mmplugins
git clone https://github.com/ctlaltdieliet/mattermost-plugin-starter.git
Modify your configuration file
Now, it’s time to modify out plugin.json file as described in the previous article.
The ID has to be unique as it will be used as the identifier in Mattermost for your plugin. Need some help? Your inverted FQDN combined with your username and a plugin name will be quite unique.
In the repository, this is branch server_step1. Use git checkout origin/server_step1 to see the code:
{
          "id": "be.controlaltdieliet.demoortom.first_mattermost_plugin",
          "name": "My First Plugin",
          "description": "This plugin is a first test.",
          "version": "0.1.0",
          "min_server_version": "5.2.0",
          "server": {
              "executables": {
                  "linux-amd64": "server/dist/plugin-linux-amd64",
                  "darwin-amd64": "server/dist/plugin-darwin-amd64",
                  "windows-amd64": "server/dist/plugin-windows-amd64.exe"
              }
          }
          "settings_schema": {
            "header": "Configure your demo plugin settings below.",
            "footer": "Footer: The code for this demo plugin can be found [here](https://github.com/mattermost/mattermost-plugin-demo).",
            "settings": [
                {
                    "key": "defaultgreeting",
                    "display_name": "The default answer:",
                    "type": "text",
                    "help_text": "The default greeting if no name is available",
                    "placeholder": "Hi there",
                    "default": "Hi there"
                }
            ]
        }
      }
Add a slash command
Now, it’s time to add a slash command to Mattermost through your plugin. For this example, we will add all of our code to the plugin.go file. Later on, we’ll move some code to a new file called commands.go.
Adding a slash command requires you to follow a two-step process. First, you have to register your command. Second, you have to add functionality to your slash command, which you can do via ExecuteCommand.
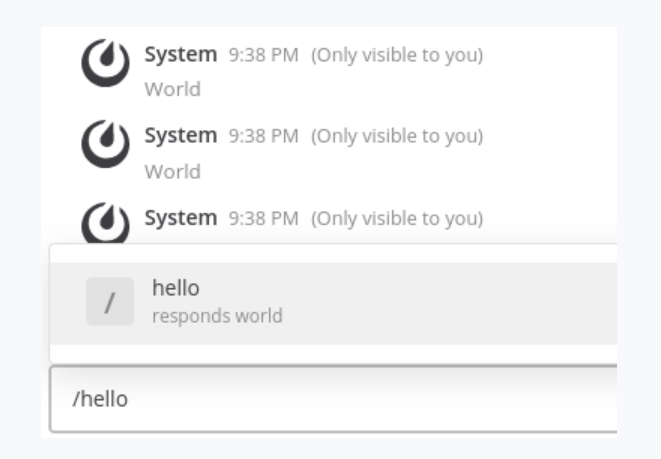
The function OnActivate() is executed when a plugin gets enabled. It’s a good place to register your slash command. If the function OnActivate() returns an error, your plugin will not be enabled. When you register the command, you can add autocomplete functionality to improve the user experience. The function ExcecuteCommand that we use to add functionality to our slash command is actually a hook that is called when a slash command is executed. You can find the slash command in the args.Command parameter of the function.
In the repository this is branch server_step2. Use git checkout server_step2 to see the code:
package main

import (
	"fmt"
	"strings"
	"sync"

	"github.com/mattermost/mattermost-server/v5/model"
	"github.com/mattermost/mattermost-server/v5/plugin"
	"github.com/pkg/errors"
)

// Plugin implements the interface expected by the Mattermost server to communicate between the server and plugin processes.
type Plugin struct {
	plugin.MattermostPlugin

	// configurationLock synchronizes access to the configuration.
	configurationLock sync.RWMutex

	// configuration is the active plugin configuration. Consult getConfiguration and
	// setConfiguration for usage.
	configuration *configuration
}

// registering a slash command /hello
func (p *Plugin) OnActivate() error {

	if err := p.API.RegisterCommand(&model.Command{
		Trigger:          "hello",
		AutoComplete:     true,
		AutoCompleteDesc: "responds world",
	}); err != nil {
		return errors.Wrapf(err, "failed to register  command")
	}
	return nil

}

// adding functionality to to slash command
func (p *Plugin) ExecuteCommand(c *plugin.Context, args *model.CommandArgs) (*model.CommandResponse, *model.AppError) {

	// reading the slash command that the user entered
	trigger := strings.TrimPrefix(strings.Fields(args.Command)[0], "/")
	switch trigger {
	case "hello":
		return &model.CommandResponse{
			ResponseType: model.COMMAND_RESPONSE_TYPE_EPHEMERAL,
			Text:         fmt.Sprintf("World"),
		}, nil

	default:
		return &model.CommandResponse{
			ResponseType: model.COMMAND_RESPONSE_TYPE_EPHEMERAL,
			Text:         fmt.Sprintf("Unknown__ command: " + args.Command),
		}, nil
	}
}
Build, upload, and enable your plugin
Now, let’s upload your plugin and also enable it through mmctl. I stay in the root folder of the plugin and execute the following commands. (I use this code a lot for testing, so my first lines actually delete the previous versions.)
  ../mattermost-server/bin/mmctl plugin delete be.controlaltdieliet.demoortom.first_mattermost_plugin
  make dist
  ../mattermost-server/bin/mmctl plugin add ./dist/be.controlaltdieliet.demoortom.first_mattermost_plugin-0.1.0.tar.gz
../mattermost-server/bin/mmctl plugin enable be.controlaltdieliet.demoortom.first_mattermost_plugin 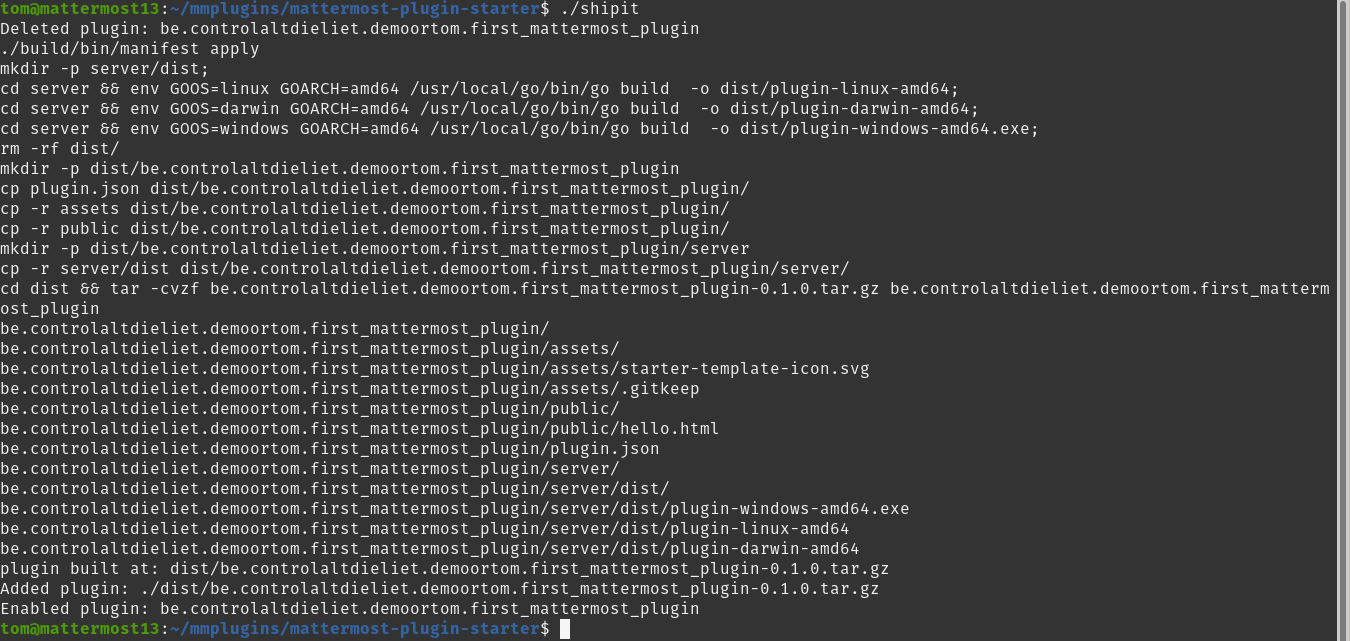
Bring structure to your code
Putting everything in the plugin.go file is not a good practice. It’s better to move to your functions to a file named commands.go.
Get personal
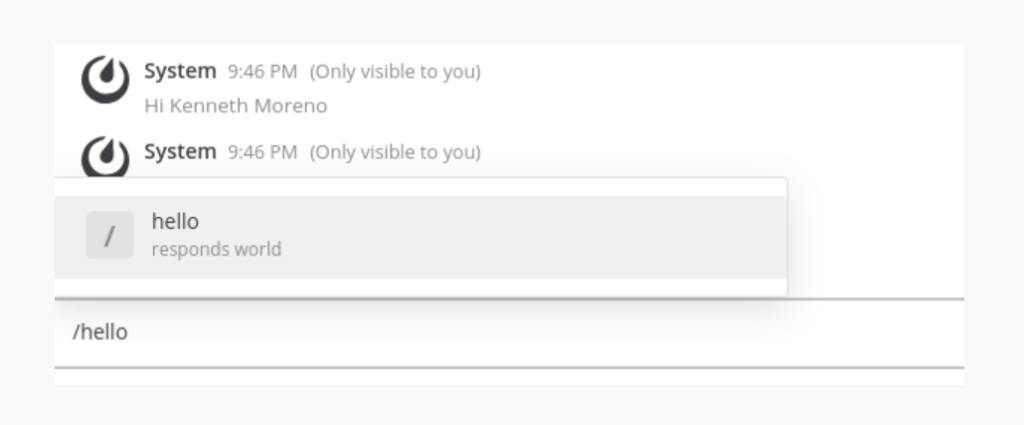
Instead of responding with simple text, let’s upgrade the plugin to make it more personal. This command sends the user ID from the user who gave the command. We use the plugin API to retrieve the username and respond with it. You can see this in the branch server_step3. Use git checkout origin/server_step3 to see the code:
func (p *Plugin) ExecuteCommand(c *plugin.Context, args *model.CommandArgs) (*model.CommandResponse, *model.AppError) {
	trigger := strings.TrimPrefix(strings.Fields(args.Command)[0], "/")
	username := ""
	switch trigger {
	case "hello":
		UserId := args.UserId

		user, appErr := p.API.GetUser(UserId)
		if appErr != nil {
			username = "there"
		} else {
			username = user.GetFullName()
		}

		//fmt.Sprintf(Apperr.Message)
		return &model.CommandResponse{
			ResponseType: model.COMMAND_RESPONSE_TYPE_EPHEMERAL,
			Text:         fmt.Sprintf("Hi " + username),
		}, nil

	default:
		return &model.CommandResponse{
			ResponseType: model.COMMAND_RESPONSE_TYPE_EPHEMERAL,
			Text:         fmt.Sprintf("Unknown__ command: " + args.Command),
		}, nil
	}
} 
Put and retrieve a variable in the configuration
Let’s add some variables in the configuration file configuration.go. You can see this in the branch server_step4. Use git checkout origin/server_step4 to see the code.
In the variable configuration, you add the variables and define two default variables beneath it. These will be used when there is no value set.
   type configuration struct {
        // The name for the command that we will create.
        Commandname string

        // The username that will respond.
        Username string
      }

      const DefaultCommandName = "hello"
      const DefaultUsername = "there"


      func (c *configuration) getCommandName() string {
        if len(c.Commandname) > 0 {
          return c.Commandname
        }
        return DefaultCommandName
      }

      func (c *configuration) getUsername() string {
        if len(c.Commandname) > 0 {
          return c.Username
        }
        return DefaultUsername
      }
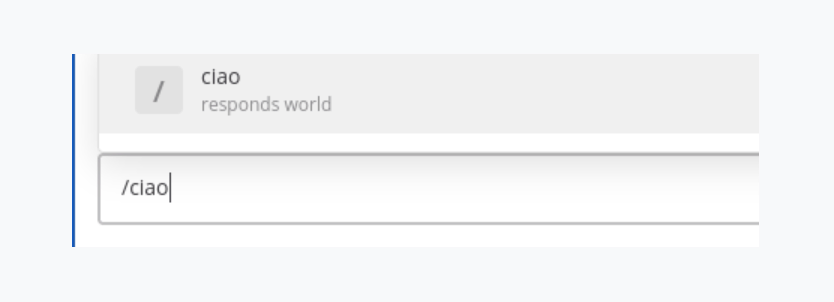
Now, you just have to read the variables from the configuration. You can check your code by changing the defaultCommandName to “ciao.” Once you’ll do that, you’ll have a /ciao command now. If the user didn’t set their firstname and lastname, you can define what to answer.
func (p *Plugin) registerCommands() error {
          commandName := p.getConfiguration().getCommandName()

          if err := p.API.RegisterCommand(&model.Command{
            Trigger:          commandName,
            AutoComplete:     true,
            AutoCompleteDesc: "responds world",
          }); err != nil {
            return errors.Wrapf(err, "failed to register  command")
          }

          return nil
        }

        func (p *Plugin) ExecuteCommand(c *plugin.Context, args *model.CommandArgs) (*model.CommandResponse, *model.AppError) {
          trigger := strings.TrimPrefix(strings.Fields(args.Command)[0], "/")
          commandName := p.getConfiguration().getCommandName()
          username := ""
          UserId := args.UserId
          user, appErr := p.API.GetUser(UserId)
          if appErr == nil {
            username = user.GetFullName()
          }
          if username == "" {
            username = p.getConfiguration().getUsername()

          }

          switch trigger {
          case commandName:
            return &model.CommandResponse{
              ResponseType: model.COMMAND_RESPONSE_TYPE_EPHEMERAL,
              Text:         fmt.Sprintf("Hello " + username),
            }, nil

          default:
            return &model.CommandResponse{
              ResponseType: model.COMMAND_RESPONSE_TYPE_EPHEMERAL,
              Text:         fmt.Sprintf("Unknown command: " + args.Command),
            }, nil
          }
        }
Modify your configuration variable through the slash command
If you want to change a configuration, you can write a function to change your variable. If you want to change the word that your plugin responds, you can add a variable to your slash command. This variable will overwrite the variable in your configuration (your variable will be lost when the plugin is restarted).
In the repository, this is branch server_step5. Use git checkout origin/server_step5 to see the code.
func (c *configuration) setUsername(newUsername string) {
	c.Username = newUsername
}
newname := ""
if len(strings.Fields(args.Command)) > 1 && newname == "" {
newname = strings.Fields(args.Command)[1]
p.getConfiguration().setUsername(newname)
}
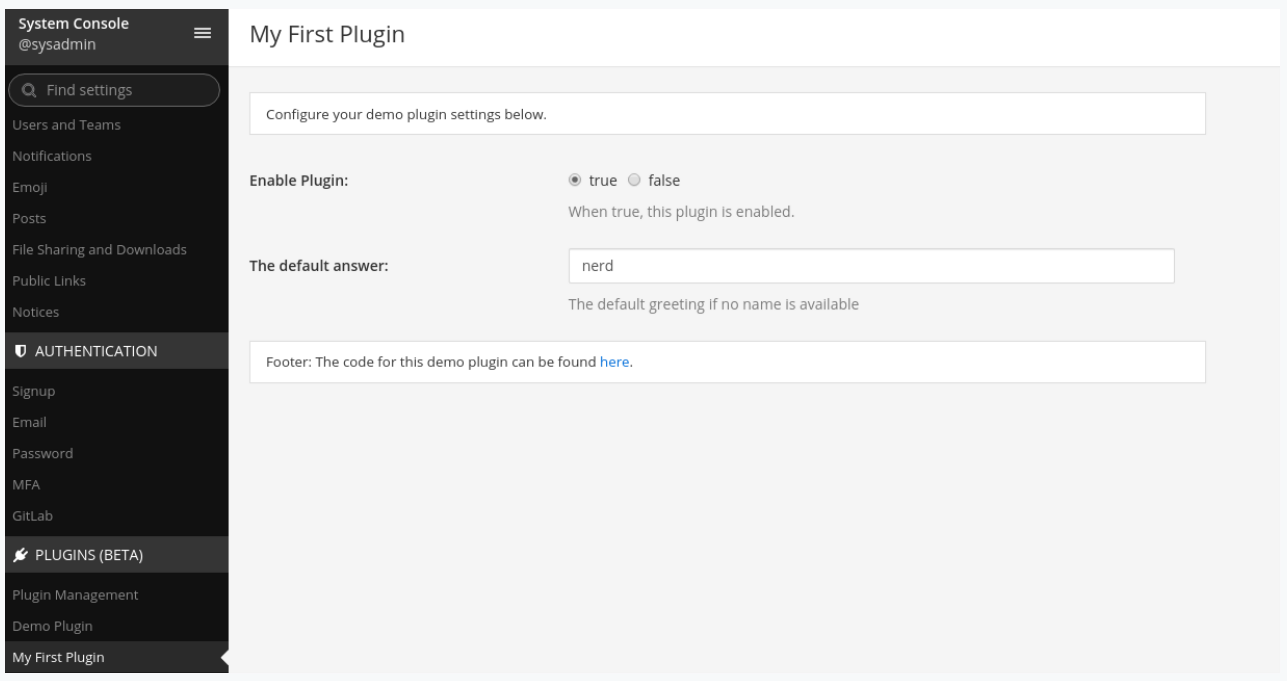
Modify your configuration variable through the plugins settings in the system console
Another way to do this is using the settings that you created in the settings_schema section of your plugin.json file. You can find the settings page in the System Console. The variable will be stored and available even after restarting the plugin because it’s defined in the plugin.json file in the main folder of the plugin.
In the repository, this is branch server_step6. Use git checkout origin/server_step6 to see the code.
type configuration struct {
// The name for the command that we will create.
Commandname string
// The username that will respond.
Username string
DefaultGreeting string
} c.Usernametype configuration struct {
// The name for the command that we will create.
Commandname string
// The username that will respond.
Username string
DefaultGreeting string
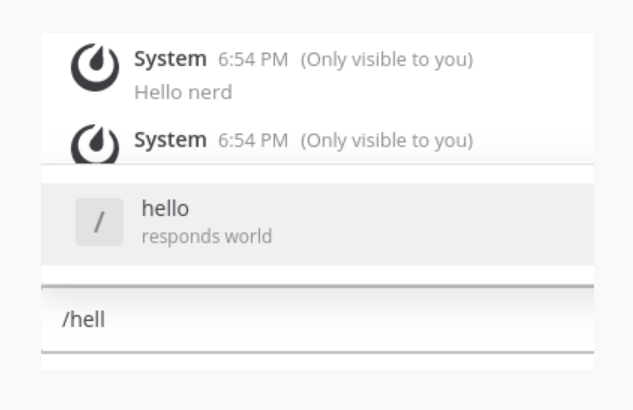
}In the commands.go file, you can easily get the variable through p.getConfiguration().DefaultGreeting:
if appErr == nil {
username = p.getConfiguration().DefaultGreeting
}
I recommend that you try to change the variable in the System Console and try the /hello command again.
Success!
Congratulations, you successfully finished this part! Now, you should be able to start building your own server-side plugins. For more information, check out the docs and this reference.
Stay tuned: Up next, we’ll take a look at how to create web app plugins.
Until then, you might be interested in checking out my previous series on Mattermost integrations: