User Authentication with the Django Rest Framework and Angular: Setting Up Your Angular Frontend
In the first part of this tutorial, we examined how to set up our Django Rest Framework back-end to build a user authentication system for a web application. In this installment, we examine how to set up our Angular frontend.
Setting up your Angular project
The entire code for the Angular portion of this tutorial can be found in this repository.
To can create a new Angular project and start building the frontend of our application, you can use npx to generate a new Angular project via the Angular CLI alongside the backend Django project and its virtual environment in the django-angular-pwa folder that you created at the beginning of this tutorial. Run this command from inside that folder:
$ npx @angular/cli ng new django-angular-auth-webAnswer ‘yes’ to the ‘Would you like to add Angular routing?’ prompt, and select CSS stylesheets. Now if you open the freshly created django-angular-auth-web directory in your IDE or text editor, you should see all of the necessary project files for bootstrapping a new Angular project.
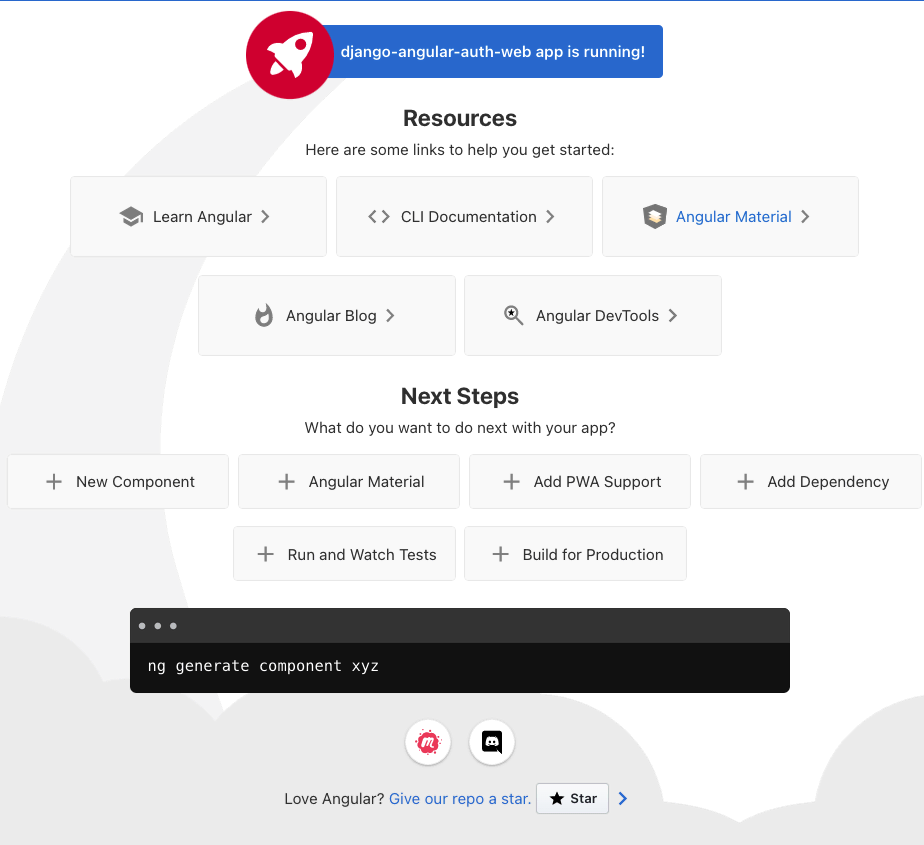
Run npx @angular/cli serve --open, and your app will open automatically in a browser window at https://localhost:4200/ to show the Angular startup screen.
Next, we’ll install the Angular Material UI component library. From inside your Angular project folder, run the following command to install Angular Material locally in your project:
$ npx @angular/cli add @angular/materialSelect a prebuilt theme of your choice and answer ‘yes’ to the prompts for adding global typography styles and browser animations. The Angular Material NPM package will be installed to your project’s node_modules folder and the necessary code updates will be made automatically to your source files to integrate the package into your Angular project.
Let’s add a main toolbar to our app by importing the `MatToolbar` module and adding it the imports annotation of the AppModule class in our project’s django-angular-auth-web/src/app/app.module.ts file:
…
import { MatToolbarModule } from "@angular/material/toolbar";

@NgModule({
  declarations: [
    AppComponent
  ],
  imports: [
    BrowserModule,
    AppRoutingModule,
    BrowserAnimationsModule,
    MatToolbarModule,
  ],
  providers: [],
  bootstrap: [AppComponent]
})
export class AppModule { }
Replace the entire file of boilerplate code for the Angular startup screen in django-angular-auth-web/src/app/app.component.html with the following:
<span>Django Angular Auth</span>
Restart your local Angular dev server in order to pick up the changes made when installing Angular Material. Now, you should see the Angular Material default toolbar at the top of the screen displaying the name of your app.

Implementing user login
Let’s create a routable user-login component for logging in our users, as well as an auth service to facilitate communication with our API backend. This can be done by running the following two commands from the root of your Angular project:
$ npx @angular/cli generate component user-login
$ npx @angular/cli generate service auth
This will create a new folder at django-angular-auth-web/src/app/user-login/ with the Angular component files for your ‘user-login’ component, as well as an auth.service.ts file and auth.service.spec.ts file in the django-angular-auth-web/src/app folder.
Open django-angular-auth-web/src/app/app-routing.module.ts and add the following lines of code, replacing the empty Routes list:
import { UserLoginComponent } from "./user-login/user-login.component";

const routes: Routes = [
  { path: 'login', component: UserLoginComponent },
];
Now if you navigate to https://localhost:4200/login in your browser, you should see the message ‘user-login works!’ beneath your app’s main toolbar.
Next, we’ll add a form for the user to enter their login credentials and call the ‘api-user-login/’ endpoint of our backend API to receive the user’s token. In Angular applications, HTTP requests are generally made from services and so we will place the call to the login endpoint in our auth.service.ts file. But first, let’s provide some extra validation and type checking for our user data by defining a UserCredentials and a LoggedInUser model in a new file at django-angular-auth-web/src/app/auth.ts:
export interface UserCredentials {
username: string,
password: string
}
export interface LoggedInUser {
id: number,
token: string,
username: string
}
Then open django-angular-auth-web/src/app/auth.service.ts and replace the contents with the following code:
import { Injectable } from '@angular/core';
import { HttpClient } from "@angular/common/http";
import { Observable } from "rxjs";
import { LoggedInUser } from "./auth";

@Injectable({
  providedIn: 'root'
})
export class AuthService {

  constructor(private http: HttpClient) { }

   logIn(username: string, password: string): Observable {
     return this.http.post(
       'https://127.0.0.1:8000/api-user-login/', { username, password }
       ) as Observable;
   }
}
Here, we use Angular’s HttpClient to POST the user’s login credentials to the api-user-login endpoint of our backend API and return an RxJS Observable with the logged-in user’s token, id and username. Add the HttpClient module to django-angular-auth/django-angular-auth-web/src/app/app.module.ts along with the ReactiveFormModule, MatInputModule and MatButtonModule modules, which we’ll use to build our user login form.
…
import { ReactiveFormsModule } from "@angular/forms";
import { HttpClientModule } from "@angular/common/http";
import { MatInputModule } from "@angular/material/input";
import { MatButtonModule } from "@angular/material/button";

@NgModule({
  declarations: [
    AppComponent,
    UserLoginComponent
  ],
  imports: [
    BrowserModule,
    AppRoutingModule,
    BrowserAnimationsModule,
    ReactiveFormsModule,
    HttpClientModule,
    MatToolbarModule,
    MatInputModule,
    MatButtonModule,
  ],
  providers: [],
  bootstrap: [AppComponent]
})
export class AppModule { }
Open django-angular-auth-web/src/app/user-login/user-login.component.ts and replace the contents with the following code:
import { Component, OnInit } from '@angular/core';
import { FormBuilder, Validators } from "@angular/forms";
import { AuthService } from "../auth.service";
import { UserCredentials } from "../auth";

@Component({
  selector: 'app-user-login',
  templateUrl: './user-login.component.html',
  styleUrls: ['./user-login.component.css']
})
export class UserLoginComponent implements OnInit {
  logInForm;
  constructor(private formBuilder: FormBuilder, private authService: AuthService) {
   this.logInForm = this.formBuilder.group({
     username: ['', Validators.required],
     password: ['', Validators.required]
   });
  }

  ngOnInit(): void {
  }

  logInUser(user: UserCredentials): void {
   this.authService.logIn(user.username, user.password).subscribe({
     next: (data) => {
       console.log(data);
     },
     error: (error) => {
       console.log(error);
     }
   }
   );
  }

  onSubmit(formData: UserCredentials): void {
    if (this.logInForm.invalid) {
      console.log(this.logInForm.errors);
    } else {
      this.logInUser(formData);
    }
  }
}
Next, open django-angular-auth-web/src/app/login/login.component.html and replace the contents of that file with this code:
<div class="login-form-container">
  <h2>Log in</h2>

    <p>

        User name


    </p>
    <p>

        Password


    </p>
    <p>
      <button type="submit">LOG IN</button>
    </p>

 </div>
Finally, add the following style rule to django-angular-auth-web/src/app/user-login/user-login.component.css to add a little space to the form:
.login-form-container {
   margin-left: 12px;
 }
Now, if you navigate to https://localhost:4200/login, you’ll see a nicely styled form displayed for entering user credentials:
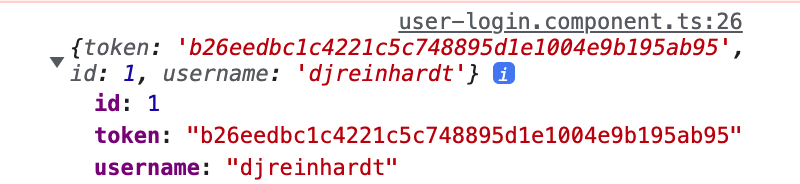
Enter the credentials for the Django superuser you created and make sure your localhost Django dev server is running on port 8000. Now when you submit the form, you should see something like the following results logged to your browser’s JavaScript console:
Great! The next step is to store the token in your browser’s Local Storage so that we can use it to authenticate requests to our API. Add the following method to the UsersService class that we defined in django-angular-auth-web/src/app/auth.service.ts:
  setLoggedInUser(userData: LoggedInUser): void {
    if (localStorage.getItem('userData') !== JSON.stringify(userData)) {
      localStorage.setItem('userData', JSON.stringify(userData));
    }
   }
```

Next, replace the `console.log(data)` statement in the `LoginComponent.logInUser` method with a call to the `AuthService.setLoggedInUser` method:

```
  logInUser(user: UserCredentials): void {
   this.authService.logIn(user.username, user.password).subscribe({
     next: (data) => {
       this.authService.setLoggedInUser(data);
     },
     error: (error) => {
       console.log(error);
     }
   }
   );
  }
Now if you refresh the login page and enter your credentials again, you can confirm that your LoggedInUser data is stored in the browser’s Local Storage by opening the Application tab of Chrome’s Developer Tools panel:
Creating a user profile page for logged-in users
After saving our user’s token in Local Storage, we want to redirect the logged in user to their user profile page. Let’s create a new ‘user-profile’ component and service by running the following:
$ npx @angular/cli generate component user-profile
$ npx @angular/cli generate service user-profile
Add a new dynamic route to django-angular-auth-web/src/app/app-routing.module.ts:
…
import { UserProfileComponent } from "./user-profile/user-profile.component";

const routes: Routes = [
  { path: 'login', component: UserLoginComponent },
  { path: 'user-profile/:id', component: UserProfileComponent },
];
Then add import { Router } from "@angular/router"; to the list of imports at the top of your django-angular-auth-web/src/app/user-login/user-login.component.ts and edit UserLoginComponent like this, creating a private router dependency injection in the constructor() method and adding a call to this.router.navigateByUrl() after the call to this.authService.setLoggedInUser() in the logInUser() method:
…
import { Router } from "@angular/router";
…
export class UserLoginComponent implements OnInit {
  logInForm;
  constructor(private formBuilder: FormBuilder, private authService: AuthService, private router: Router) {
   this.logInForm = this.formBuilder.group({
     username: ['', Validators.required],
     password: ['', Validators.required]
   });
  }
…
  logInUser(user: UserCredentials): void {
   this.authService.logIn(user.username, user.password).subscribe({
     next: (data) => {
       this.authService.setLoggedInUser(data);
       this.router.navigateByUrl(`/user-profile/${data.id}`);
     },
     error: (error) => {
       console.log(error);
     }
   }
   );
  }
Now when you submit your user credentials, you should see the ‘user-profile works!’ message from the stubbed-out component HTML template file.
Open your django-angular-auth-web/src/app/user-profile.service.ts file, and replace its contents with the following code to query your backend API for the user profile data:
import { Injectable } from '@angular/core';
import { Observable } from "rxjs";
import { HttpClient } from "@angular/common/http";

@Injectable({
  providedIn: 'root'
})
export class UserProfileService {

  constructor(private http: HttpClient) { }

  getUserProfile(userId: string|null): Observable {
    return this.http.get(`https://127.0.0.1:8000/api/v1/users/${userId}/`);
  }
}
Create a new file at django-angular-auth-web/src/app/user-profile.ts and add the following TypeScript interface definition:
export interface UserProfile {
  id: string,
  username: string,
  first_name: string,
  last_name: string,
  bio: string,
  profile_pic: string
}
Then, edit the contents of django-angular-auth-web/src/app/user-profile/user-profile.component.ts to look like this:
import { Component, OnInit } from '@angular/core';
import { ActivatedRoute } from "@angular/router";
import { UserProfileService } from "../user-profile.service";
import { UserProfile } from "../user-profile";

@Component({
  selector: 'app-user-profile',
  templateUrl: './user-profile.component.html',
  styleUrls: ['./user-profile.component.css']
})
export class UserProfileComponent implements OnInit {
  userProfile: UserProfile|null = null;

  constructor(private userProfileService: UserProfileService, private activatedRoute: ActivatedRoute) { }

  ngOnInit(): void {
    const userId = this.activatedRoute.snapshot.paramMap.get('id');
    this.userProfileService.getUserProfile(userId).subscribe({
        next: (data) => {
          console.log(data);
          this.userProfile = data;
        },
        error: (error) => {
          console.log(error);
        }
      }
    );
  }
}
Now when you enter your login credentials, you should see a 403 error response in your Developer Tools console:
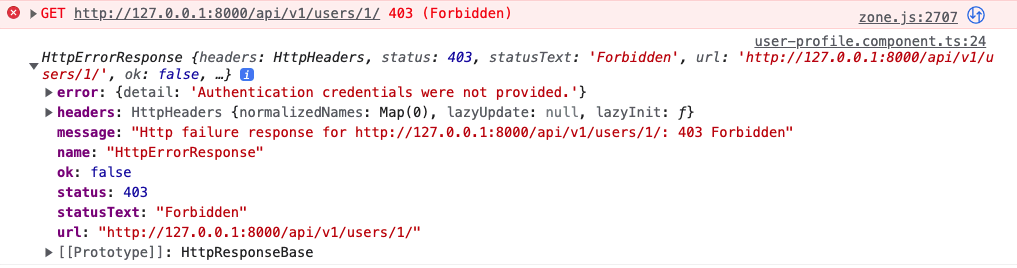
That’s because we set the token value in Local Storage but we didn’t pass the token in the header of our HTTP request. Thankfully, Angular provides a handy tool called an interceptor that gets called before or after every HTTP request. Run npx @angular/cli generate interceptor token and edit the code in django-angular-auth-web/src/app/token.interceptor.ts to look like this:
import { Injectable } from '@angular/core';
import {
 HttpRequest,
 HttpHandler,
 HttpEvent,
 HttpInterceptor
} from '@angular/common/http';
import { Observable } from 'rxjs';

@Injectable()
export class TokenInterceptor implements HttpInterceptor {

 constructor() {}

 intercept(request: HttpRequest, next: HttpHandler): Observable<HttpEvent> {
   const userData = JSON.parse(localStorage.getItem('userData') || '{}');
   if (userData.token) {
     request = request.clone({
       setHeaders: {
           Authorization: `Token ${userData.token}`
       }
     });
   }
   return next.handle(request);
 }
}
This code checks to see if the user’s token is stored in their browser’s Local Storage, indicating that they have successfully authenticated with the server, and then includes the token in the ‘Authorization’ header of the HTTP request. We must then register the interceptor with our application by updating the providers annotation from the @NgModule decorator on the AppModule class with the following code in django-angular-auth-web/src/app/app.module.ts and add necessary imports to the top of the file:
…
import { HTTP_INTERCEPTORS, HttpClientModule } from "@angular/common/http";
import { TokenInterceptor } from "./token.interceptor";

@NgModule({
…
  providers: [
     { provide: HTTP_INTERCEPTORS, useClass: TokenInterceptor, multi: true },
   ],
  bootstrap: [AppComponent]
})
export class AppModule { }
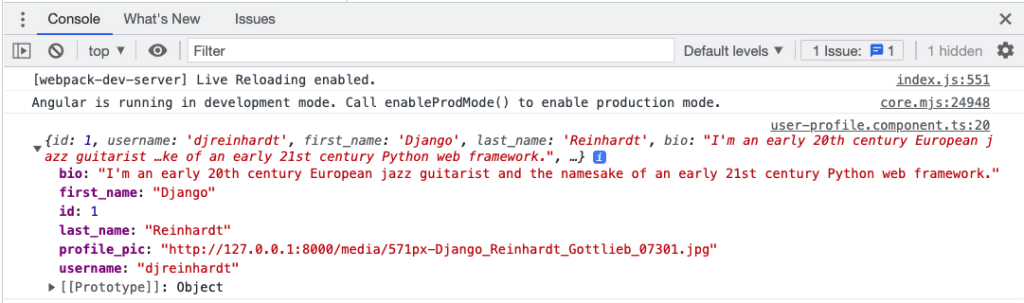
Now when you enter your login credentials, you should see your own user data logged to the console:
Nice! Just as we added permissions for authenticated users to our backend API, we should also limit our frontend user profile route to only be accessible by authenticated users of our app. We can do this by creating an Angular guard for the route with this command and selecting ‘Can Activate’ at the prompt:
$ npx @angular/cli generate guard authThis will create a new django-angular-auth-web/src/app/auth.guard.ts file. Open that file and edit it to look like this:
import { Injectable } from '@angular/core';
import { ActivatedRouteSnapshot, CanActivate, Router, RouterStateSnapshot, UrlTree } from '@angular/router';
import { Observable } from 'rxjs';

@Injectable({
 providedIn: 'root'
})
export class AuthGuard implements CanActivate {
  constructor(private router: Router) {}

  canActivate(
    route: ActivatedRouteSnapshot,
    state: RouterStateSnapshot): Observable | Promise | boolean | UrlTree {
    if (localStorage.getItem('userData')) {
      return true;
    }
    this.router.navigateByUrl('/login');
    return false;
  }
}
Here we add a constructor method to include the Angular Router class as a dependency injection, and we only return true from our canActivate method if we confirm that the user is logged in by checking for a token in their browser’s Local Storage. If there’s no token, we redirect the user back to the login page.
Open django-angular-auth-web/src/app/app-routing.module.ts and add the AuthGuard to your user profile route:
…
import { AuthGuard } from "./auth.guard";

const routes: Routes = [
  { path: 'login', component: UserLoginComponent },
  { path: 'user-profile/:id', component: UserProfileComponent, canActivate: [AuthGuard] },
];
…
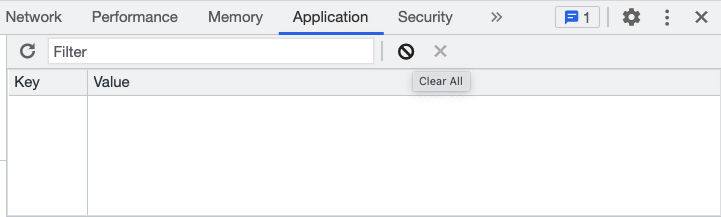
Since we haven’t added the ability to log out yet through the UI, you can log out your user by clearing your browser’s Local Storage. Select the Application tab of Chrome Developer Tools and click the icon at the top of the Local Storage panel to ‘Clear All’.
Now if you refresh the user profile page, you’ll be redirected back to the login screen. Go ahead and log back in with your user credentials, and you’ll once again be allowed to access your user profile page after the automatic redirect.
The last thing we need to do to finish our login flow on the frontend is to code the actual HTML template code. Add MatCardModule, which we’ll use for displaying our user profile data in our UI to your django-angular-auth-web/src/app/app.module.ts file:
Next, replace the code in django-angular-auth-web/src/app/user-profile/user-profile.component.html with the following:
<div>
 <h1 class="profile-heading">User profile</h1>


     {{ userProfile.first_name }} {{ userProfile.last_name }}
     {{ userProfile.username }}

  <img src="{{ userProfile.profile_pic }}" alt="Profile photo">

     <p>
       {{ userProfile.bio }}
     </p>


 </div>
Also, add the following CSS rules in django-angular-auth-web/src/app/user-profile/user-profile.component.css:
.profile-heading {
   margin: 20px;
 }

 .profile-card {
   max-width: 400px;
   margin: 20px;
 }
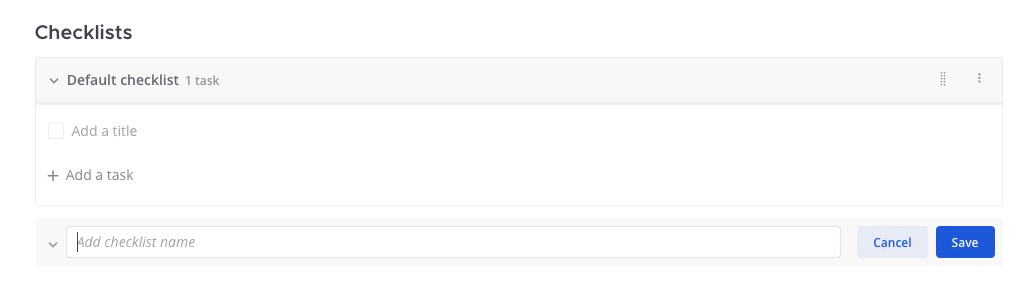
Now when you refresh your user profile page, you should see something like this:
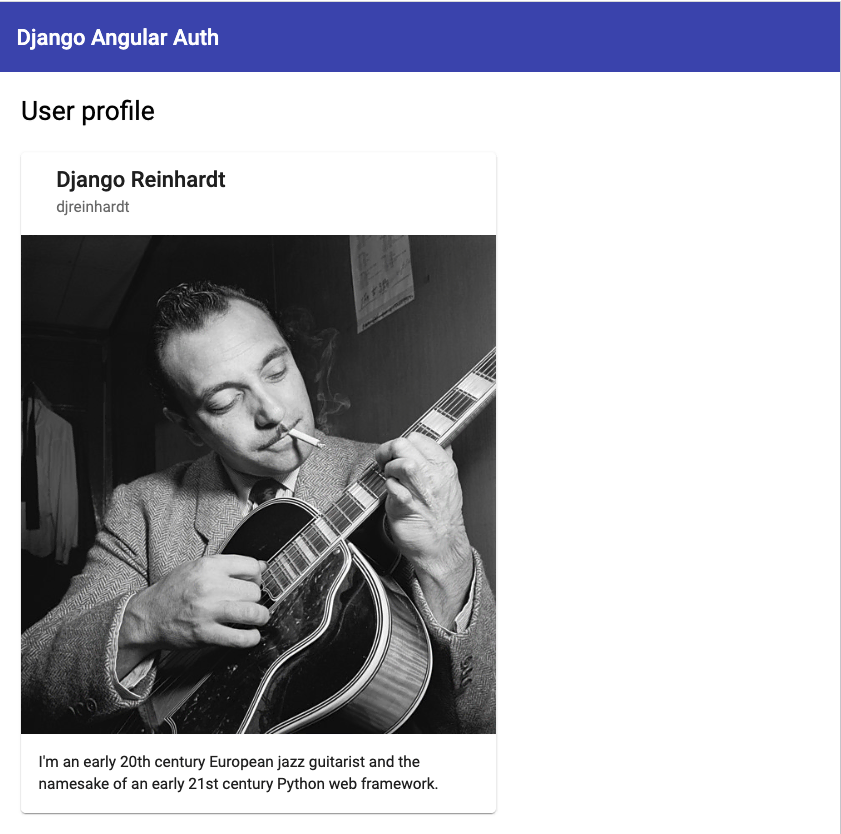
And in case you’re wondering who this dapper authenticated user of our web application is, it’s Django Reinhardt the Romani-French jazz musician and composer for whom the Django web framework was named.
Conclusion
In this tutorial, you learned the fundamentals of token-based authentication in an SPA frontend built with Angular and an API backend built with Django and the Django Rest Framework.
As a next step, you may want to check out the Django Rest Knox package, which builds upon the default DRF token authentication implementation that we used in this tutorial, adding additional security measures such as per-client tokens, expiring tokens and password-like hashing for protecting tokens stored in your database.
Another popular option for production systems is to use JSON Web Tokens (JWTs) which refresh at configurable intervals, and do not require the use of a database for authentication. DRF recommends the djangorestframework-simplejwt package for implementing JWT authentication in a Django project.
This blog post was created as part of the Mattermost Community Writing Program and is published under the CC BY-NC-SA 4.0 license. To learn more about the Mattermost Community Writing Program, check this out.


