
How to build a CI/CD pipeline in Travis CI for a Django app on Heroku
Creating an automated flow that controls how changes will be incorporated into the main application and how these new changes will be deployed is a key component of the continuous integration (CI) and continuous deployment (CD) practices.
By utilizing Travis CI, you can integrate CI/CD into your project repository. Travis CI is typically a good option because it makes it simple to automate processes like testing and project deployment within the project repository on GitHub.
This tutorial will teach you how to create a Django app, write unit tests for the app, and then create a pipeline to test the Django app and — if all tests pass — publish changes to Heroku.
Prerequisites
You must have the following fundamental knowledge to follow along:
- Django
- Git and GitHub
Building a base Django app
In this section, we will build a recipe API as the base app that will be deployed to Heroku.
I recommend cloning the khabdrick/django-travis-heroku repository and following along with how it was constructed below, but you can also create your own local project by following the steps.
To get started from scratch, create a new folder that will contain your application:
$ mkdir django-travis-heroku
$ cd django-travis-heroku
Now, we need to create a new Django project. You can do this by running the following command:
$ django-admin startproject recipe .Next, run the following command to create a Django app:
$ python3 manage.py startapp appTo make Django aware of the app you just created, add the app you just created to the INSTALLED_APPS in your settings.py file. While you are there, you can add rest_framework since we will be using it to build the API.
INSTALLED_APPS = [
     ...
    'django.contrib.staticfiles',
    'app',
		'rest_framework', #needed to create the API
]
Now, you will update the settings.py file in order for your Django application to accept the Heroku host and connect with Postgres on Heroku.
Add the Heroku host to Django by adding .herokuapp.com to ALLOWED_HOST in the settings.py file, since that is where the host Heroku runs on lives.
ALLOWED_HOSTS = ['.herokuapp.com']Update the database settings by pasting the following code below the DATABASE dictionary you have in your settings.py file:
db_from_env = dj_database_url.config(conn_max_age=500)
DATABASES['default'].update(db_from_env)

import the ****dj_database_url ****module used in the code above by adding the following at the top of your settings.py file.
import dj_database_url
...
We will now start coding out the recipe API that will be deployed on Heroku. Open recipe/urls.py and include the URL of the app you created earlier by updating the urlpatterns list.
from django.contrib import admin
from django.urls import path, include

urlpatterns = [
    path('admin/', admin.site.urls),
    path('app/', include("app.urls"))] #route for new app
Now, open app/models.py and paste the following code. The following code contains the database fields for recipe creation.
from django.db import models
class RecipeModel(models.Model):
    meal = models.CharField(max_length=200)
    recipe = models.CharField(max_length=1000)
    def __str__(self):
        return self.meal
Next, create a new file named serializers.py in your app/ folder, and paste the following code. The code below transforms data obtained from the database into JSON and then returns it to its original format when needed.
from rest_framework import serializers
from .models import RecipeModel

class RecipeListSerializer(serializers.ModelSerializer):
    class Meta:
        model = RecipeModel
        fields = ('meal', 'recipe',"id") # fields in the models
Next, develop the function for saving and listing out recipes in the database. To do that, paste the following code into the app/views.py file:
from rest_framework import generics
from rest_framework import status
from rest_framework.decorators import api_view
from .serializers import RecipeListSerializer
from rest_framework.response import Response
from .models import RecipeModel

@api_view(['POST'])
def create_recipe(request):
        # create recipe
    recipe = RecipeListSerializer(data=request.data)
    if recipe.is_valid():
        recipe.save()
        return Response(recipe.data)
    else:
        return Response(status=status.HTTP_404_NOT_FOUND)

class RecipeListView(generics.ListCreateAPIView):
    # list out recipes
    queryset = RecipeModel.objects.all()
    serializer_class = RecipeListSerializer
To set the routing for the views, create a new file called urls.py in your app/ folder and paste the code below into it.
from app import views
from django.urls import path

urlpatterns = [
    path('create/', views.create_recipe, name='create-recipe'),
    path('list/', views.RecipeListView.as_view(), name='view-recipes'),
]
Write unit tests for the app
Since the API has been completed, we can create unit tests, which is what we’ll be doing in this part of the article. We’ll write a unit test for the recipe retrieval endpoint. This will be a step that will need to be passed before the application can be deployed to Heroku.
To start, open app/tests.py file and then put the following code into it. The code that follows adds some sample information to a test database and then tests that we will be able to retrieve the saved recipe.
from django.test import TestCase
from rest_framework import status
from rest_framework.test import APIClient

from app.models import RecipeModel
from django.urls import reverse
from app.serializers import RecipeListSerializer

RECIPES_URL = reverse('app:view-recipes')

def sample_recipe(**params):
    """Create and return a sample recipe"""
    defaults = {
        'meal': 'Sample recipe',
        'recipe': "Sample recipe detail",
    }
    defaults.update(params)

    return RecipeModel.objects.create(**defaults)

class RecipeApiTests(TestCase):
    """Test recipe retrieval API"""

    def setUp(self):
        self.client = APIClient()

    def test_retrieve_recipes(self):
        """Test retrieving a list of recipes"""
        sample_recipe()
        sample_recipe()
        res = self.client.get(RECIPES_URL)

        recipes = RecipeModel.objects.all()
        serializer = RecipeListSerializer(recipes, many=True)
        self.assertEqual(res.status_code, status.HTTP_200_OK)
        self.assertEqual(res.data, serializer.data)
Prepare a Django application for Heroku
Now, we’ll create the requirements.txt file, which will provide a list of dependencies needed to run the API. Add the text below to the file you create at the project’s root. Django needs psycopg2-binary to operate the Postgres database; WhiteNoise will be used to manage static files.
Django==3.2
djangorestframework==3.13.1
gunicorn
dj-database-url
psycopg2-binary
wheel
whitenoise==6.0.0
We can now generate the Heroku Procfile. The command that will be executed when the application is deployed on Heroku is contained in the Procfile. To accomplish this, make a new file called Procfile in the project root and paste the command below into it. Instead of utilizing the built-in Django server, we will use Gunicorn — a Python WSGI HTTP server for UNIX which is well-optimized for production environments — to run the application. Put this in your new Procfile:
web: gunicorn recipe.wsgi
Now, let’s configure WhiteNoise to manage the static files. You can do this by copying the following configuration to your settings.py file. Paste the code directly above STATIC_URL = '/static/'.
STATIC_ROOT = BASE_DIR / 'staticfiles'Next, paste the following code below the last line in your settings.py file:
STATICFILES_STORAGE = 'whitenoise.storage.CompressedManifestStaticFilesStorage'Now you can push the code you have now to GitHub. Make sure your application is in the master branch; if not, the pipeline above will not work.
Set up Heroku
In this section, we will create an empty Heroku app and also get the necessary data that we will need to deploy your app automatically with Travis CI.
We will be running some Heroku commands locally, so you’ll need to install Heroku CLI if you haven’t already. Once that’s done, you can log into your Heroku CLI by running the following command:
heroku login
Now, you can create a new Heroku app by running the command below. recipe-app-101 is the name of the app, so replace that with a new unique name of your choice.
heroku create todo-app-101Note: This free tier is no longer supported as of November 28, 2022. As such, you’ll need to either sign up for a paid plan or join the student program for Heroku.
Once the app is developed, you’ll be given a URL that you can use to access it once it has been launched. This is also visible on the Heroku dashboard.

You will be using a Postgres database provided as an add-on by Heroku. Activate it by running the following command:
heroku addons:create heroku-postgresql --app recipe-api-101The API key for our Heroku account must now be obtained. In order for Travis CI to know which account to deploy to, this is crucial. Visit your Account settings to obtain it. Scroll down on the account settings page until you see “API Key.” Make a note of it because it will be needed by Travis CI for deployment.
Build a CI/CD pipeline with Travis CI
Assuming you already have a GitHub account, visit Travis CI, click “Sign in”, and then select “Sign in with GitHub” to configure Travis CI for your project. You should next follow the procedures provided by Travis CI to enable your repository so that Travis CI may work on it.
Note: Travis CI will ask you to sign up for a free trial, which requires a credit/debit card. You can do this by clicking the Plan tab on your account repositories page.
The CI/CD pipeline will have steps to run the unit tests for the Django application, and if the tests pass, your application will now be deployed to Heroku. Travis CI will need your Heroku API key in order to use the default configuration.
To get started, create a new file named.travis.yml in the root of your application and paste the following YAML configuration:
language: python
python:
  - "3.8"

before_script: pip install -r requirements.txt

script:
  - python manage.py test
# The Faraday library must be installed before the build can be deployed to Heroku.
before_deploy:
  - rvm $(travis_internal_ruby) --fuzzy do ruby -S gem install faraday -v 1.8.0

deploy:
  provider: heroku
  api_key: $HEROKU_API
  app: recipe-api-101 # name of your heroku app
Put the following information in the Environment Variables section of the settings page of your application on Travis CI:
- NAME: enter the text
HEROKU_API - VALUE: enter your Heroku API key
Now, click on the Add button to add the Heroku API key so that it can be accessed by the pipeline, and push your current changes to GitHub.
Your app should be deployed successfully in about 5 or 10 minutes because all the tests pass. Now, you need to migrate the database since you will be using Postgres on Heroku. You can do this by running the following command:
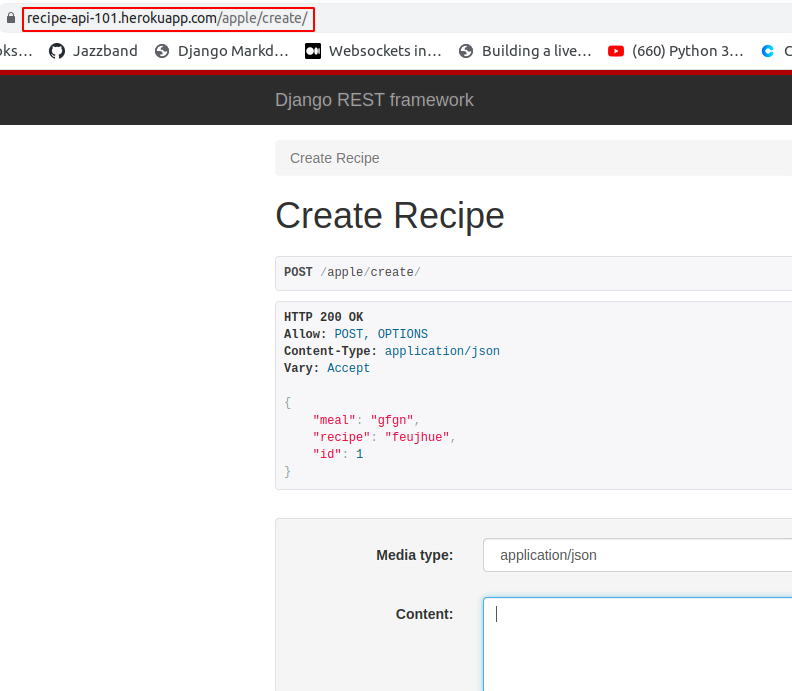
heroku run --app recipe-api-101 python manage.py migrateNow, you can access the application by following the URL you were given earlier by Heroku.
Conclusion
This post taught you how to use the Django REST API to build a recipe API and generate unit tests for the API endpoint. You also learned how to build a pipeline that will test the Django API and deploy it to Heroku if all tests pass.
You can build on what you have learned here by adding more checks to your pipeline. For example, another check you can add to the pipeline is lining checks for Python, like Black.
Do you like reading content about CI/CD? Here are some additional posts you might want to check out:
- Integration testing with GitLab CI and Docker
- An intro to designing secure CI/CD pipelines
- How to create a full CI/CD pipeline with Jenkins
This blog post was created as part of the Mattermost Community Writing Program and is published under the CC BY-NC-SA 4.0 license. To learn more about the Mattermost Community Writing Program, check this out.


