Git for non-developers
“Git is user-friendly, but it’s picky about its friends.” — Stack Overflow
In this article, I’ll provide a guide to Git for non-developers. So, if you are reading this as a full experienced Git user, you may disagree with some of my statements. Don’t bother reading on; we recognize you as the expert! If, on the other hand, you’re new to Git, this piece is for you.
What is Git?
Git is a standard industry tool for developers. Its most important purpose is letting developers work together in the same code base at the same time. Further, Git gives devs control over different versions and lets them have access to a full history of every code change.
But if you’re a non-developer in an environment full of developers, the devs will push (yes, pun intended) you to use Git. A very talented developer once told me after I broke my local copy of the Mattermost server project that I was a real developer because real developers break Git.
So, it’s okay to have issues with Git. Everyone does. Initially, I hated Git but have since learned to appreciate it by using it more often. When I started out, I wish I had a comprehensive guide at the time. There are a lot of guides, but many were way too simple and didn’t answer my needs and questions. Others were too complex and threw around terms and presupposed knowledge that I didn’t have.
If I help only one person with this guide, my mission was a success.
A short overview of what we will be talking about
With Git, you have the code of the project you are contributing to on your local machine.
So, first things first: You have to get a copy of the code on your machine. Most guides start by encouraging you to clone the repository.
Did I lose you already? The repository is the part of the project you want to contribute to. At Mattermost, you’ll find projects like webapp, server, mobile, and documentation.
Most guides start with cloning the repository, but hold your horses! At Mattermost, you don’t have write access to the repository by default. You have to be a core developer for that. So, you have to fork the repository first.
Forking or cloning?
Imagine that all 5,500 people who have contributed to Mattermost had direct write-access to the Mattermost-server repository.
That would become a huge mess with way too many different versions, changes, and people overwriting changes from other people. So, to keep things in order and keep it working, only core developers have write access to the Mattermost repository.
And here’s where forking comes into the picture. If you want to contribute to such a large project, you can fork the project. Forking the project is making a copy to your GitHub account. Instead of working on the Mattermost project itself, you work on your own copy.
You can receive the changes from the original project; in Git terminology, this is called fetch. You can write your changes to your fork; in Git terms, this is called commit.
But how do you get your changes into the Mattermost server repository? You’ll create a pull request for this, often abbreviated PR. Your pull request will be reviewed by at least two core developers. And if your changes are approved, they will be integrated into the official Mattermost server project. In Git terminology, this is called merge.
Create your fork
I assume you already have created an account on GitHub, the service where the Mattermost repositories are hosted.
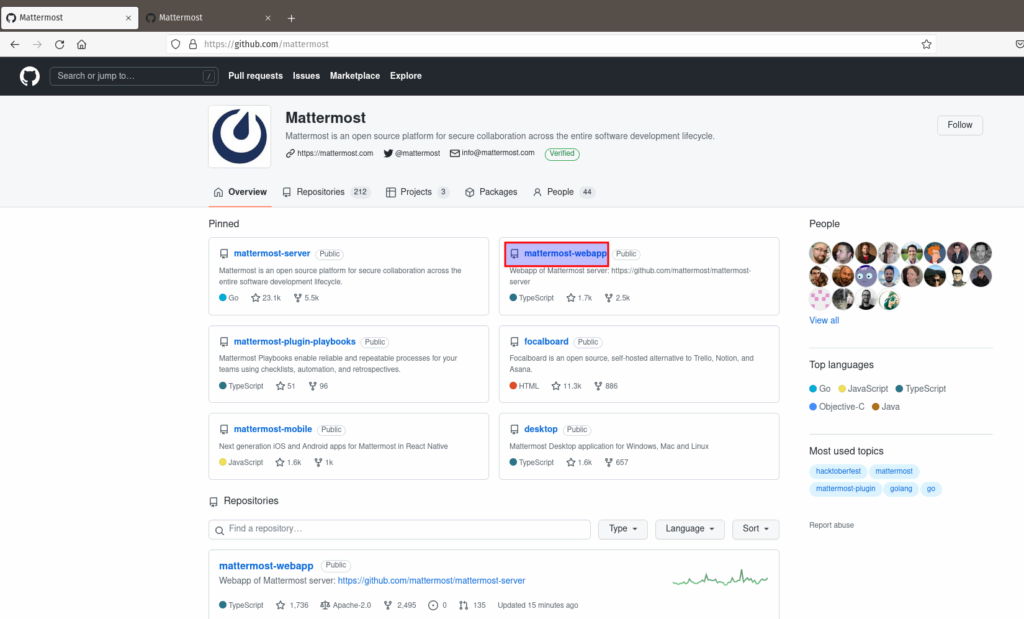
Let’s assume you want to change a typo in the mattermost-server. You’ll find all the repositories at https://github.com/mattermost.
The Mattermost-server repository is pinned there, so you just need to click on it.
You now see the Mattermost-server repository. You can browse through the branches and all the files. But as you have read-only rights, you can’t do much wrong 😉.
Now, it’s time to create your fork, i.e., your own personal copy of this magnificent library of code. Just push the button on the top right-hand corner of your screen and follow me deep into the rabbit hole.

After clicking the button, you get a confirmation screen where you have to confirm that you do indeed want to create the fork.
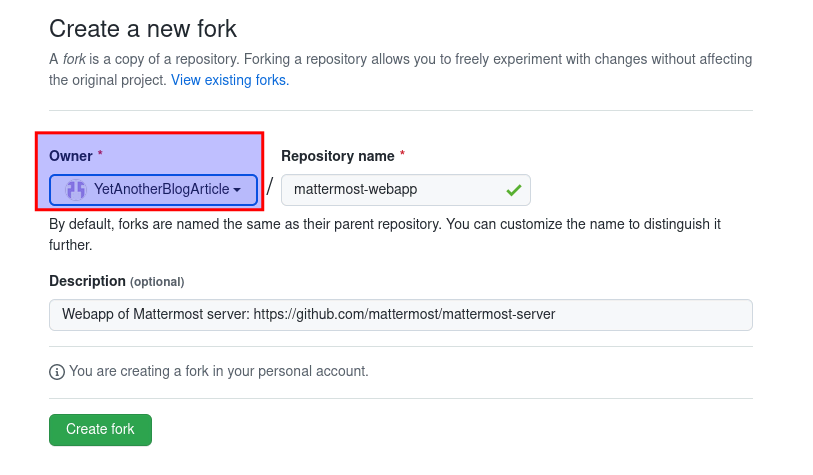
Success!!! You just created your own fork of the Mattermost-server. Check out your username before the repository name. It’s yours.

Clone your fork to your computer
I assume you already have installed Git on your computer. If not, here’s a manual.
Once Git is on your computer, open up your console. Go to the main directory where you want to get your repository. Here’s a pro tip: Git will create a folder Mattermost-server. So, a folder name like Mattermost would be perfect for our purposes.
In your own mattermost-server repository, click on the code button and copy this: https://github/YourUsername/mattermost-server.git.
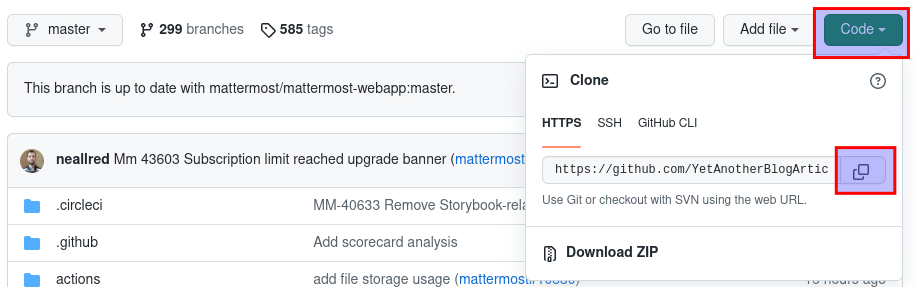
Now, you have to type the magic code in your console — git clone https://github/YOURUSERNAME/mattermost-server.git — to start on your journey to becoming a Git Jedi:
git clone https://github/YOURUSERNAME/mattermost-server.git
Create a new branch
Wow, your own forked repository on your own computer! You are almost there. Now, you can almost start making your modifications.
But first, you have to make a new branch. Why? By default, you’re working in the main branch, the main root of the project. It’s safer to create a new branch to make your modifications.
The advantages of this approach are that modifications don’t break the main root of the project. You can also work on multiple issues at the same time, each in its own branch.
Beware: If you create branch A, and you are working in that branch and you create a new branch B, then branch B will start with the modifications you already made in branch A. At the same time, new modifications in branch A will not automatically go to branch B. And modifications in branch B will not automatically go in branch A.
Normally, you start by creating a new branch from the main one. Only create a new branch based on another branch if that branch is needed for your work but is not yet merged into the main branch.
We start creating a branch with the following command:
git branch MyBranchYou can check which branches are on your computer and which branch you’re currently working in by just typing a simple command:
git branchAs you can see, you’re still working in the main branch. This isn’t what we want. So, you have to go to MyBranch, which you can do by typing the following code:
git checkout MyBranchAnother pro tip: You can create a new branch and make it your active branch with one single command:
git checkout -b MySecondBranch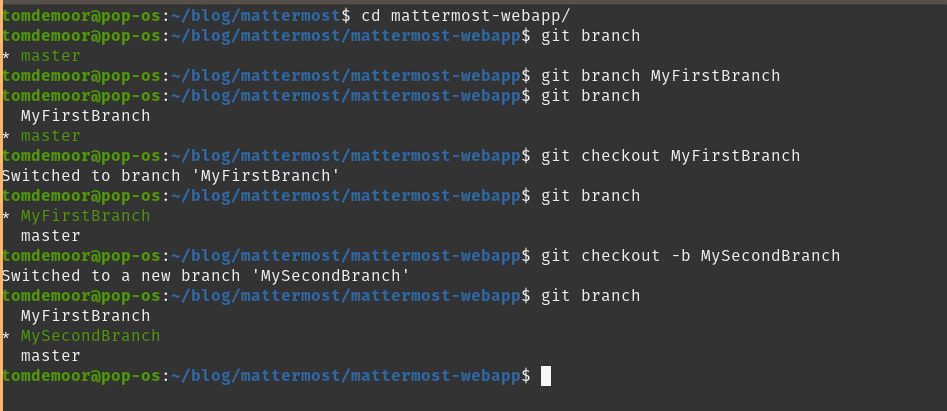
Do what you have to do
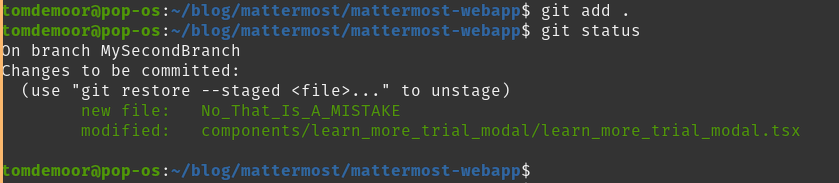
At this point, you are finally ready to make your changes. I corrected a typo in components/learn_more_trial_modal/learn_more_trial_modal.tsx and saved the file. Git already knows what’s been modified. You can follow up on your changes with git status. This command tells you that your modified files are still unstaged, meaning that these files will not be sent to your repository just yet.

You have to tell Git that these changed files should be added to your repository. To do that, type git add ./path/to/yourfile.jsx or add all changed files by typing git add.
Oops! What if you see that you added a file that shouldn’t be added? You can remove it with this command:
git restore --stage filename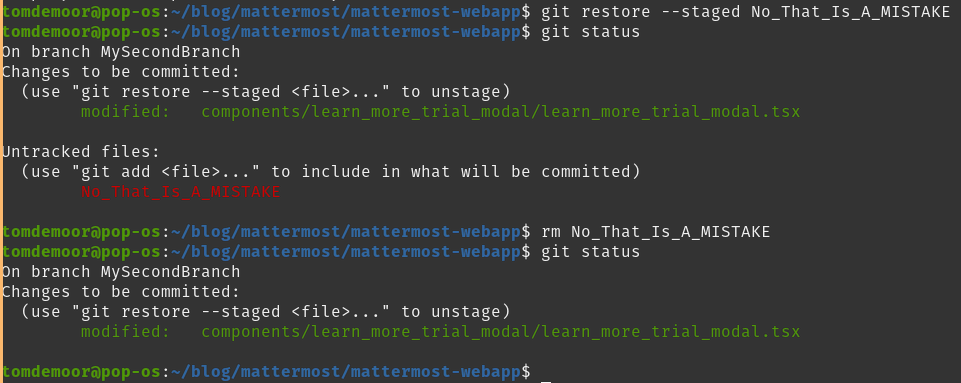
Ready to commit?
You are not there quite yet.
At this point, you need to tell Git that you want to save your changes in a commit, which you can think of as a “save point” that you can easily return to if you find out you made a mistake. I’m famous in that I commit very often.
Make your commit with this command:
git commit -m "some text to remind you what you have done"
Ok, let’s see what our Git status says now. It’s empty!
Don’t panic; everything is still there. First, you had an unstaged file, i.e., a file that was changed but not ready to commit. Then you added the file, making it ready to commit and turning it into a staged file. Then you committed it, so your stage is empty again.
You and I have history
Don’t worry that your Git status doesn’t show anything anymore. You still can see your changes (and those others made) using this command:
git log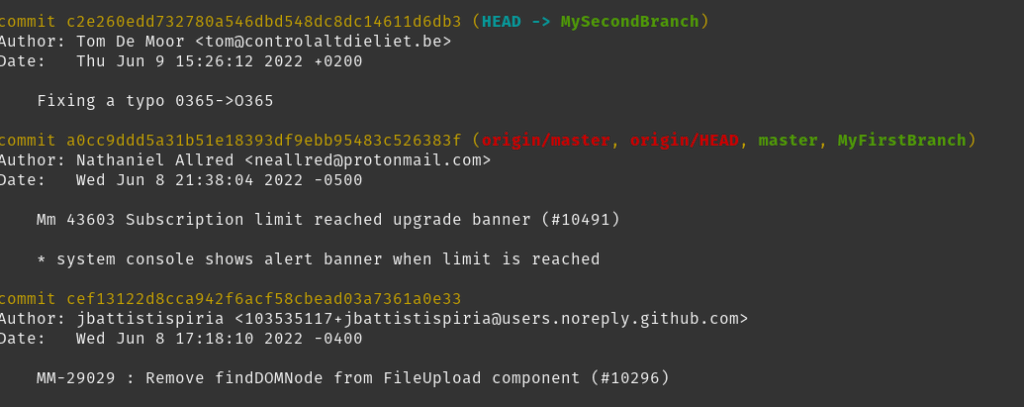
Now, this is an interesting output! You can see your commit but also the history of the commits others made before you. You also see some words that you will come across when working with Git, which we’ll briefly define next:
- head: Your current commit in your repo. It’s the current state of your repo
- main: The default branch where everything started and everything will ultimately get merged back into, i.e., the main track of your repository. This used to be called master.
- origin: The origin of your local repository on your computer. In this case, it’s the
yourusername/mattermost-web-apprepository. Git knows where you got your clone from, so you can send your changes back there and receive changes others have made. - remote: The origin of your fork. In this case, it’s the
Mattermost/mattermost-web-apprepository. Git knows where you got your fork and will tell you how much you are behind or in front of the main remote repository.
With Git keeping such a detailed track of the history, you can start time traveling (only to the past, sorry). It’s a way to undo your change if you noticed that you messed up but you already made a commit. Here’s how:
git reset --hardtakes you back to the latest commit in your branch where you can undo your staged and unstaged modifications.git reset --hard HEAD~1enables you to undo the latest commit.git reset --hard HEAD~Tenables you to undo the last five commits.git reset --hard sha1-commit-idenables you to undo one specific commit. The sha1-commit-id for fixing my typo is c2e260edd732780a546dbd548dc8dc14611d6db3, as you can see in the output of Git log.
Push it to the world!
Great! You’ve made a successful modification. But only you know about it and can see it. Let’s get it out to the world.
You do that by pushing your commits to your repository with git push. Oops. Git tells you that you’re working in a branch that does not exist on the server yet. So, you have to create one. Luckily, it tells you right away how to do it. Who said that Git wasn’t user-friendly?
Ok, Git asks you for your username and password. Don’t bother; it won’t work on GitHub, which removed the use of username/password authentication. So, let’s create a token for authentication and use that instead of that unsafe password. This article tells you how. In short, go to GitHub, choose Settings under your account, click developer settings in the left navigation bar, and generate a token there with repo-rights. (Yes, I know the title of this article is Git for non-developers; titles always tend to lie.)
git push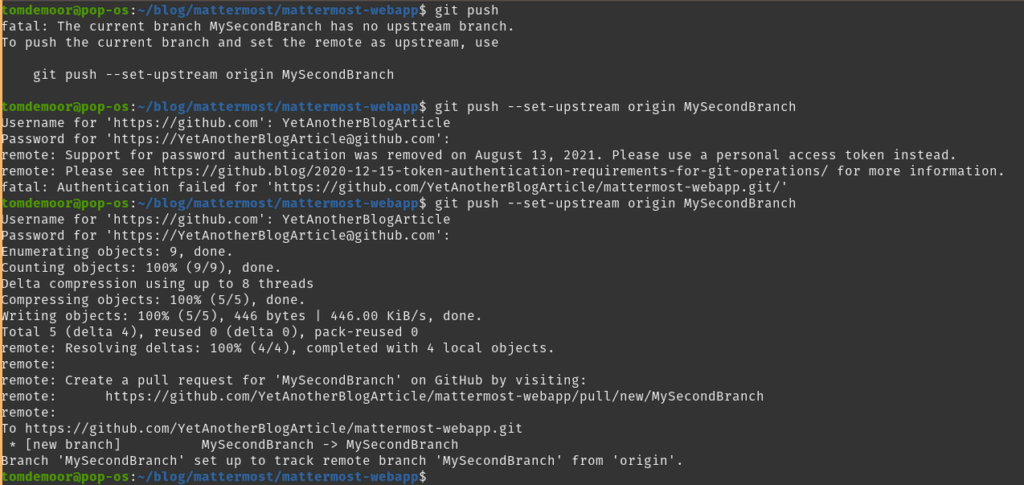
What’s been pushed needs to be pulled
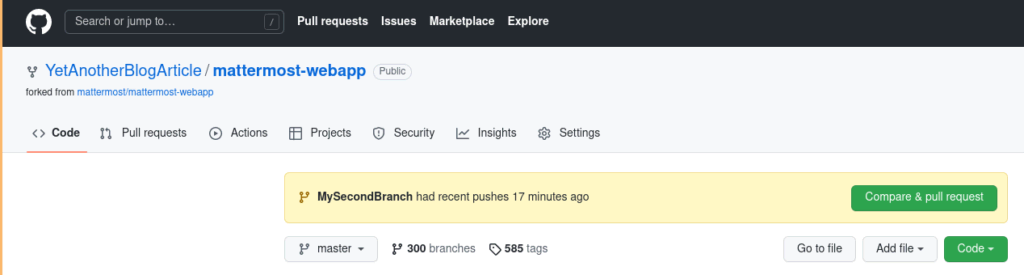
When you surf to GitHub and go to your own mattermost-webapp repository, it tells you that you have made a push and that you can create a pull request.
A PR or pull request sends your changes to the remote Mattermost/mattermost-webapp repository so that we all can benefit from your work. So click that shiny button Compare & pull request:
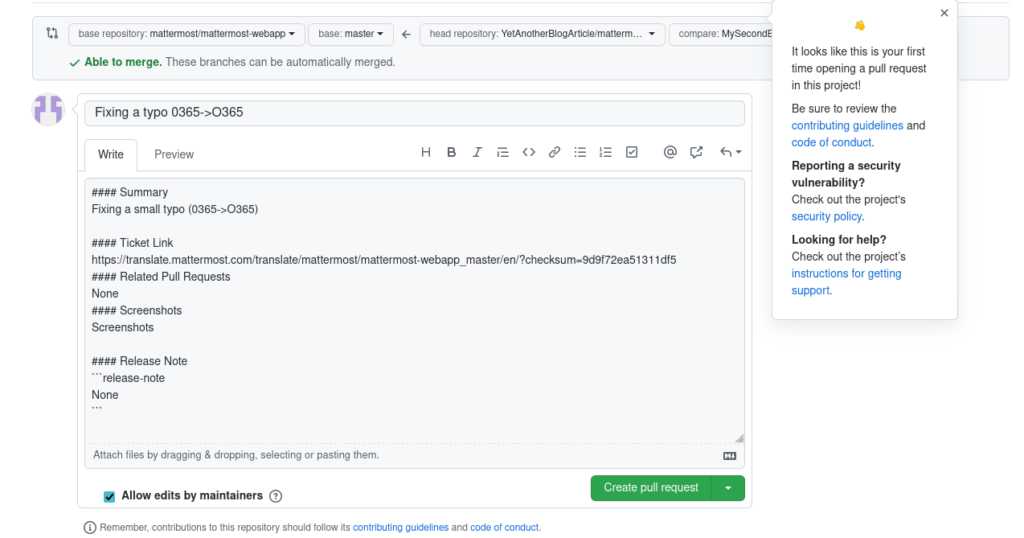
Mattermost knows this is your first contribution and asks you to read the contributing guidelines and code of conduct.
Before getting started, you have to fill in the Mattermost Contributor agreement. An extra benefit is that the amazing Mattermost swag department will send you a Mattermost mug — customized with your GitHub handle and the date of your first contribution — as a reward for your first PR. These mugs are famous!
In any case, you have to write a note that gives reviewers an idea of what you modified. That note must contain the following five items. There’s a template, so use it:
- A summary in a few lines of what you did
- A link to an issue or a Jira ticket your PR relates to
- Whether there are any related Pull Requests in the Server or Mobile repository
- Screenshots that showcase changes in the layout
- Release notes, unless you are fixing a typo
Being reviewed and merging
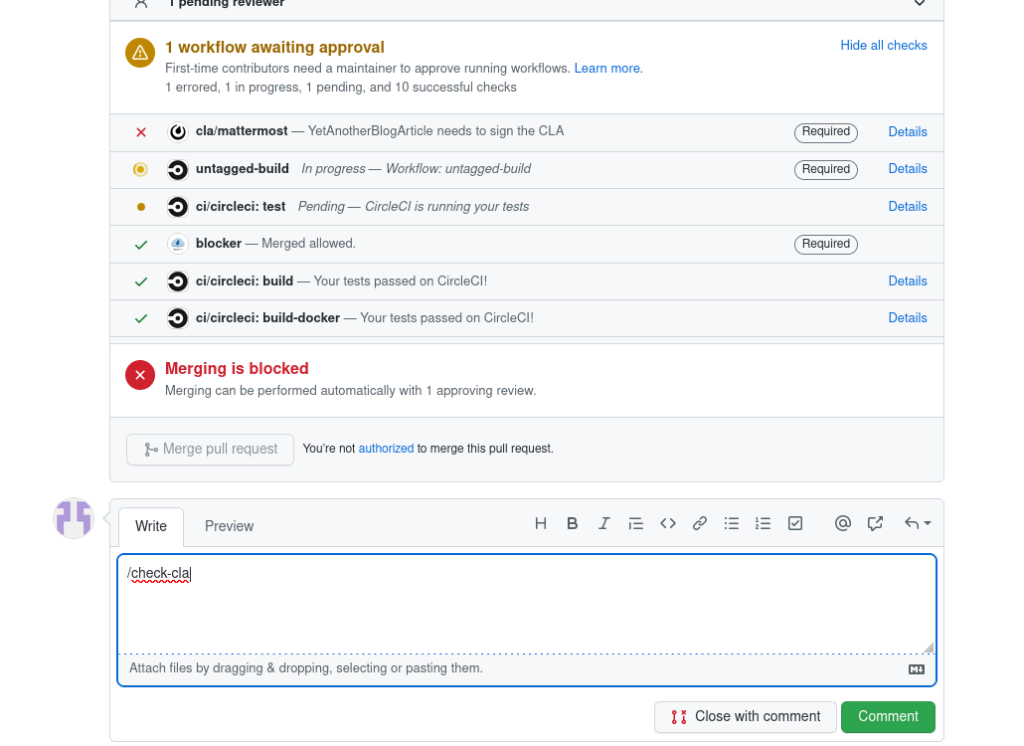
Unfortunately, your change doesn’t go into Mattermost right away. Mattermost has high quality standards and does a lot of checking to avoid as many bugs as possible.
So, at this point, a test server is spun up, rainbow tests are conducted, tools like CircleCI are enlisted — a whole machinery is started to check the quality of your request.
As this is your first pull request, the team will ask you to sign the Contributor License Agreement (CLA). If you didn’t sign it before you submitted your PR, the Mattermost repo will block your PR. To unblock it, you can comment /check-cla or click on the blocking notification in the PR. Doing so will run the check for your name then remove the block if you’ve signed the CLA.
Further, two core developers will check your PR as well and will comment on it or request changes. After that process is complete, your PR can be merged and you can call yourself a junior developer. Cool, isn’t it?
For more information on the PR that is created for this blog article, check this out. Soon, I hope to see you on the channel for git-related issues Mattermost has on its community server.
Pull, Fetch, Merge
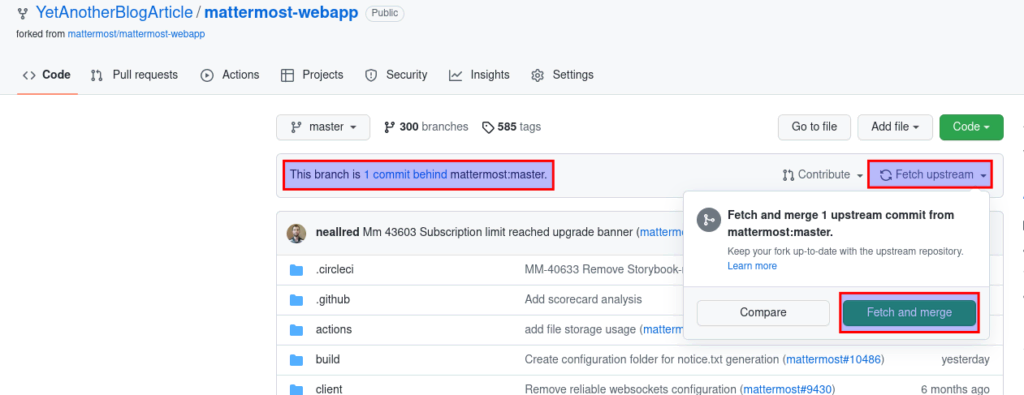
Woot! My PR got merged and is now part of the official Mattermost code. Hooray!
But how do you get to see your changes in your repository? In GitHub, you’ll see that your main repository is running behind. To solve this, click Fetch upstream and Fetch and merge.
- Pull forces Git to fetch first and attempt to merge immediately after.
- Fetch receives the changes from other contributors. You receive them but they are not in your code base yet.
- Merge imports those changes into your repository. The changes become a full part of your files. That is where merge conflicts occur, i.e., when your changes are not compatible with other changes. You have to solve these issues manually, but that is beyond the scope of this article.
When you have fetched your upstream, you still need to get those changes on your local computer. You can use git pull for this.
But remember, if you want to make a new contribution, go to the main branch first, create a new branch from there and continue contributing. If you make a MyThirdBranch straight from MySecondBranch, your changes from MySecondBranch will still be in MyThirdBranch.
Be careful, drive safe, and give me a ring when you’ve arrived!
git pull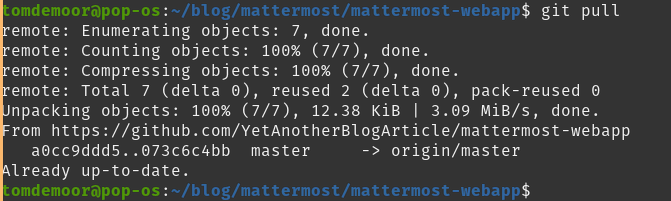
Read more articles from Tom De Moor on the Mattermost blog, including how his team used Mattermost to build a COVID-19 contact tracing tool and his series on learning how to use Mattermost plugins.


