
How to get started with Mattermost on Kubernetes in just a few minutes
Since it first appeared in June 2014, Kubernetes has become something of a household name, at least in houses developers live in. The open source container orchestration platform makes challenges like load balancing, secret management, and portability a cinch and makes it easy to orchestrate large, highly scalable and distributed systems.
As an open source messaging solution built for today’s largest organizations and orchestrated with Kubernetes, Mattermost is designed to serve tens of thousands of concurrent users spread out all across the world. At that scale, however, managing Kubernetes can get complex, which is why the Mattermost team built an operator that can help automate complicated workflows, including installation, software updates, and failure recovery.
Keep reading to learn how to install Mattermost on Kubernetes in just a few minutes and see what it’s like to have what essentially translates into a Mattermost Cloud Engineer running inside your own Kubernetes cluster, managing your Mattermost instance for you.
Installing Mattermost on Kubernetes
Prerequisites:
- A Kubernetes cluster.
- kubectl installed locally. Connect the kubectl to the remote cluster using the appropriate CLI command. For example, a cluster on Google Kubernetes Engine uses:
gcloud container clusters get-credentials cluster-test --zone us-west1-a --project mattermost-test
Here’s what the installation process looks like:
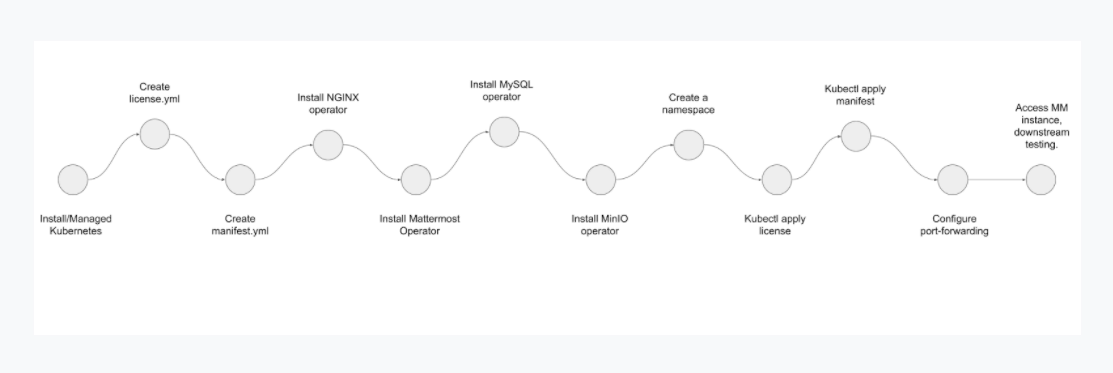
1. Create a YAML file that will act as the license for the installation
This will be a generic opaque type Kubernetes Secret, with a user-defined data string:
vi mattermost-license-secret.yml
Paste the following into the file and save it:
apiVersion: v1
kind: Secret
metadata:
  name: mattermost-license
type: Opaque
stringData:
  license: "foo"
2. Create the installation manifest file
This is a second YAML file that will contain the information required to process the installation.
vi mattermost-installation.ymlPaste the following into the file and save it:
apiVersion: installation.mattermost.com/v1beta1
kind: Mattermost
metadata:
  name: mm-demo
spec:
  size: 50users
  ingressName: example-mm-install
  ingressAnnotations:
	kubernetes.io/ingress.class: nginx
  version: 5.31.0
  licenseSecret: "mattermost-license"
Note: What follows next is a series of steps that create individual namespaces for various resources and on the Kubernetes cluster.
3. Install the NGINX controller
The first resource to be installed is the NGINX controller, which can be done by running the following command:
kubectl apply -f https://raw.githubusercontent.com/kubernetes/ingress-nginx/controller-v0.46.0/deploy/static/provider/cloud/deploy.yaml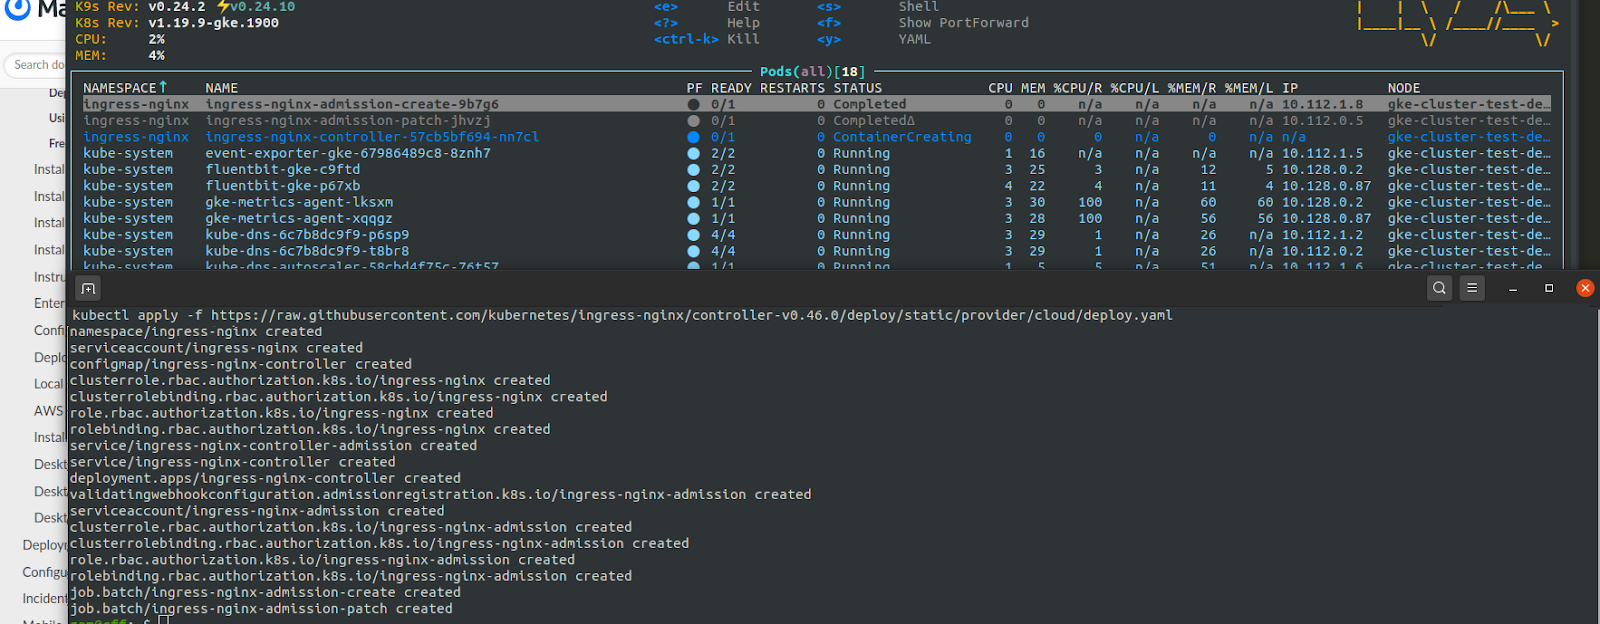
4. Use the Mattermost Operator
Next comes the Mattermost operator. Create a namespace for the Mattermost operator using this command:
kubectl create ns mattermost-operatorWithin this namespace, install the custom operator with the following command:
kubectl apply -n mattermost-operator -f https://raw.githubusercontent.com/mattermost/mattermost-operator/master/docs/mattermost-operator/mattermost-operator.yaml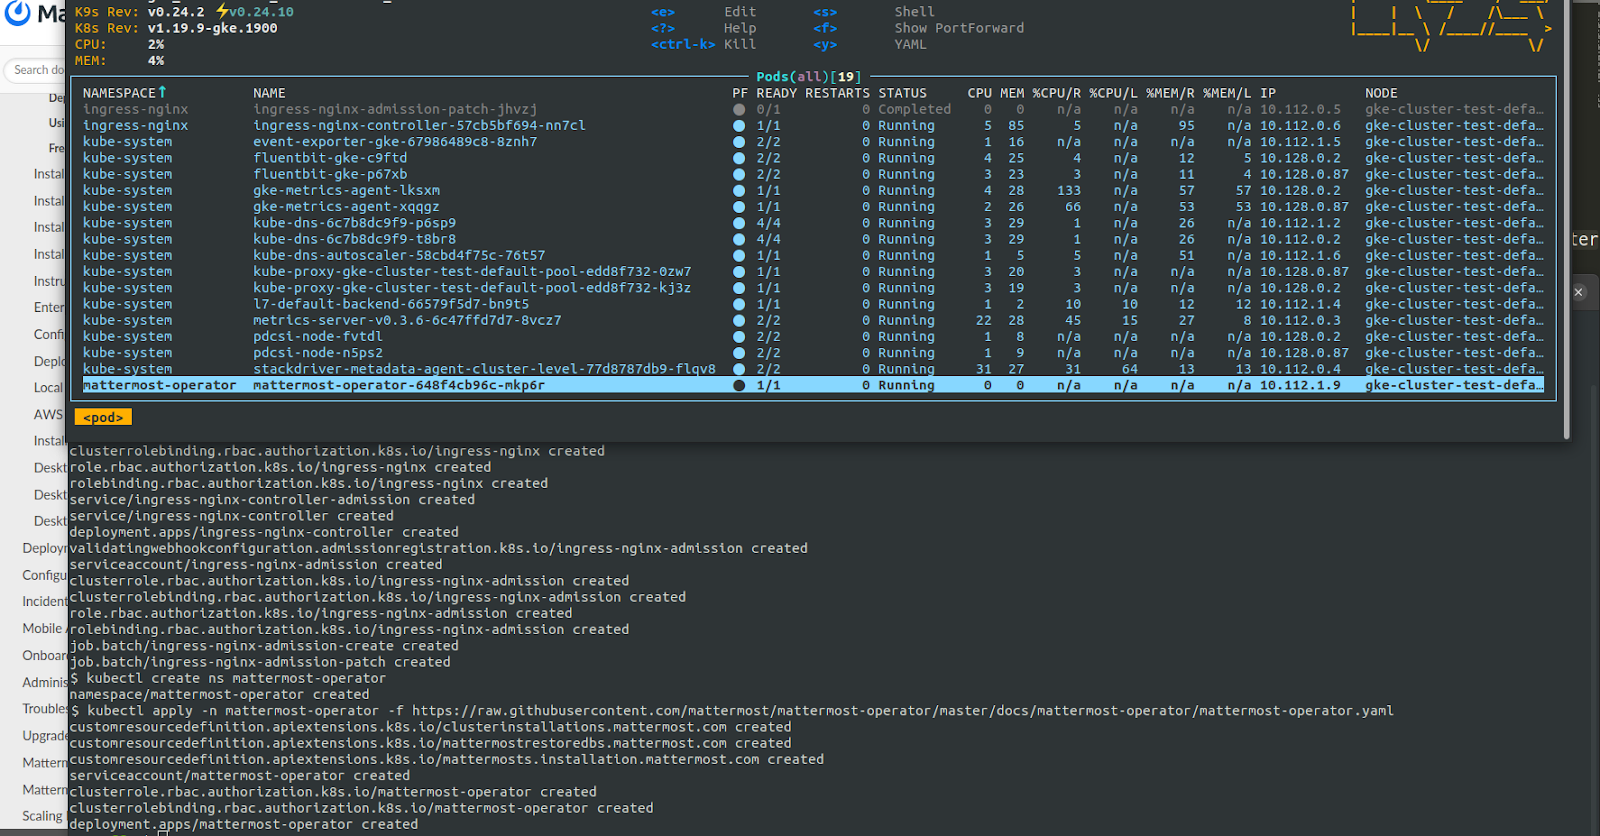
5. Install a database
Any Mattermost installation will require a database. In this case, a MySQL database will be used. To install it, first create a namespace:
kubectl create ns mysql-operatorNext, install the operator itself using this command:
kubectl apply -n mysql-operator -f https://raw.githubusercontent.com/mattermost/mattermost-operator/master/docs/mysql-operator/mysql-operator.yaml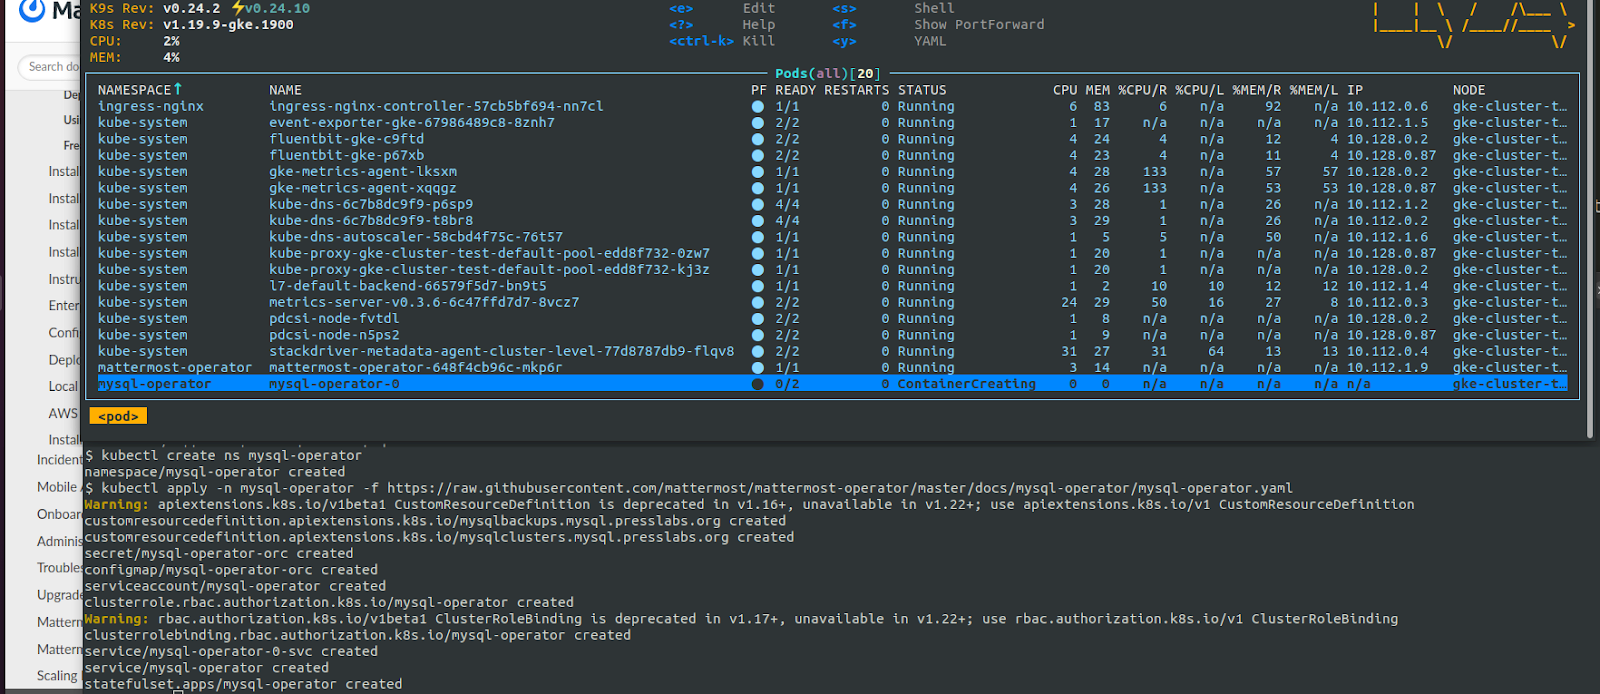
6. Install MinIO
Because many files are exchanged within the collaboration tool, an object storage tool is required for storage and retrieval of all these contents. For this, we will install MinIO, which is a Kubernetes Native Object storage. ‘
First, create the namespace where this will install:
kubectl create ns minio-operatorThen, install it using the following command:
kubectl apply -n minio-operator -f https://raw.githubusercontent.com/mattermost/mattermost-operator/master/docs/minio-operator/minio-operator.yaml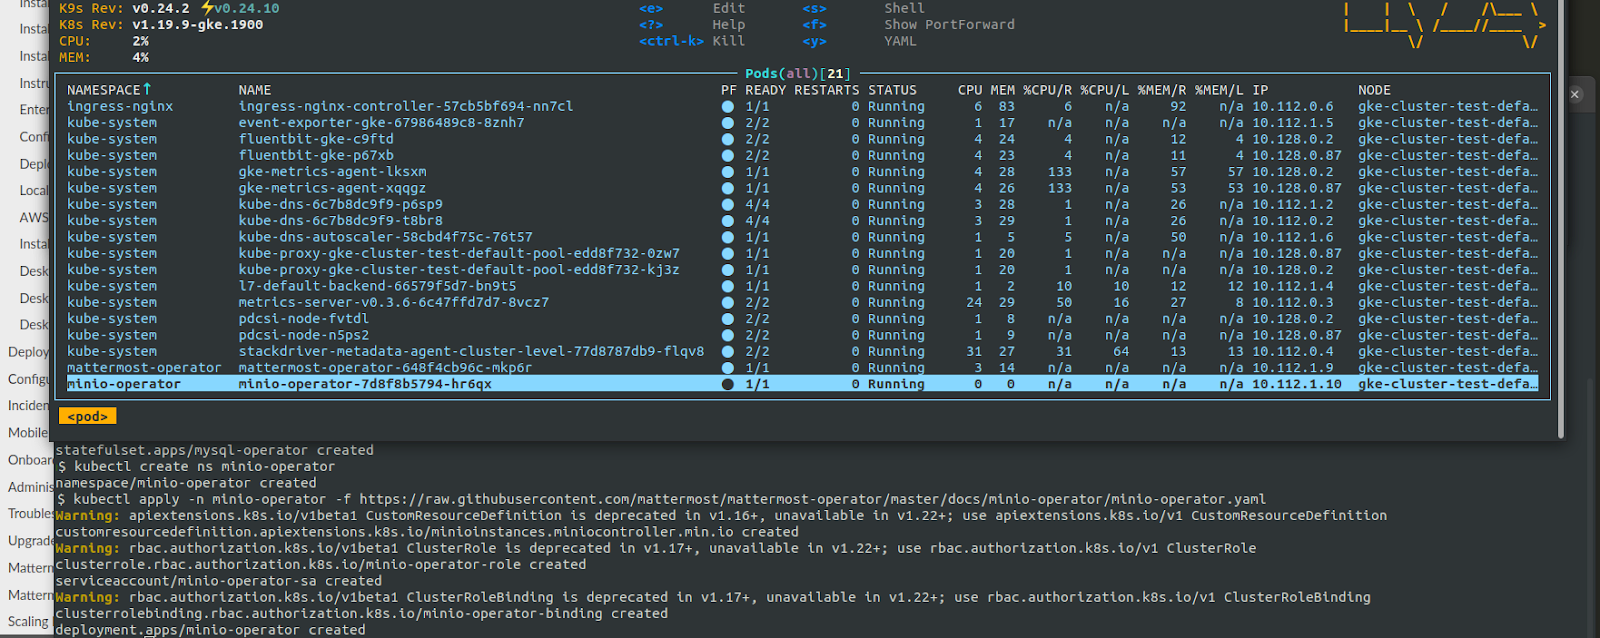
7. Create a namespace for Mattermost
Finally, create the a namespace for the Mattermost installation using the following command:
kubectl create ns mattermost8. Apply the license
Next, apply the license file created in Step #1 using the following command:
kubectl apply -n mattermost -f /home/ram/mattermost-demo/mattermost-license-secret.yml9. Complete the installation
Complete the installation by applying the Mattermost installation manifest created in Step #2 by using this command:
kubectl apply -n mattermost -f /home/ram/mattermost-demo/mattermost-installation.yml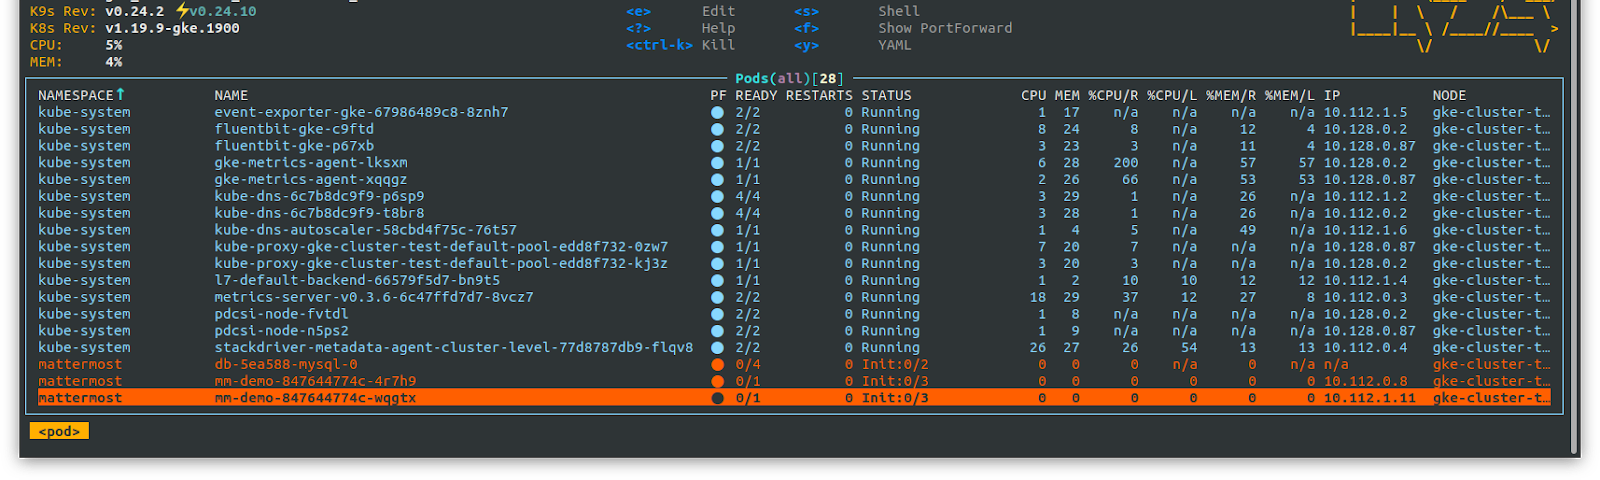
Allow a few minutes for the installation to complete. Monitoring the installation is best done using k9s. Screenshots depicting the progress of each installation step has been included in every stage.
10. Access the installation
In order to access the installation, set up a port forwarding from the pod to the local machine using this command:
kubectl -n mattermost port-forward svc/mm-demo 8065:8065Now, use the browser and hit localhost:8065 to access the installation.
You’re all set! Here’s a screengrab of the first few interactions with the new Mattermost installation running on a remote Kubernetes cluster.

Conclusion
Interested in learning more about Mattermost on Kubernetes?
To continue the conversation, stop by our community server and say hello.
If you want to learn more about how to get involved with the Mattermost open source project, learn about the many ways to contribute.
This post is written to coincide with the 7th anniversary of the commencement of the Kubernetes project. In this short span of time, it has become second only to Linux in popularity as an open source project! We sincerely hope that this post inspires you to adopt more open and secure infrastructure for your organization — both for compute and collaboration.